4. Assembly and Installation
22 PNEG-1156ETL Design III Series Grain Stir-Ator CSA
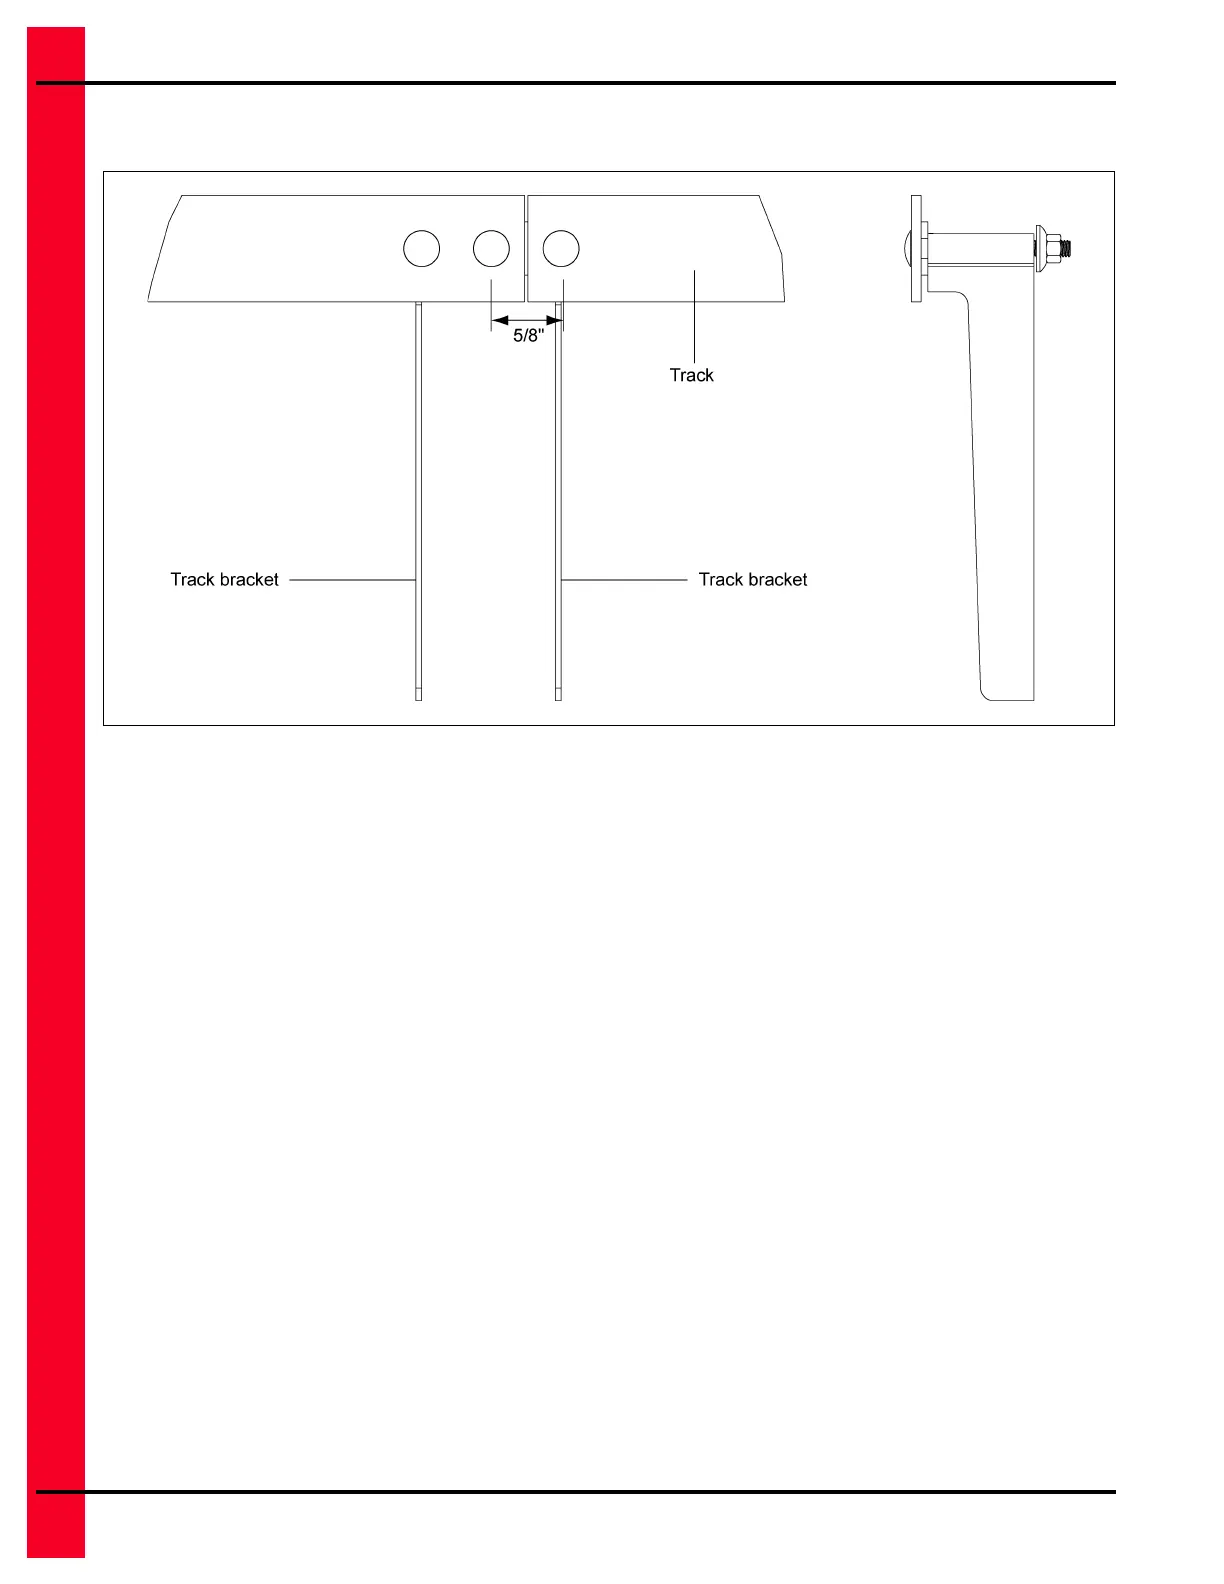
c. Use the hole in the track as a guide to drill or punch the next hole and install an additional track
bracket and bolt; repeat this process around the bin. Tighten bolts as you go. (See Figure 4E.)
Figure 4E
NOTE: If upon completing the circuit of the bin, the last section needed is less than 3' in length,
shorten the preceding piece so that a 3' or longer section can be used as the final section.
There should be slightly more material than required.
3. The end of the last section should be cut to fit snugly against the starting end of the first length and
a 5/16" hole drilled about 5/8" from the cut off end. All track joints should be aligned as smoothly
as possible.
The closer the augers run to the bin wall, the less chance of grain spoilage. Drying in cold weather
can require the use of wall liners (not sold by GSI) or air tubes (sold separately) to minimize bin
wall spoilage.
NOTE: After the wall track is installed, check clearance between the track and bin sheet splice bolts.
Long bolts may catch on the Stir-Ator track wheel or pivot pin on the track unit. To alleviate
this problem, cut off the bolts or reverse them.
 Loading...