The GIS-gateway must be configured before it can be used. The product has a very easy to
use Wizard which speeds through the configuration process. Configuration takes around
five minutes.
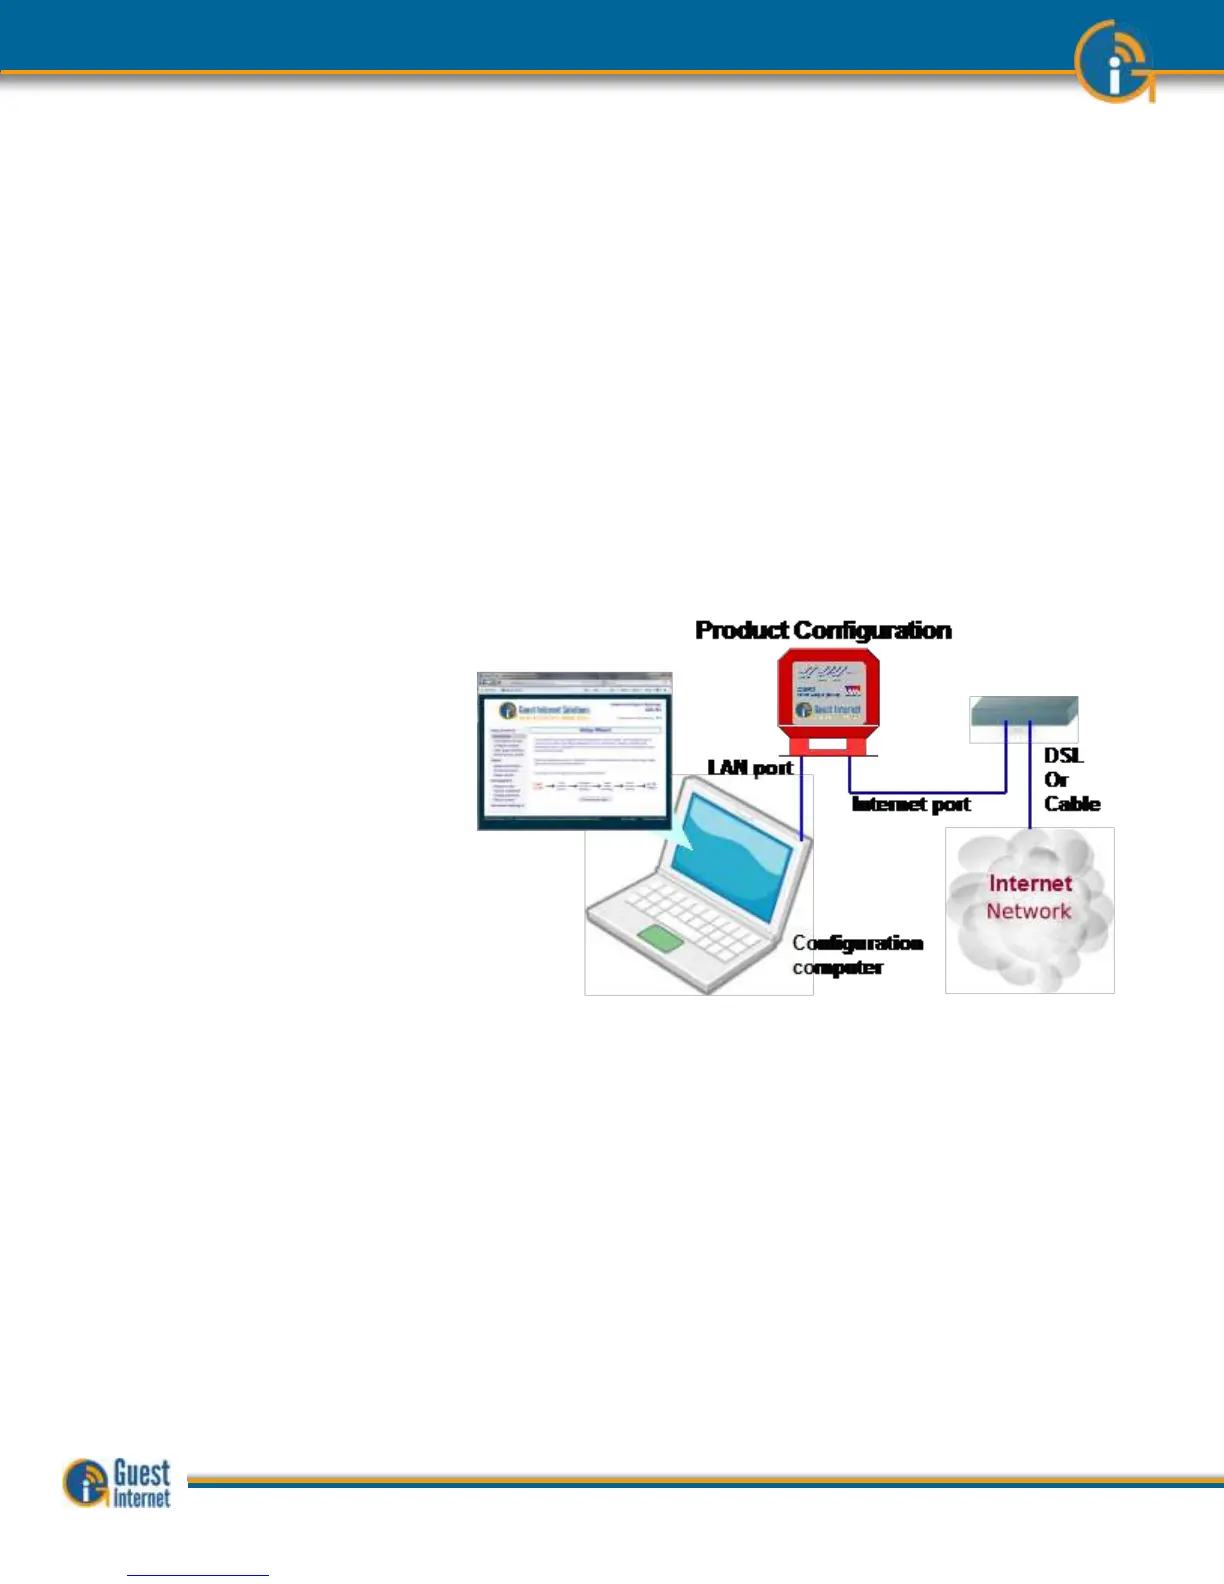
The GIS-gateway must be connected as shown in the diagram at the bottom of this page.
The INTERNET port must be connected to the Internet via the DSL router. The GIS-
gateway cannot be configured without Internet access. The computer Ethernet cable is
connected to any LAN port
When the GIS-gateway is connected as shown in the diagram the power supply should be
connected. Check the power on LED is lit on the front of the enclosure, or the LCD display
is lit on some models. The WAN link LED indicates that the Internet port is connected to
the DSL router, on models with the LCD display a message indicated this connection.
Next switch on the computer. When the computer has booted up then open the browser.
If the browser gives a message that the Internet is not available then check the Ethernet
cable and connectors between the GIS-gateway LAN port and the computers Ethernet
connector.
The GIS-K2 must be connected as shown in the diagram on the following page. The GIS-K2
INTERNET port must be connected to the Internet via the DSL/Cable/T1 router. The GIS-
K2 cannot be configured without Internet access. The computer wireless network interface
is connected to network name:
Hotspot
When the GIS-K2 is connected as shown in the diagram the power supply should be
connected. Check power on LED is lit above the enclosure. A LED indicates power is
connected and a LED indicates that the Internet port is connected to the DSL router.
Next open the computer browser. If the browser gives a message that the Internet is not
available then check the wireless connection between the GIS-K2 and the computer.
 Loading...