15
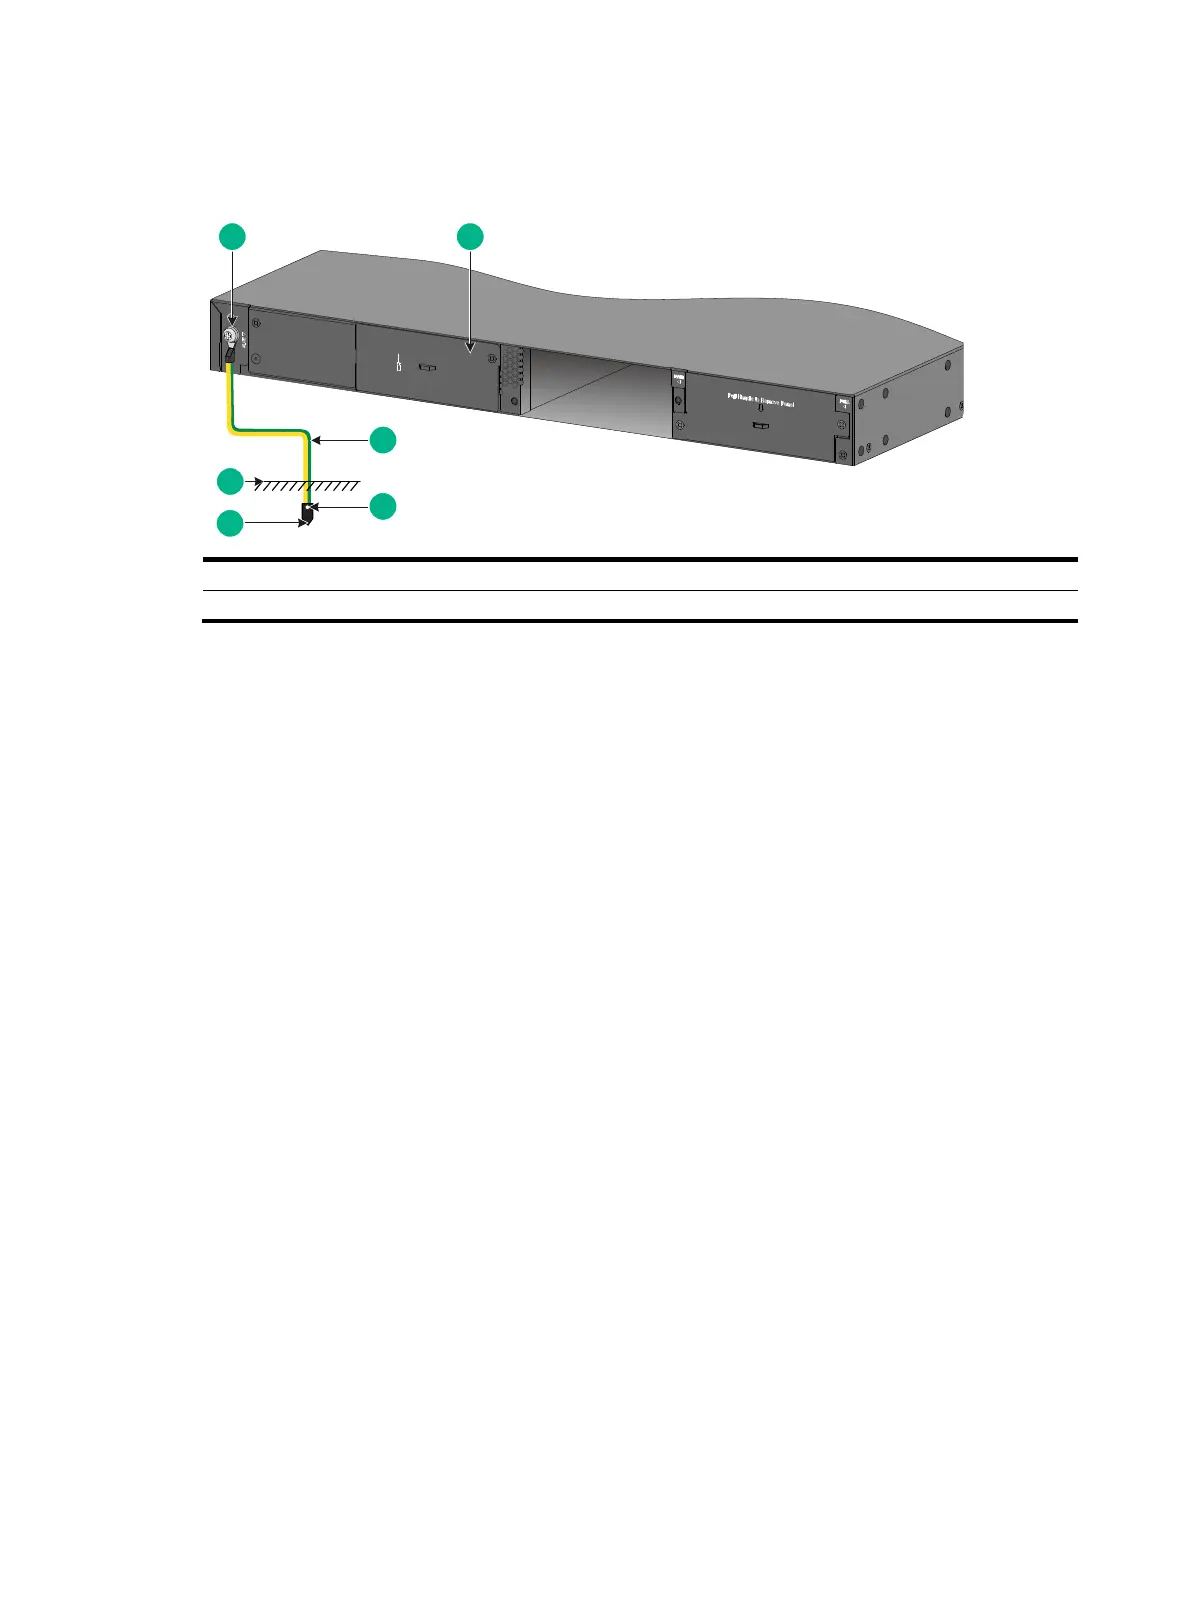
Weld the yellow-green grounding cable to the angel iron or steel tube and treat the joint for corrosion
protection.
Figure 18 Grounding the switch by burying the grounding conductor into the earth ground
(1) Grounding screw (2) Chassis rear panel (3) Grounding cable
(4) Welding point (5) Grounding conductor (6) Earth
Installing and removing a fan tray
The S6520X-26XC-UPWR-SI and S6520X-54XC-UPWR-SI switches each comes with empty fan
tray slots and supports the LSPM1FANSB fan trays.
To ensure good ventilation of the switch, follow these guidelines to install and remove fan trays:
• The LSPM1FANSB fan tray provides port-side intake and power module-side exhaust airflows.
The fan tray handle is red. Select the LSPM1FANSB fan trays for the switch based on the
ventilation requirements at the installation site.
• Before powering on the switch, make sure all fan tray slots have fan trays installed and the fan
trays are the same model.
• Make sure all slots have a module or filler panel installed when the switch is operating.
• For an S6520X-26XC-UPWR-SI switch, if both fan trays fail during the switch operation, replace
them within two minutes.
• For an S6520X-54XC-UPWR-SI switch, if more than one fan tray fail during the switch
operation, replace the faulty fan trays one by one and finish replacing a fan tray within three
minutes.
• If one fan tray fails while the switch is operating, perform either of the following tasks:
{ If the ambient temperature is not higher than 27°C (80.6°F), replace the fan tray within 24
hours and make sure the failed fan tray is in position before the replacement.
{ If the ambient temperature is higher than 27°C (80.6°F), replace the fan tray immediately.
Installing a fan tray
1. Wear an ESD wrist strap. Make sure the strap makes good skin contact and is reliably
grounded.
2. Unpack the fan tray and verify that the fan tray model is as required.
3. Orient the fan tray with the TOP mark facing up.
5
4
1 2
3
6
 Loading...