26
The installation and removal procedures are similar for expansion cards. The following procedures
install and remove LSWM2QP2P (with an ejector lever) and LSPM6FWD (without an ejector lever)
expansion cards.
Installing an expansion card
1. Wear an ESD wrist strap. Make sure the strap makes good skin contact and is reliably
grounded.
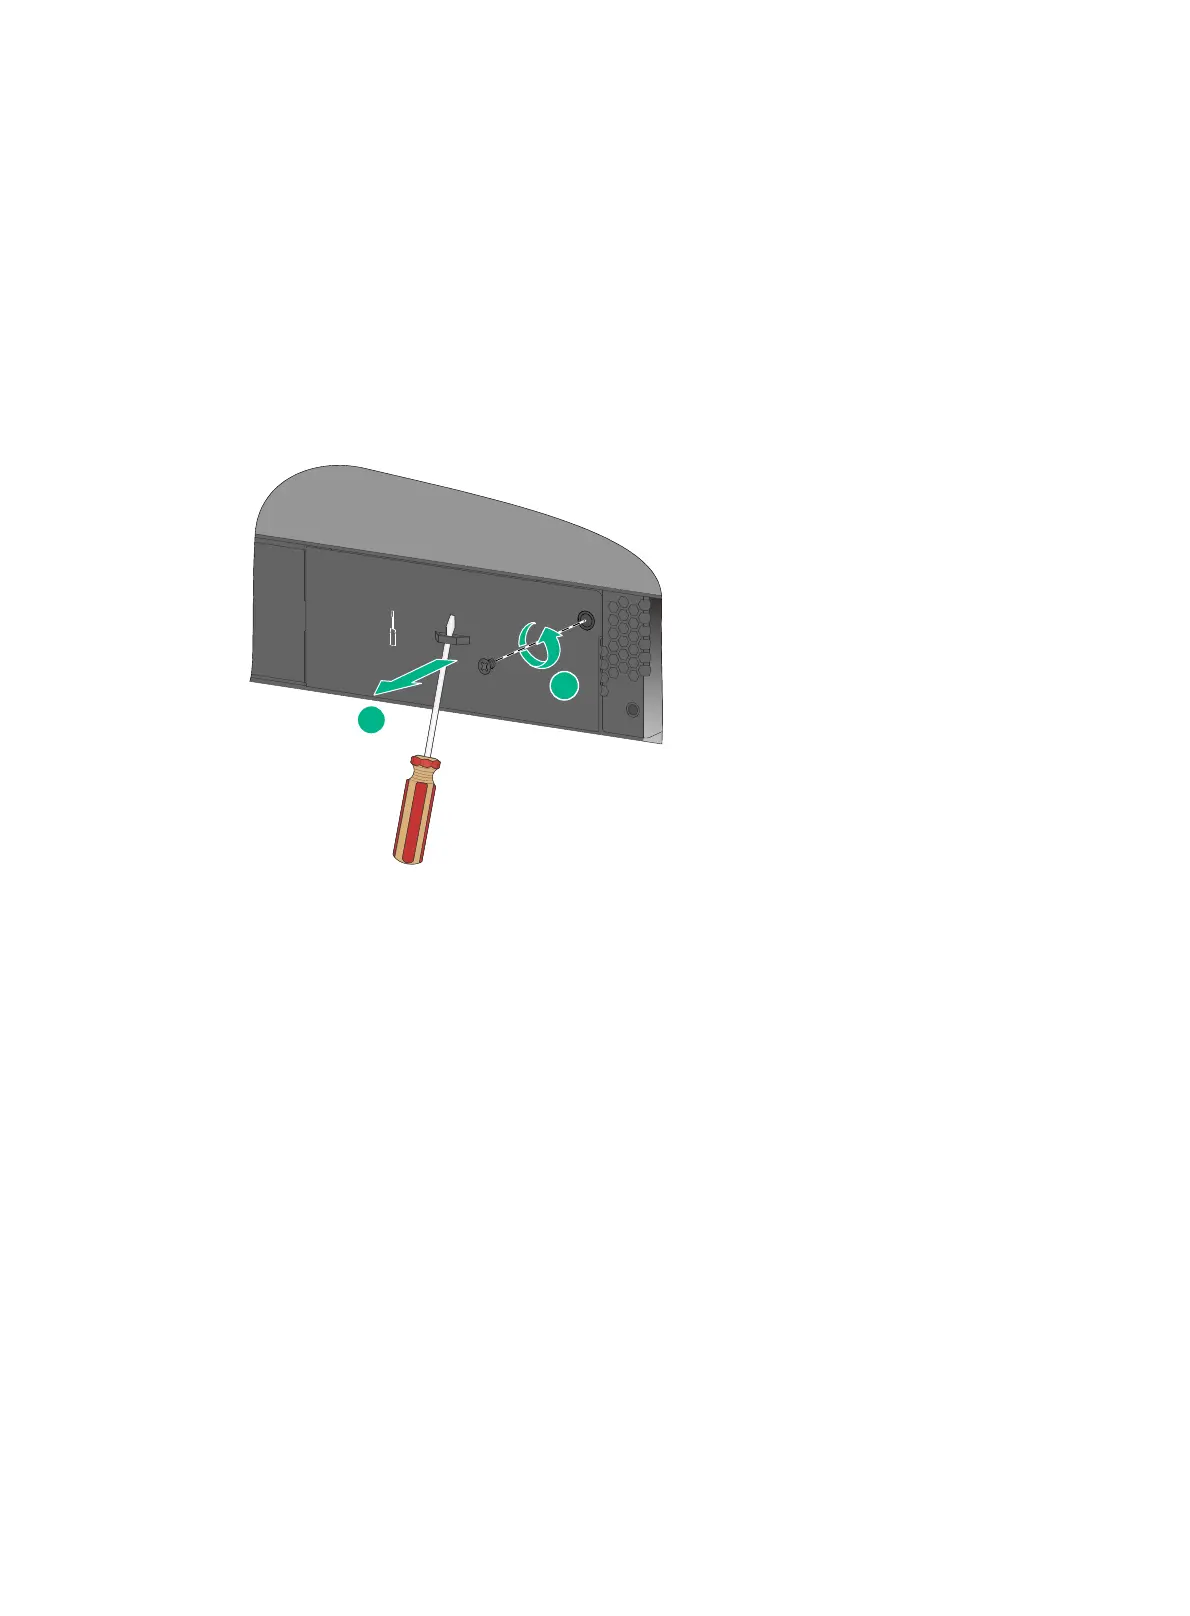
2. Use a Phillips screwdriver to remove the screw on the filler panel in the target expansion slot.
Then remove the filler panel.
Keep the filler panel secure for future use.
Figure 35 Removing the filler panel from the target expansion slot
3. Unpack the expansion card.
4. If the expansion card has an ejector lever, follow these steps to install it:
a. Fully open the ejector lever, as shown by callout 1 in Figure 36.
b. Gently push the expan
sion card into the slot along the guide rails until the expansion card
has good contact with the chassis. See callout 2 in Figure 36.
c. Clo
se the ejector lever, as shown by callout 3 in Figure 36.
d. Use a Phillips screwdriver to fasten the captive screw on the expansion
card to secure the
card in the slot. See callout 4 in Figure 36.
5. If the expansi
on card does not have an ejector lever, follow these steps to install it:
a. Gently push the expansion card into the slot along the guide rails until the expansion card
has good contact with the chassis. See callout 1 Figure 37.
b. Use a Phillips screwdriver to fasten the captive screw on the expansion
card to secure the
card in the slot. See callout 2 Figure 37.
2
1
 Loading...