Printer Installation and Setup
50081_PrinterInstallation.fm Page 153
Appendix B Printer Installation and Setup
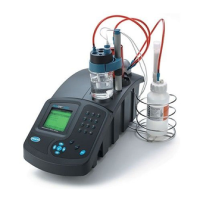
The AutoCAT 9000™ can be connected to an optional printer to generate analysis
reports. Supervisor-level access is required to modify these parameters (see Entering the
Supervisor Code on page 27).
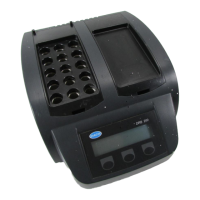
The Kyoline printer requires the correct switch orientation. The printer has 8 DIP
switches located under the paper roll. To access the switches, remove the top cover and
the paper roll. Use an object with a fine point (e.g.,a ball-point pen) to set the switches.
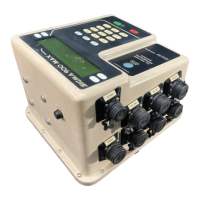
Insert the round 6-pin plug (index arrow on top) into the back of the printer. Insert the
other end of the printer cable into the serial PC/Printer port located on the back panel of
the AutoCAT 9000 (see Figure 3 on page 19). Plug one end of the printer power adapter
into a 110-V ac outlet and the other end to the printer.
Note: The AutoCAT 9000 must be in operation before the printer is connected and turned ON in
order for the software to detect the printer.
The Titrants menu and Methods menu have identical printer set ups. The following
software setup uses the Methods menu as an example.
Switch 12345678
Setting ON ON OFF OFF ON OFF ON OFF
1. From the Methods
menu, press
3 to select
Method Library.
2. Highlight ID.
Press the
CHECK MARK
to validate.
3. Highlight the desired
method.
Press the
CHECK MARK to
validate.
Note: Total Cl2 - Fwd is chosen
for demonstration purposes
only. The printer parameters
are identical for all embedded
methods.
4. Press 2 to select
Cl2 - Fwd Titr.
Software Setup Method Parameters
 Loading...