PAO/5.64 mN
PAO/5.64 mN
Page 54
50081_PAONaThioCalibration.fm
17. The calibration titration
starts by filling the burette
with titrant and
subsequently dispensing a
2.2-mL predose of PAO into
the calibration sample.
This will bring the electrical
signal into measurable
range.
18. The Start Timer will
begin.
This allows the electrode to
stabilize before data is
collected.
Once the electrode has
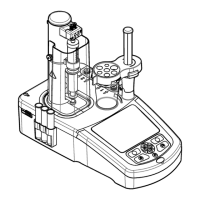
stabilized, the AutoCAT will
begin data acquisition and
plot the titration curve in real
time.
19. The Zoom range
determination window will
display the titration curve.
Use the navigation keys to
select and move the cursor
(vertical lines) to define the
range of data points for
analysis.
Note: Defining the range of
data points eliminates
undesirable portions of the
titration curve.
Select type of end point
determination.
Press the
CHECK MARK for
Automatic. Proceed to
step 22 or press
DEL for
Manual and proceed to
step 20.
20. Select two line
segments, one on each side
of the titration end point, by
positioning cursors at the
beginning and end of each
segment.
Press the
CHECK MARK to
confirm changes, press
DEL
to return to the previous
window.
21. Press the CHECK MARK
to accept the analysis.
Proceed to step 24.
Press
DEL to return to the
previous window (Zoom
range determination) to
adjust the linear segments
and reanalyze the data.
22. The AutoCAT will run
the analysis based on the
automatic selection of linear
segments.
Note: This algorithm requires
approximately 60 seconds to
complete.
23. Press the CHECK MARK
to accept the analysis.
Press DEL to return to the
previous window (Zoom
range determination) to
adjust the linear segments
and reanalyze the data.
24. Press 1 continue.
Press
2 to select More details
to view analysis statistics
specific to the current
calibration.
 Loading...

