Do you have a question about the Hanna Instruments HI 83749 and is the answer not in the manual?
Explains the prevention of protein haze in wine using bentonite.
Details the T.I.S. system for sample traceability and data management.
Lists abbreviations used in the manual.
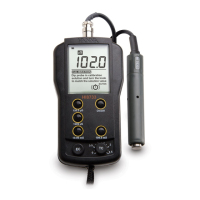
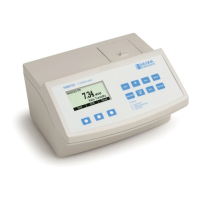
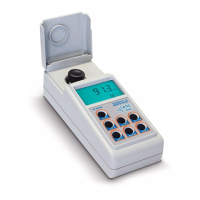
Illustrates and names the main external parts of the instrument.
Explains the function of each key on the instrument's keypad.
Describes the various connectors on the instrument for external links.
Explains the icons and readouts on the instrument's LCD display.
Describes the beeper's function for error and confirmation signals.
Highlights the cuvette's role in optical measurements and potential issues.
Instructions for proper handling and storage of cuvettes to prevent damage.
Details the procedure for oiling cuvettes for low turbidity readings.
Key considerations for taking representative samples for turbidity analysis.
Methods to remove air bubbles for accurate turbidity readings.
Offers specific tips for filling cuvettes and using pipettes.
Detailed instructions for performing a two, three, or four-point calibration.
Explains the alert for measurements outside the calibration range.
Details error messages during calibration and their causes.
Procedure to delete current calibration and restore factory settings.
Explains using Signal Average Mode for unstable samples.
Describes continuous measurement for observing settling rates.
Instructions for preparing wine samples and bentonite suspensions.
Step-by-step guide for taking readings for bentonite requirement.
Explains the comparative mode for turbidity value comparison.
Guide to viewing stored records and searching through logged data.
Procedure for deleting user calibration and restoring factory settings.
Guides setting a reference value for comparative turbidity analysis.
Explains how to activate comparative mode for turbidity value comparison.
Details setting the instrument to meet EPA reporting requirements.
Describes how to turn the instrument's beeper on or off.
Instructions for showing or hiding the current time on the secondary LCD.
Procedure for setting the instrument's internal real-time clock date.
Procedure for setting the instrument's internal real-time clock time.
Explains how to set a unique four-digit ID for the instrument.
Details setting the baud rate for PC communication via RS232.
How to turn the LCD backlight on or off.
Procedure for replacing the instrument's AA batteries.
Details on using the AC adapter for powering the instrument.
Guidelines for proper disposal of the product as e-waste.
Instructions for the environmentally sound disposal of used batteries.
| Type | Photometer |
|---|---|
| Parameter | Iron and Total Hardness |
| Light Source | LED |
| Light Detector | Silicon Photocell |
| Light Source Wavelength (Total Hardness) | 525 nm |
| Power Supply | 4 x 1.5V AA batteries |
| Environment | 0 to 50°C (32 to 122°F); RH max 95% non-condensing |
| Iron Low Range | 0.00 to 5.00 mg/L Fe |
| Iron High Range | 0.0 to 30.0 mg/L Fe |
| Iron Low Range Resolution | 0.01 mg/L |
| Iron High Range Resolution | 0.1 mg/L |
| Iron High Range Accuracy | ±0.1 mg/L ±5% of reading |
| Measurement Range (Total Hardness) | 0 to 750 mg/L CaCO3 |
| Resolution (Total Hardness) | 1 mg/L |
| Accuracy (Total Hardness) | ±5 mg/L ±5% of reading |
| Method (Iron) | Adaptation of the TPTZ method for low range; adaptation of the Ferrover method for high range. |
| Auto-off | After 15 minutes of non-use |