© 2016 Harmonic Inc. All rights reserved. 25 ProStream 9100 Release 17.5, Rev A
Chapter 2
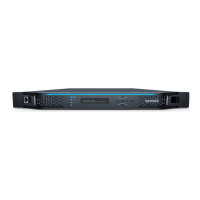
Installing the ProStream 9100
This chapter provides detailed instructions for installing the ProStream 9100 unit in a standard
19-inch rack, connecting the cables, and powering up the device.
The following installation checklist links to instructions for each task. Perform these tasks in the
order presented.
Preparation
Unpacking
Installing the Device in a Rack
Inserting the IOM Cards and RF Input Card
Cabling ProStream 9100
Front Panel LEDs
Back Panel LEDs
Preparation
For installation and cabling, you need the following:
Phillips screwdriver - To mount the ProStream 9100 device in a standard 19-inch rack.
Rack-mount screws - Harmonic ships the necessary rack-mount screws and rack rails with the
optional rack-mounting kit. Harmonic ships rack-mounting kits in a separate shipping
container.
Unpacking
The ProStream 9100 device comes in a specially designed shipping container that ensures the
integrity of the unit. To avoid damage to the component, follow the unpacking instructions that
come with the device.
The ProStream 9100 container includes the following items:
Device
Standard IEC power cord
Spare air filters
Installation guide
NOTE: The AC power input cable must comply with the national electrical code and 18 AWG minimum.