Chapter 2 Installing the ProStream 9100
© 2016 Harmonic Inc. All rights reserved. 26 ProStream 9100 Release 17.5, Rev A
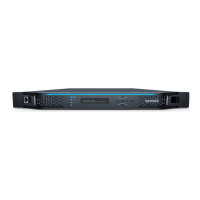
Installing the Device in a Rack
Installing the Device in a Rack
This section describes how to mount the device in a standard 19-inch rack, using the two side-
mount rails included in the optional rack-mounting kit. The recommended rack setup is a 30-inch-
deep rack with a spacer or chimney between racks with multiple devices.
When you view the rack from the rear, the power rail is installed on the left side.
Rack Guidelines
When operating the device in the rack, ensure that:
The ambient temperature around the unit (which might be higher than room temperature) is
within the limit specified for the unit.
There is sufficient airflow around the unit.
Electrical circuits are not overloaded; consider the nameplate rating of all the connected
equipment.
There is overcurrent protection.
The equipment is properly grounded.
No objects are placed on top of the unit.
Chassis Warnings for Rack Mounting and Servicing
The following guidelines are provided to assure your safety:
This unit should be mounted at the bottom of the rack if it is the only unit in the rack.
When mounting this unit in a partially filled rack, load the rack from the bottom to the top with
the heaviest component at the bottom of the rack.
If the rack is provided with stabilizing devices, install the stabilizers before mounting or
servicing the unit in the rack.
CAUTION: Rack mount the platform using the screws that came with your Harmonic rail kit. If you did not
purchase a Harmonic rail kit, use a rack-mount screw with a head no larger than 0.4 inches in diameter and
0.14
inches in height to avoid damaging the front panel of the platform. (Some platforms come with a peel-
away sticker specifying the correct screw size.) Using only the bottom two screw holes is sufficient.
Airflow
The airflow through the device is critical for maintaining the proper temperature range. Fans in the
chassis draw air in through the front bezel and through the device. The airflow ventilates out of
the right side (front view).
CAUTION: Do not obstruct the airflow of the device. Severe equipment damage can result when the device
cannot properly exhaust the airflow.