© 2016 Harmonic Inc. All rights reserved. 43 ProStream 9100 Release 17.5, Rev A
Chapter 4
Maintenance
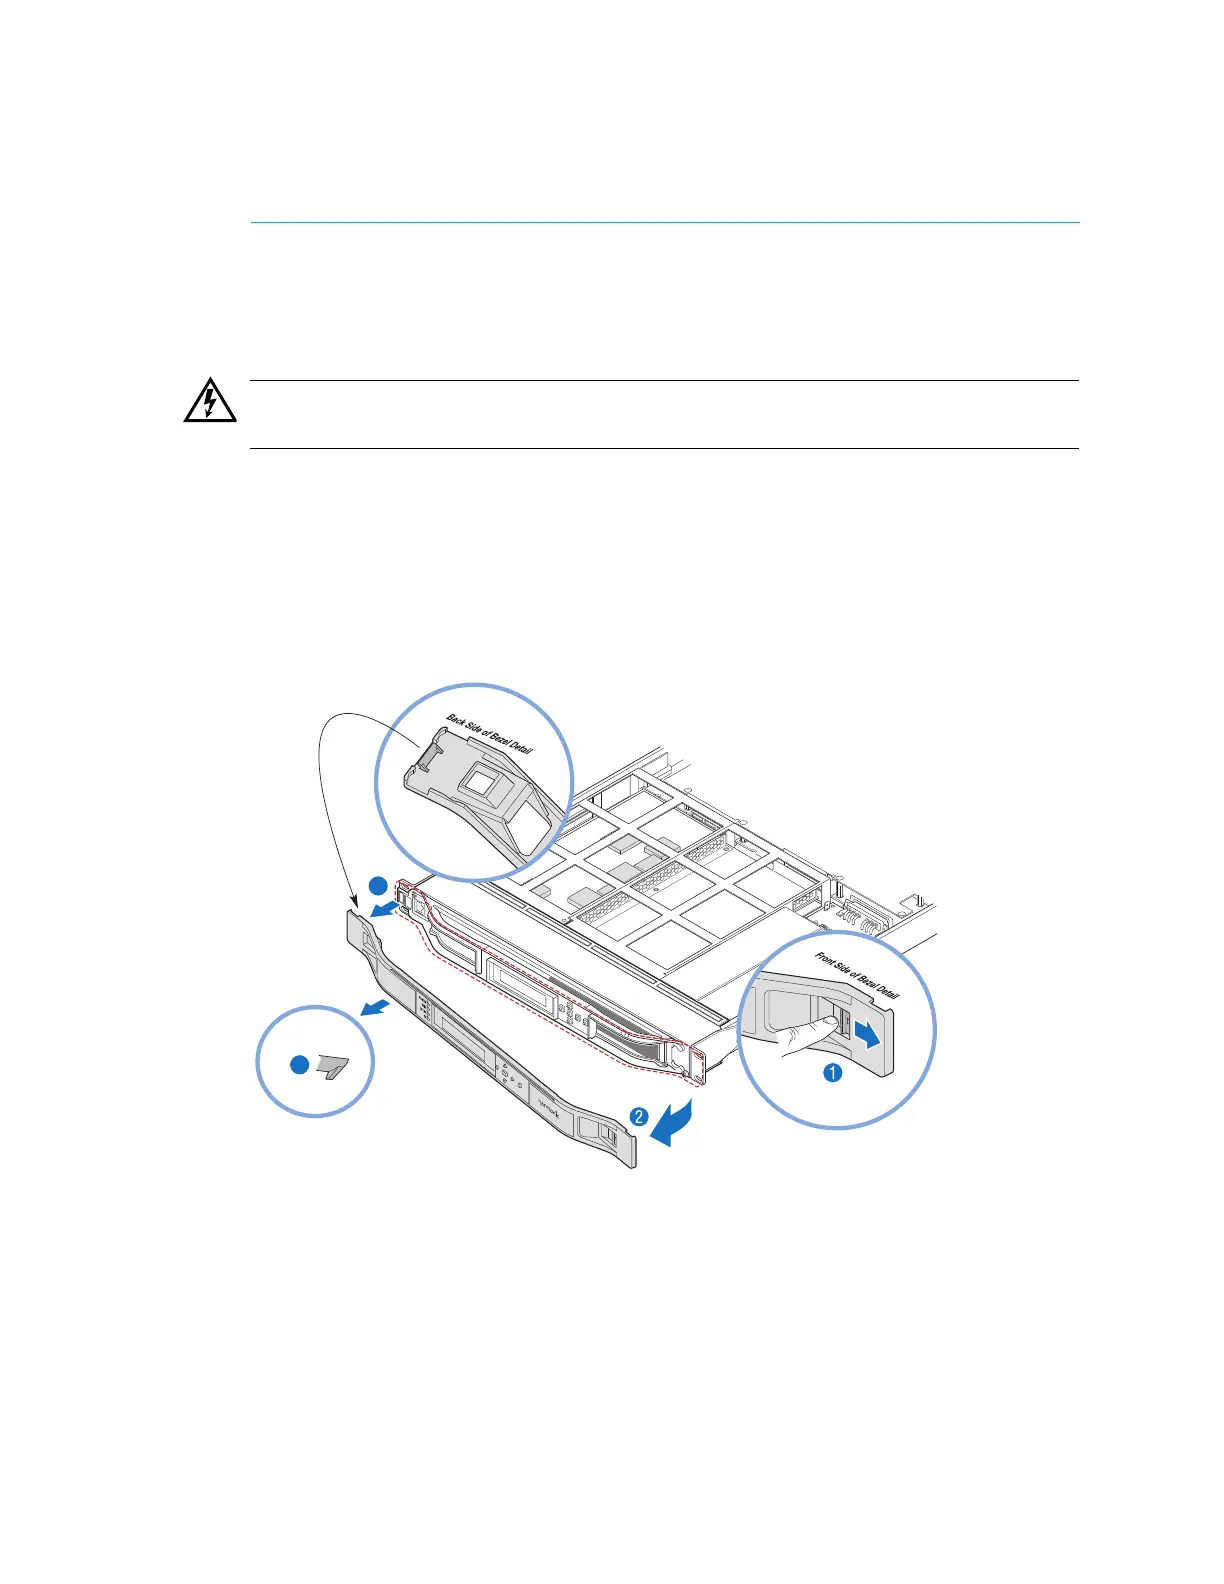
Removing and Replacing the Bezel
The bezel, made of a lightweight, flexible plastic material, is field replaceable.
WARNING: The front panel display on the device is susceptible to electrostatic discharge (ESD) when the
bezel is removed. Wear the appropriate ESD protection when the bezel is removed. See ESD Guidelines.
You do not need to unplug the device when
removing and replacing the bezel.
As you go through the steps in the following procedu
re, refer to the corresponding number in
Figure 4–1.
To remove the bezel:
1. Locate the lever on the front of the bezel and push to the right to disengage the right side of
t
he bezel.
Figure 4–1: Steps for removing the Bezel
2. Pull the right side of the bezel towards you.
3. Ease the bezel away from the fan tray.
The bezel is secured to the fan tray by a clip.
4. Ease the left side of the bezel away from the unit.