Chapter 4 Maintenance
© 2016 Harmonic Inc. All rights reserved. 44 ProStream 9100 Release 17.5, Rev A
Air Filter
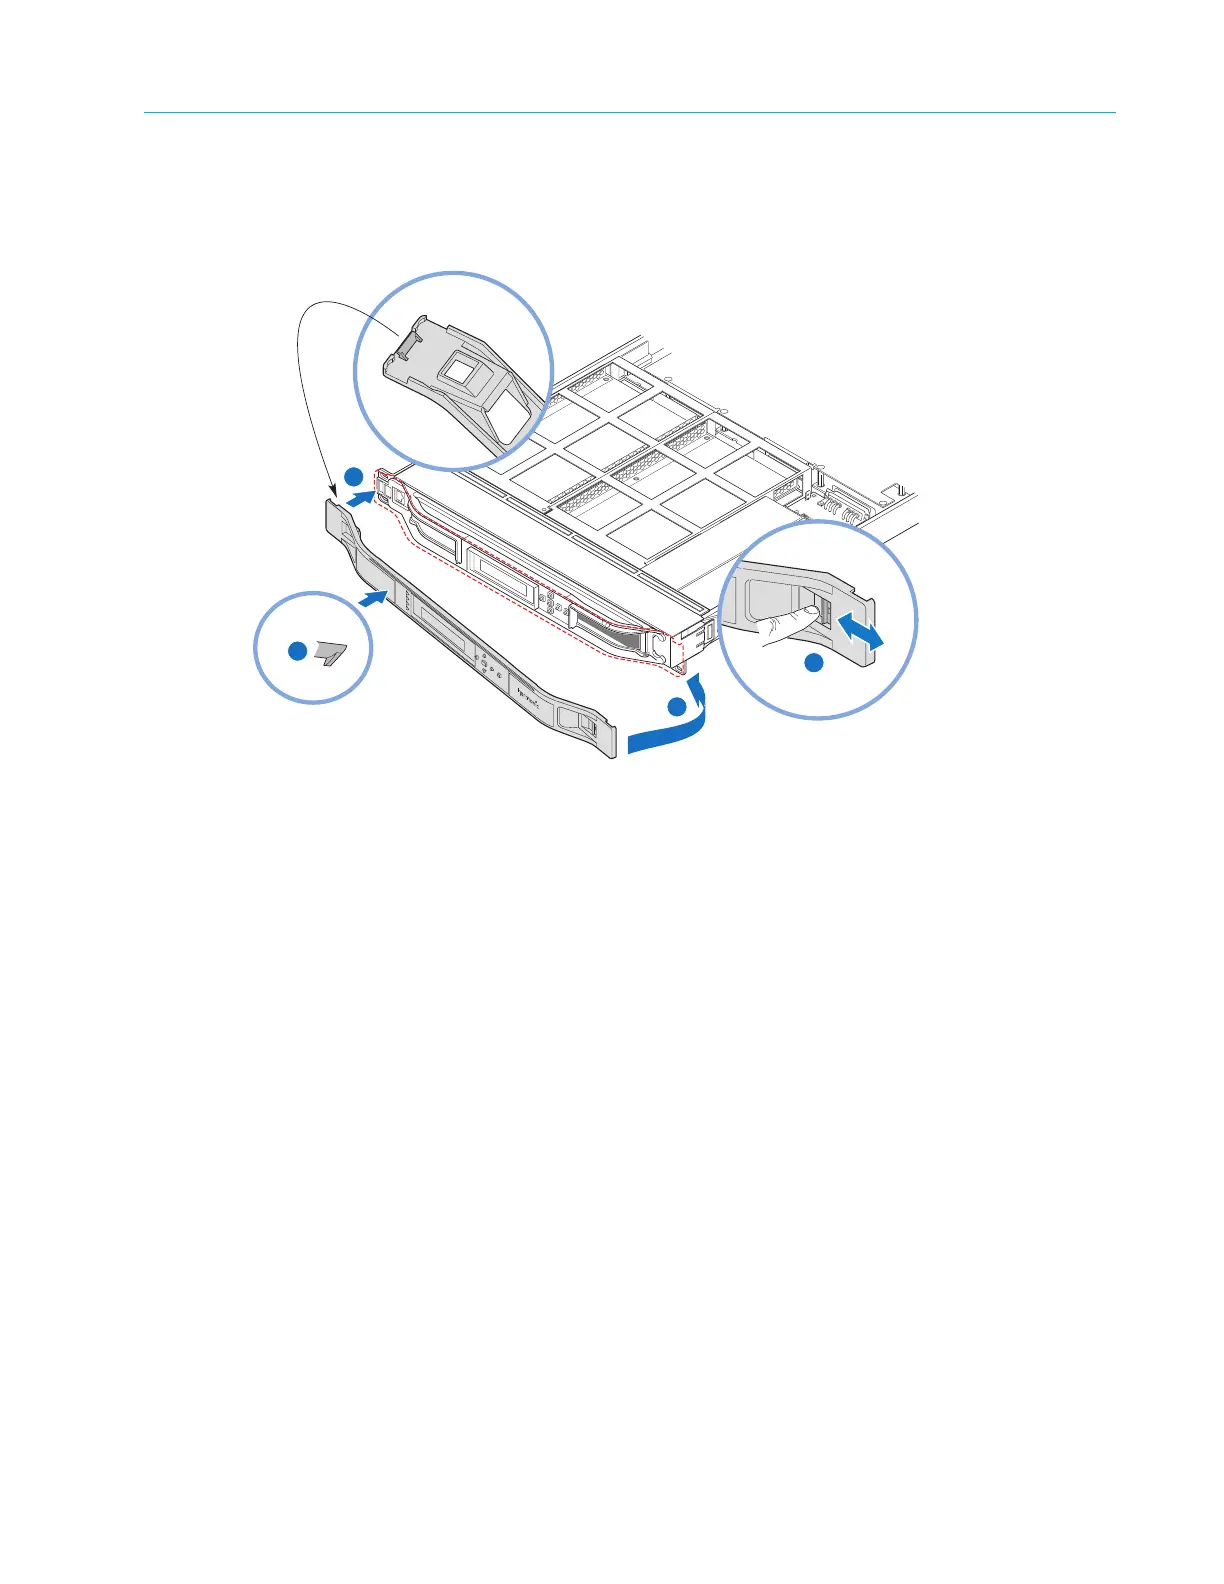
To replace the bezel:
1. Replace the bezel by inserting the plastic catch at the back of the left side of the bezel into
the slot in the metal frame, as shown in Figure 4–2.
1
2
Back Side of Bezel Detail
POWER
TX
FAIL
LOCAL
Front Side of Bezel Detail
4
3
Back Side of Bezel
Figure 4–2: Steps for replacing the Bezel
2. Ease the right side of the bezel onto the unit, as shown in Figure 4–2, step 2.
3. Push the front of the bezel flush with the fan tray to secur
e the clip that holds the bezel to the
fan tray, as shown in Figure 4–2, st
ep 3.
4. Locate the lever on the front of the bezel and push to the right to snap the bezel into place, as
shown in Figure 4–2, step 4.
Air Filter
The device uses an air filter to minimize dust and dirt in the circuitry and components in the
chassis. The filter is made of flexible, open cell polyurethane foam, which is specially coated to
provide flame and fungus resistance. It is enclosed in a sheet metal frame that slides from the top
of the unit and is located directly in front of the air vents in the fan cage at the front of the device.
The filter is fire retardant and conforms to UL 900 Class 2 and UL 94 HF-1 specifications.
Maintaining the Air Filter
The operating environment of the device plays a large factor in determining the life of the air filter.
Devices that operate in dusty and dirty surroundings require more frequent inspections and filter
cleaning than those operating in cleaner environments.
Inspect and clean the filter with a frequency that is appropriate to the environment in which the
device operates. Harmonic recommends inspecting and cleaning the filter every six weeks to
ensure proper airflow through the chassis.