Chapter 4 Maintenance
© 2016 Harmonic Inc. All rights reserved. 46 ProStream 9100 Release 17.5, Rev A
Fan Tray
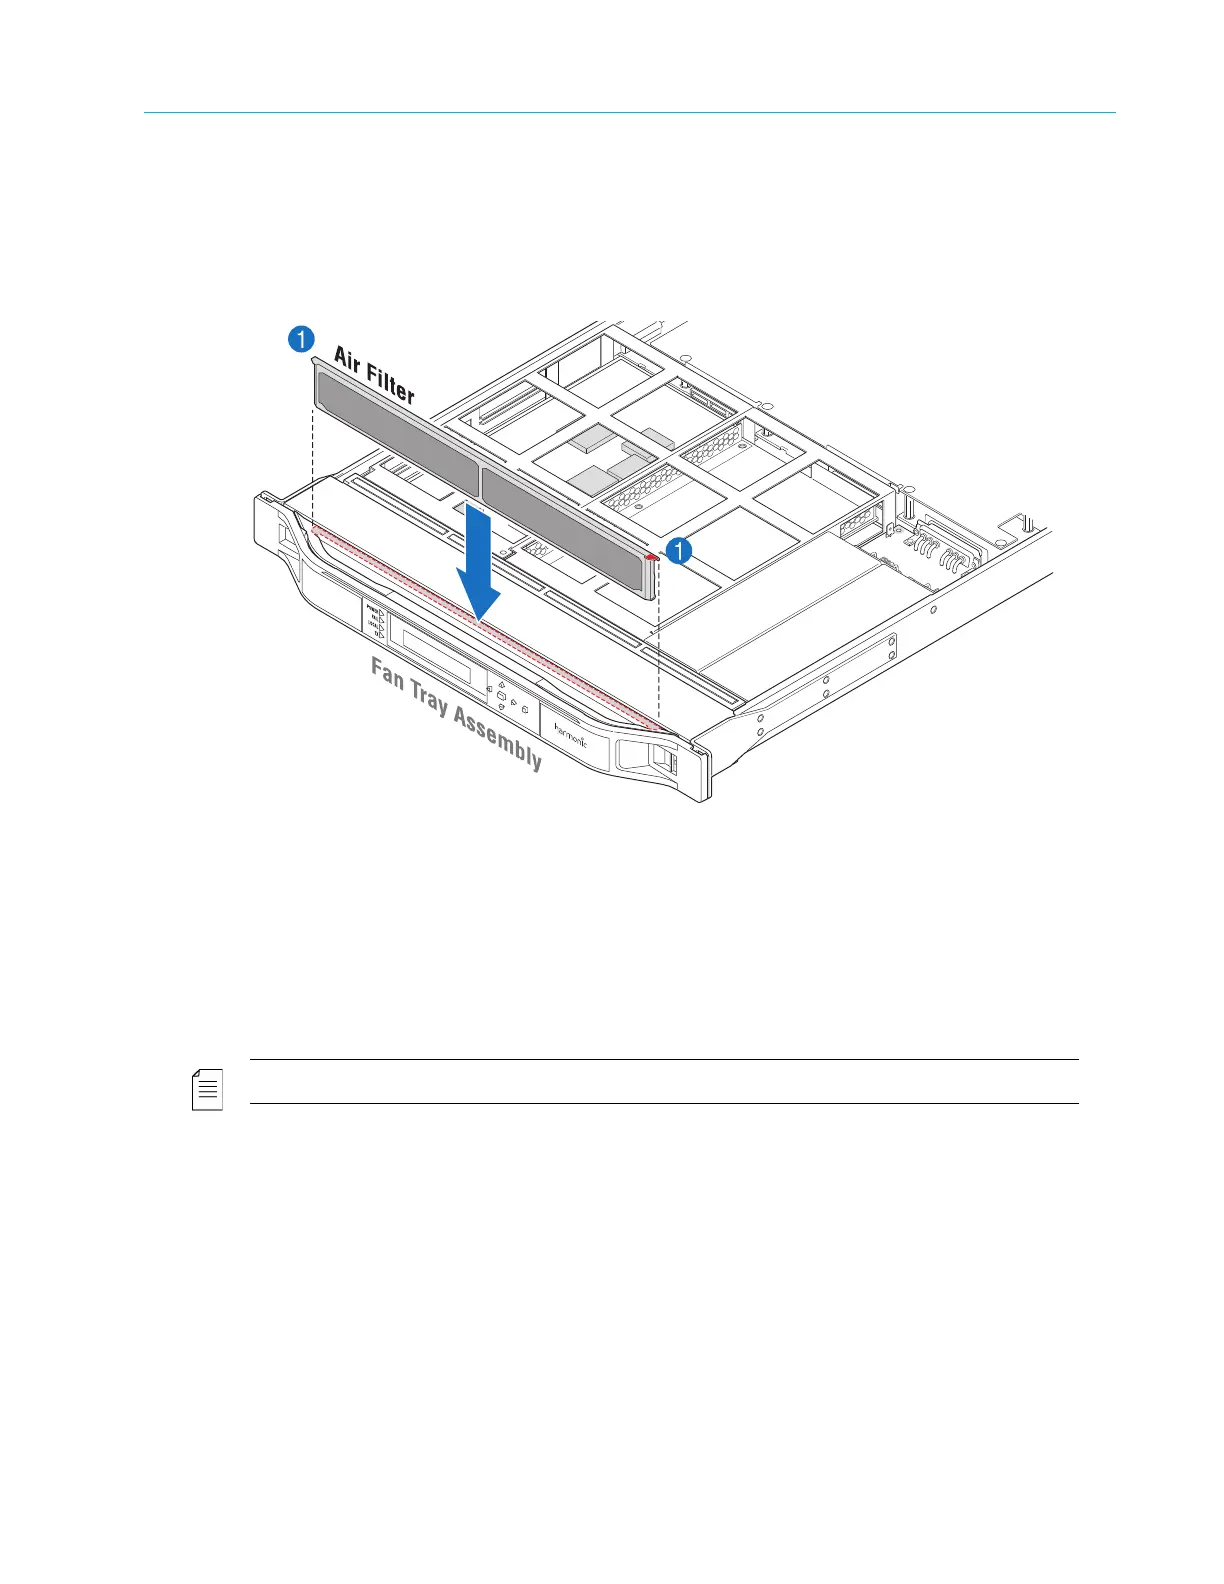
To replace the filter:
1. With your fingers on the corners of the filter (indicated in red), push down on the filter until it
is secure in the chassis, as shown in Figure 4–4.
The corners of the filter press against the chassis when it is fully inserted.
Figure 4–4: Replacing the Air Filter
Fan Tray
The fan tray unit contains eight 12V fans which pull air from the front of the unit through a series of
air vents. A curved frame, housing the front panel display unit, attaches to the front of the fan tray
unit and is considered an integral part of the fan tray unit. This curved frame must not be removed
at any time.
NOTE: If the fan tray unit is removed for more than two minutes, the device might shut down.
Removing and Replacing the Fan Tray
To remove the fan tray:
1. Remove the bezel from the unit, as described in Removing and Replacing the Bezel.
2. With a Phillips-head screwdriver, remove the two scr
ews that attach the fan tray assembly to
the chassis, as shown in Figure 4–5, st
ep 2.
3. Grasp the front of the fan tray assembly, and pull
the tray firmly but smoothly towards you to
disengage it from the PC connector inside the unit.