58
3
1
4
To make a rapid User Button white balance setting:
(Please note: this function works with a CF card or an ImageBank-
II only)
1. Assign the User Button (or AE-L, STOP DOWN or M.UP
button) to activate Grey balance exp. (see later section –
Advanced Features / Customizable button function list – for
details).
2. While framing the centre spot in the viewnder over a neu-
trally colored surface, press the assigned button.
A small rectangle appears on the OLED marking that particu-
lar area. Calculations then take place automatically so that
the following shots use the area chosen as the new ‘white bal-
ance’ standard.
Media
e storage setting controls where your digital capture unit will
store new images and which stored images will be visible in the
browse window.
Oen, you have just one type of storage media available—the
internal compact-ash card. However, if you have several media
attached (e.g., a card and one or more external disks), then you
may need to switch between them.
If your selected storage medium has more than one batch (folder)
on it, then the batch selected when you use the storage menu item
will be the one you most recently created.
To select the medium to which to save new shots and from which
to browse previous shots:
1. Press the MENU button.
2. Use and to select the MEDIA sub-menu.
3. Use the zoom (
–
or
+
)
button to step through the available
media until the name for destination/source you wish to use is
shown.
4. Either move on to another setting by using the navigator but-
ton, or,
press the MENU button to exit the menu system and keep
your setting.
Note that you can also select media using just the (+) and (-)
buttons while browsing images. This method also enables
you to select a batch as you zoom in from media to batch to
thumbnails to preview. See Navigating Media and Batches for
complete details about this method.
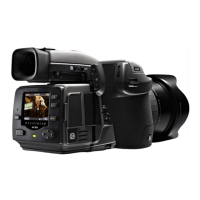
White Balance Shot screen
appears after test capture to
illustrate the area chosen for
white balance calculation.
2
1
1

 Loading...