84
1
2
6
5
4
3
New metered area is 1.8 EV lower than the area metered
when the AE-L button was pressed.
AE-L button pressed to call the metered area ‘Zone 5’.
Metered area reads ‘Zone 8’.
Metered area above ‘Zone 10’.
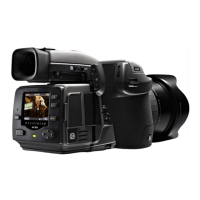
AE- L button 1, 2, 3, 4, 5, 6
is button has two main functions that can be incorporated in
various working methods involving exposure locking. It also has
an extra function for the ash meter capability (see AE-L section
under Flash). e AE-L button can:
a) lock an EV setting in manual and automatic modes.
b) be used as a Zone System placement button.
a) When the button is pressed (g 1), the light metering facility is
locked to the EV setting at that moment. An L (= locked) symbol
appears between the shutter speed and the aperture indication (g
2) on the grip display and viewnder display to conrm the status.
Press the AE-L button again to unlock (toggle function).
In the locked setting, the aperture and shutter speed become
interlocked. In this way, a new aperture/shutter combination that
still represents the same EV, can be rapidly chosen. For example,
if you set the shutter at 1/125s and the aperture at f/8 and lock
them together, you can access new EV-equivalent combinations
of, for example, 1/30s a f/16 or 1/500s at f/4 just by moving the
front control wheel.
In practice this means you could, for example, in auto mode, posi-
tion the metering area (spot setting) over an area in the subject
that you determine to be equivalent to a mid-grey and lock it with
the AE-L button. You can then recompose the picture with the
metering zone positioned over an area much brighter or darker
while still retaining the original exposure setting and choose a new
combination of aperture and shutter speed settings.
b) e AE-L button also allows the spot metering function to make
zone placements. When the AE-L button is pressed, the metered
area is saved as a mid-grey (Zone 5). When the spot area is then
placed over another part of the scene, the new area is then com-
pared to the saved area and the dierence can be read o the scale
seen in the viewnder. For example, in a landscape situation you
could meter the foreground, lock the reading with the AE-L button
(thereby locking that area to be reproduced as the equivalent to a
mid-grey 18%), point the camera at some rocks to see by how much
darker they are compared to the foreground by the EV dierence
read o the scale (illus 3).
If you have chosen Spot together with Zone display (see ‘Custom
options’ for settings and ‘Zone’ in the Appendix for further in-
formation about the zone system.) as well as one of the automatic
modes A, S, P or Pv, point the spot marking at an area that you
decide should be a Zone 5 and click the AE-L button (illus 4). e
meter will now display dierent parts of the subject as zone values
(illus 5) in the viewnder display, instead of EV deviations, as you
move the spot marking over the subject. (Included are Lo and Hi
(illus 6)to signify areas beyond the range of the sensor).
Alternatively you can choose to re-classify an area as another zone
and then check the rest of the subject to see how other areas fall
on the zone scale. Do this by following the above procedure and
then turning the rear control wheel until you see the new desired
zone value in the viewnder display. You will also see the new
exposure that will now produce that new zone. For example, you
might have measured a rock at zone 5 but wish to make it darker.
By moving the rear control wheel you could re-classify it as zone
4. You will then be able to see, for example, whether white clouds
are now falling within the exposure range by their new Zone
classication.

 Loading...