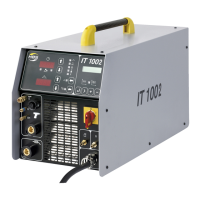
IT 1002 Order No BA 93-66-1206 Issue 03.11.08 37
5.6.2 Adjusting the Welding Current
Set the welding current (digital display ) with the two arrow keys
(⇑ higher – ⇓ lower) on the display.
5.6.3 Adjusting the Gas Pre-Flow Time
If working with shielding gas, you have to set the gas pre-flow time. Adjust at the display,
how long the shielding gas should flow before the welding process starts. The gas flows
automatically until the welding gun is removed from the joined welding element.
Adjust the flow meter at the gas bottle to 8 to 16 liters/min (minimum 8 l/min.)
Press the shielding gas key, LED shielding gas on
The display welding time ( ) shows the gas pre-flow time
Set the gas pre-flow time with the two arrow keys (⇑ longer – ⇓ shorter).
After approx. 2 seconds, the display welding time ( ) automatically switches
back to the previously set welding time.
If you are working with ceramic ferrules, then trigger the
shielding gas key, the shielding gas LED is off. In this way, the
gas valve remains closed during the welding procedure.
5.6.4 Library Mode
In the library mode, you can call up and modify charging voltages, depending on stud
diameter (UD/pins).
Simultaneously press both arrow keys of welding time (⇓ shorter ⇑ longer) for
about one second. The display welding time shows 0-06 (06 means the set
welding current and welding time for stud diameter of 6 mm).
You can pre-select the stud diameter (6 mm to 12 mm) with both arrow keys
(⇓ shorter ⇑ longer). After about 3 seconds the display ( ) jumps onto the pre-
selected welding time and the display ( ) onto the pre-selected welding
current.
In addition, you can modify the welding time and welding current individually by
pressing the arrow keys (as described above).
If you are working with shielding gas, different welding parameters for stud
diameters (from 6 mm to 12 mm) are available in library mode.
5 Stud Welding Procedure
5.6 Switching on the Power Unit