User manual for single-phase meter
58
23 Maintenance
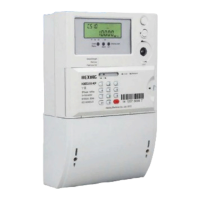
There is no need to change the METER within the life cycle. METER maintenance can be
executed based on local regulations. Recommended every 5~10 years.
23.1 Clean
Use dry cloth to clean the surface of the METER and wipe the stains and insects.
Warning: Flowing water and high-pressure water equipment is not
allowed to clean the METER, which may lead to short circuit.
23.2 Error and function check
The following process can be performed to recognize error and check function.
1. Insert the METER to the corresponding terminal of error test bench. (METER wiring hole number detailed in
chapter "Meter Connection"), tighten the connection screws(maximum torque is 3Nm)
2. Put the pulse testing part of the error testing bench align to the LED on the METER.(Actual auxiliary terminal
definition can be found on installation manual or on the wiring diagram on the nameplate.)
3. Start the error test bench. Put on rate voltage but no current. Confirm no current indictor display on LED. Check
whether the electric METER is displayed correctly (trouble-free code instructions).
4. After the METER is power on, set the METER to test mode through communication. The test mode is with the
highest level of security. Both communication key and administrator password are needed to enter the test mode.
Attention: In order to not affect the actual accumulated power when doing the test,
each time METER is off from the electricity, the METER need to set into the test
mode again.
5. Start the error testing bench
6. Execute relay control operation through PC software(if the relay is applied), check whether the
relay is working properly.
7. Take away the METER from the test bench after test finished
23.3 Reinstall
In order to avoid the change of asset management, it’s recommended to reinstall the METER
in the former position.