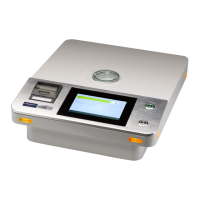
LAB-X5000 Series User Guide
6.1 Blank Subtraction
6.2 Overlapping Segment
6.3 Ratio Correction
6.4 Mass Absorption Corrections
6.4 Setting Up Samples (SUSs)for Instrument Corrections
If a poor correlation of X-ray intensity against concentration is seen after Regressions are
performed, then a correction may be necessary to improve the calibration fit.
Corrections should only be applied where appropriate, i.e. when a Test Measurement shows an
overlap of one element on another.
Some knowledge of X-ray fluorescence theory is required to check the validity
of any corrections. If a calibration is over-corrected (i.e. many
corrections applied to a single calibration) to make the correlation look
good, analysis of unknown samples will produce inaccurate results.
6.1.
Blank subtraction ‘forces’ the regression to pass through for zero concentration at the 6.1.1.
measured intensity of the blank. A reference blank sample must be measured in the
instrument correction section of the regression.
To apply a new blank correction to the regression: In the pull-down menu, select 6.1.1.1.
Method, then tap Regressions. Choose Blank Correction.
A screen to name the blank sample will display. Type in a name for the blank 6.1.1.2.
sample.
Insert the sample into the sample port and press the Start button. Allow the 6.1.1.3.
sample to analyze. Remove the blank sample when it rotates back into view.
To apply a new blank for measuring unknown samples, return the to routine 6.1.1.4.
analysis screen. Insert the sample to be adjusted in the sample port. Note that if
Sample Naming is toggled OFF, you will not be given an opportunity to name the sample
prior to analysis. If you wish to name the sample, access the pull-down menu and tap
Sample Naming prior to analysis. Press the Start Button. Allow the sample to analyze.
Remove the sample when it rotates back into view.
The analysis results will show the values of the blank that were subtracted, both 6.1.1.5.
on the printout, and on the saved results file.

 Loading...