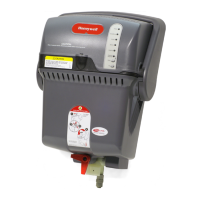
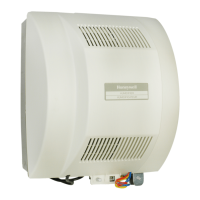
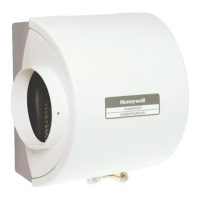
TrueSTEAM
TM
NEED HELP? For assistance with this product please visit http://yourhome.honeywell.com
or call Honeywell Customer Care toll-free at 1-800-468-1502.
Read and save these instructions.
®U.S.RegisteredTrademark.Patentspending.Copyright©2009HoneywellInternationalInc.Allrightsreserved.
?
TrueSTEAMHumidicationSystem69-2285EF—01
GETTING
STARTED
MOUNTING PLUMBING WIRING APPENDICES
OPERATION
AND SERVICE
1
GETTING STARTED
Safety Definitions and Precautions . . . . . . . . . . . . . . 2
Setting Homeowner Expectations ............... 3
Important Installation Requirements . . . . . . . . . . . . . 4
MOUNTING
Choosing a Mounting Method . . . . . . . . . . . . . . . . . . 5
Duct Mounting .............................. 6
STEP ONE: Select a Mounting Location . . . . . . . 6
STEP TWO: Connect the Duct Nozzle ......... 6
STEP THREE: Install Mounting Bracket
to the Duct ............................ 7
STEP FOUR: Install TrueSTEAM onto the
Mounting Bracket . . . . . . . . . . . . . . . . . . . . . . 7
PLUMBING
Choosing the Proper Water Filter . . . . . . . . . . . . . . . 8
STEP ONE: Test the Water Hardness . . . . . . . . . 8
STEP TWO: Interpret the Test Result .......... 9
Water Supply and Water Drain Connections ...... 10
STEP ONE: Connect the Cold Water Supply ... 10
STEP TWO: Tap into a Water Line ........... 10
STEP THREE: Connect TrueSTEAM to the
Water Pipe. . . . . . . . . . . . . . . . . . . . . . . . . . . 11
STEP FOUR: Connect the Water Drain ....... 11
WIRING
Before Wiring TrueSTEAM .................... 12
Using the DIP Switches . . . . . . . . . . . . . . . . . . . 12
STEP ONE: Remove the TrueSTEAM Cover ... 12
STEP TWO: Understand the DIP Switches . . . . 12
STEP THREE: Set the Automatic Flush
Cycle Timing . . . . . . . . . . . . . . . . . . . . . . . . . 13
WIRING, CONTINUED
Deciding on the Wiring Configuration . . . . . . . . . . . 14
STEP ONE: Make Power Monitoring Decision . . 14
STEP TWO: Make System Fan
Regulation Decision . . . . . . . . . . . . . . . . . . . 16
STEP THREE: Make Add-On Air
Proving Decision ...................... 18
Wiring the TrueSTEAM . . . . . . . . . . . . . . . . . . . . . . 19
Using the Terminals . . . . . . . . . . . . . . . . . . . . . . 19
Routing the Wires ........................ 19
Using the Correct Control Diagram ............. 20
OPERATION AND SERVICE
Startup and Checkout . . . . . . . . . . . . . . . . . . . . . . . 23
Routine Maintenance ........................ 24
Automatic Cleaning Cycle . . . . . . . . . . . . . . . . . 24
Manual Cleaning Cycle . . . . . . . . . . . . . . . . . . . 24
STEP ONE: Initiate a Flush Cycle . . . . . . . . . . . 24
STEP TWO: Remove the Water Tank ......... 26
STEP THREE: Clean the Tank .............. 27
STEP FOUR: Replace the Water
Level Sensor (if necessary) .............. 27
STEP FIVE: Reinstall the Tank .............. 28
Changing the Water Filter .................. 29
Troubleshooting ............................ 30
APPENDICES
A: Specifications . . . . . . . . . . . . . . . . . . . . . . . . . . . 34
B: Parts List ............................... 35
C: Remote Installation ....................... 36
D: Advanced Wiring ......................... 38
E: Advanced Draining . . . . . . . . . . . . . . . . . . . . . . . 41
F: Reverse Osmosis Filter .................... 42

 Loading...