MOUNTING
Before proceeding to Plumbing:
I selected a duct mounting location
I connected the duct nozzle
Iinstalledthemountingbrackettotheduct
IinstalledtheTrueSTEAMontothemountingbracket
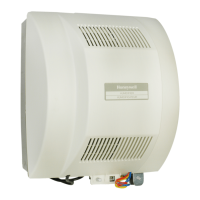
TrueSTEAMHumidicationSystem69-2285EF—01
7
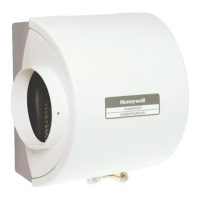
STEP THREE: Install Mounting Bracket to the Duct
Position the template on the supply duct:
Makesurethetemplateislevelandinthedesired•
positionontheduct.
EnsureproperclearancesfromA-coil.•
Makesuretheductnozzlewillhaveproper•
clearancesfromductwalls.
Minimum 4-inch clearance from nozzle outlet to •
anyductwall.
Minimum24inchesofdownstreamopenductair•
space.(Neededtopreventwatercondensation.)
Drillthe1-3/4inchhole.
Securethemountingbrackettotheduct,usingfour
self-drillingsheetmetalscrewsprovided.
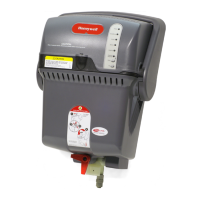
STEP FOUR: Install TrueSTEAM onto the Mounting Bracket
Makesurethefoamgasketispositionedcorrectly
overthenozzle.
LiftTrueSTEAMintoplaceagainstthemounting
bracket.Insertthenozzledirectlyintotheducthole.
Checkthefoamgasket–itmustformatightsealin
theducthole.
PushdowntosecureTrueSTEAMtothebracketarms.
2
3
1
3
2
1
4

 Loading...