Impact / Impact Pro / Impact Pro IR Operating Instructions
45
4�9�4 Enforcer Calibration
This is designed for oxygen, flammable (catalytic or IR LEL
sensor), carbon monoxide and hydrogen sulfide, using a
special-to-type gas cylinder. It offers quick, simple and safe
operation by any user, due to the use of a patented low
pressure, low flow rate system.
Note that the Enforcer cylinder contains dangerous
gases.
Performing a Calibration Check with Enforcer
To perform a calibration check of your Impact unit using the Enforcer, power the unit
on and place it into the Enforcer and follow the on-screen instructions (see Section
4.9.4.1 Enforcer On-Screen Instructions). Then review the peak readings as shown
in Section 4.1.1 Peak Screen.
Performing a Bump Test with Enforcer
To perform a bump test of your Impact unit using the Enforcer, power the unit on then
place it into the Enforcer and follow the on-screen instructions (See Section 4.9.4.1
Enforcer On-Screen Instructions). A bump test is a check of basic functionality
(not a calibration check), so the Impact unit need not remain in the Enforcer for
the full ninety seconds; 30 seconds is usually sufficient. Remove the Impact and
check that all the fitted sensor channels are showing alarms, and that the visual
(red flashing lights) and audible alarms are active.
If there is any doubt about the bump test result, carry out a calibration check as
described above, or a full calibration as described below.
Performing full Calibration with Enforcer
Power up the instrument and perform a ‘hard zero’ (using the zero on the calibration
menu - see Section 4.9.2.1 Zero) then follow the steps in Section 4.9.4.1. If
the Enforcer calibration is successful, the unit will automatically update the next
calibration required by date by the predefined calibration interval value (default
180 days).
Note:
If the ’Hard Zero’ is omitted then the calibration is retained only for the
current session and the calibration date will not be updated.
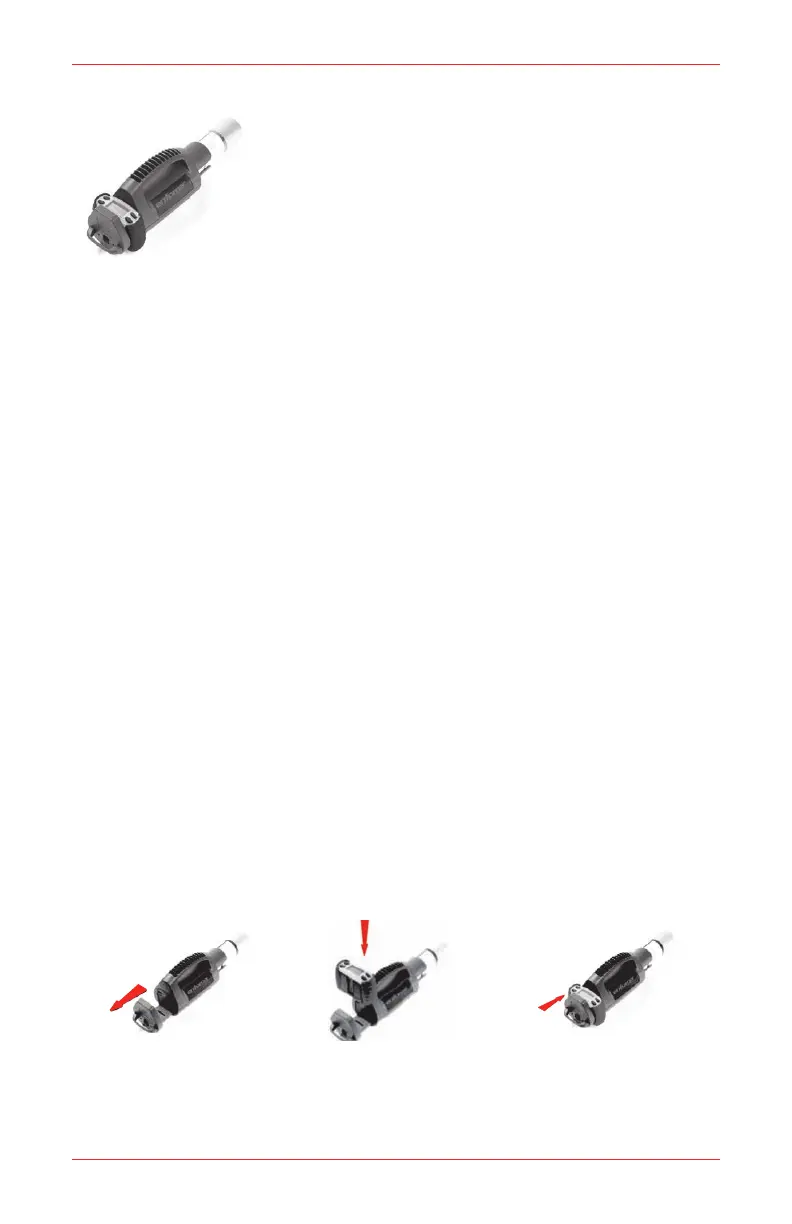
4.9.4.1 Enforcer On-Screen Instructions
If it is not already fitted, screw the Honeywell Analytics cylinder in tightly 1.
(multi-gas mix for Enforcer), check that the pressure gauge shows gas
pressure is present, and pull back the instrument drawer.
Insert the instrument, by tilting at a slight angle, so that the instrument 3.
front cover locks under the cover lip in the Enforcer as indicated.
Then return the instrument to the vertical. The rear locking mechanism 4.
of the Enforcer will retain the instrument. Now close the drawer firmly.
 Loading...