15
Installing Push Arm
Tension the closing spring (Fig.17) to EN4
Remove screws (B) and cleat (A) from arm assembly
Secure cleat to door leaf according to dimensions in Fig. 11
Insert washer (D) and screw (E) in spindle
Locate and secure arm (F) to spindle (C) with screws (G)
Close door
Locate spindle (C) on output shaft so that arm is perpendicular to
door and tighten screw (C)
Replace screws (B) loosely and re-attach cleat (A) to arm
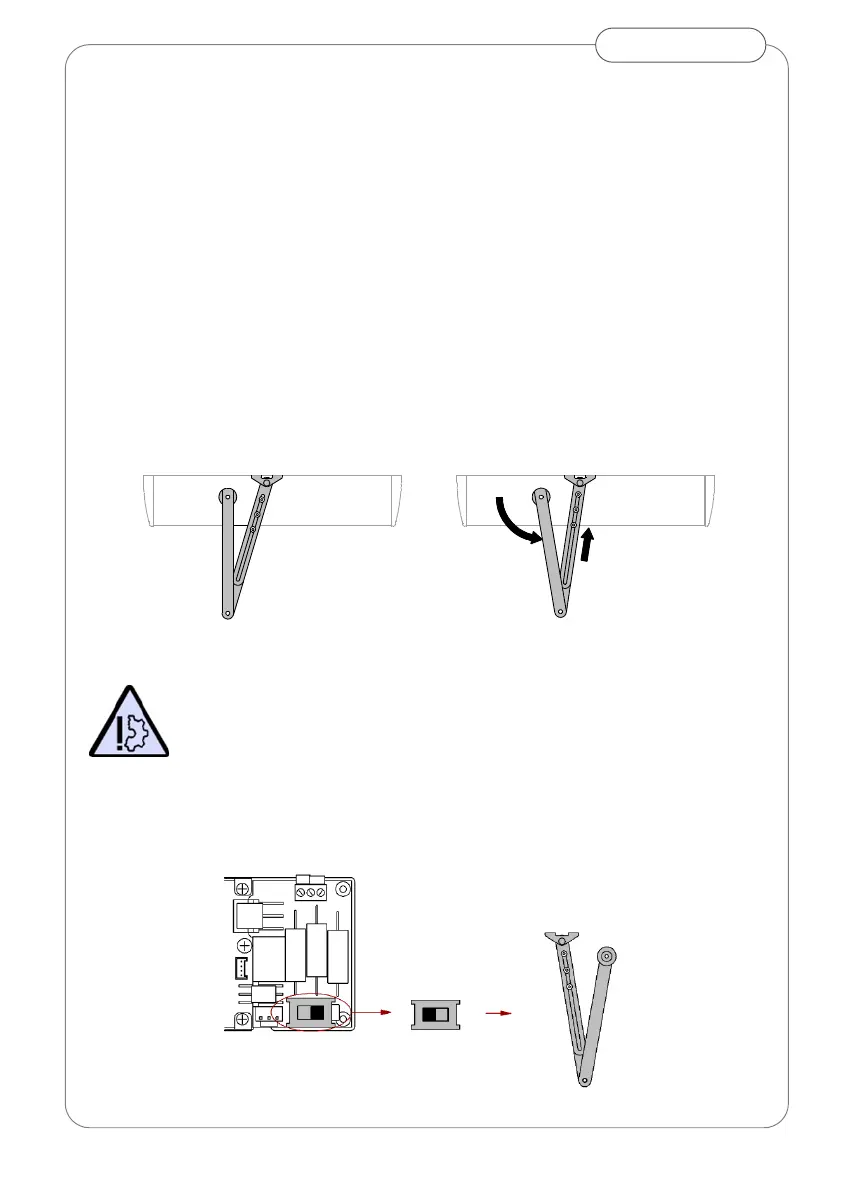
Keep door shut and rotate arm 5 to 15° to tension spring (Fig. 13).
Tighten screws (B)
Fig.13 Push arm pre-tensioning
Misalignment of operator in relation to door leaf will effect a
bending force upon the arm causing stress and damage the
operator.
Arm Type Selection
Set slide switch according to push arm position.
Fig.15 Arm type selector switch