3-122
Performance Tests
STM-1/STM-4 Optical Interface (Options 130, 131)
f. Using , and keys, set the REF to 0.000dBm.
g. Press key to display CAL.
h. Using , and keys, set the CAL to 0.000dBm.
i. Cover the end of the Power Meter Optical Input connector with a protective cap.
j. Press the key on the Power Meter to calibrate - the Power Meter is now
ready.
43. Switch on the HP 37717C and check that immediately on power-up the Optical
Module LASER ON led illuminates for a few seconds.
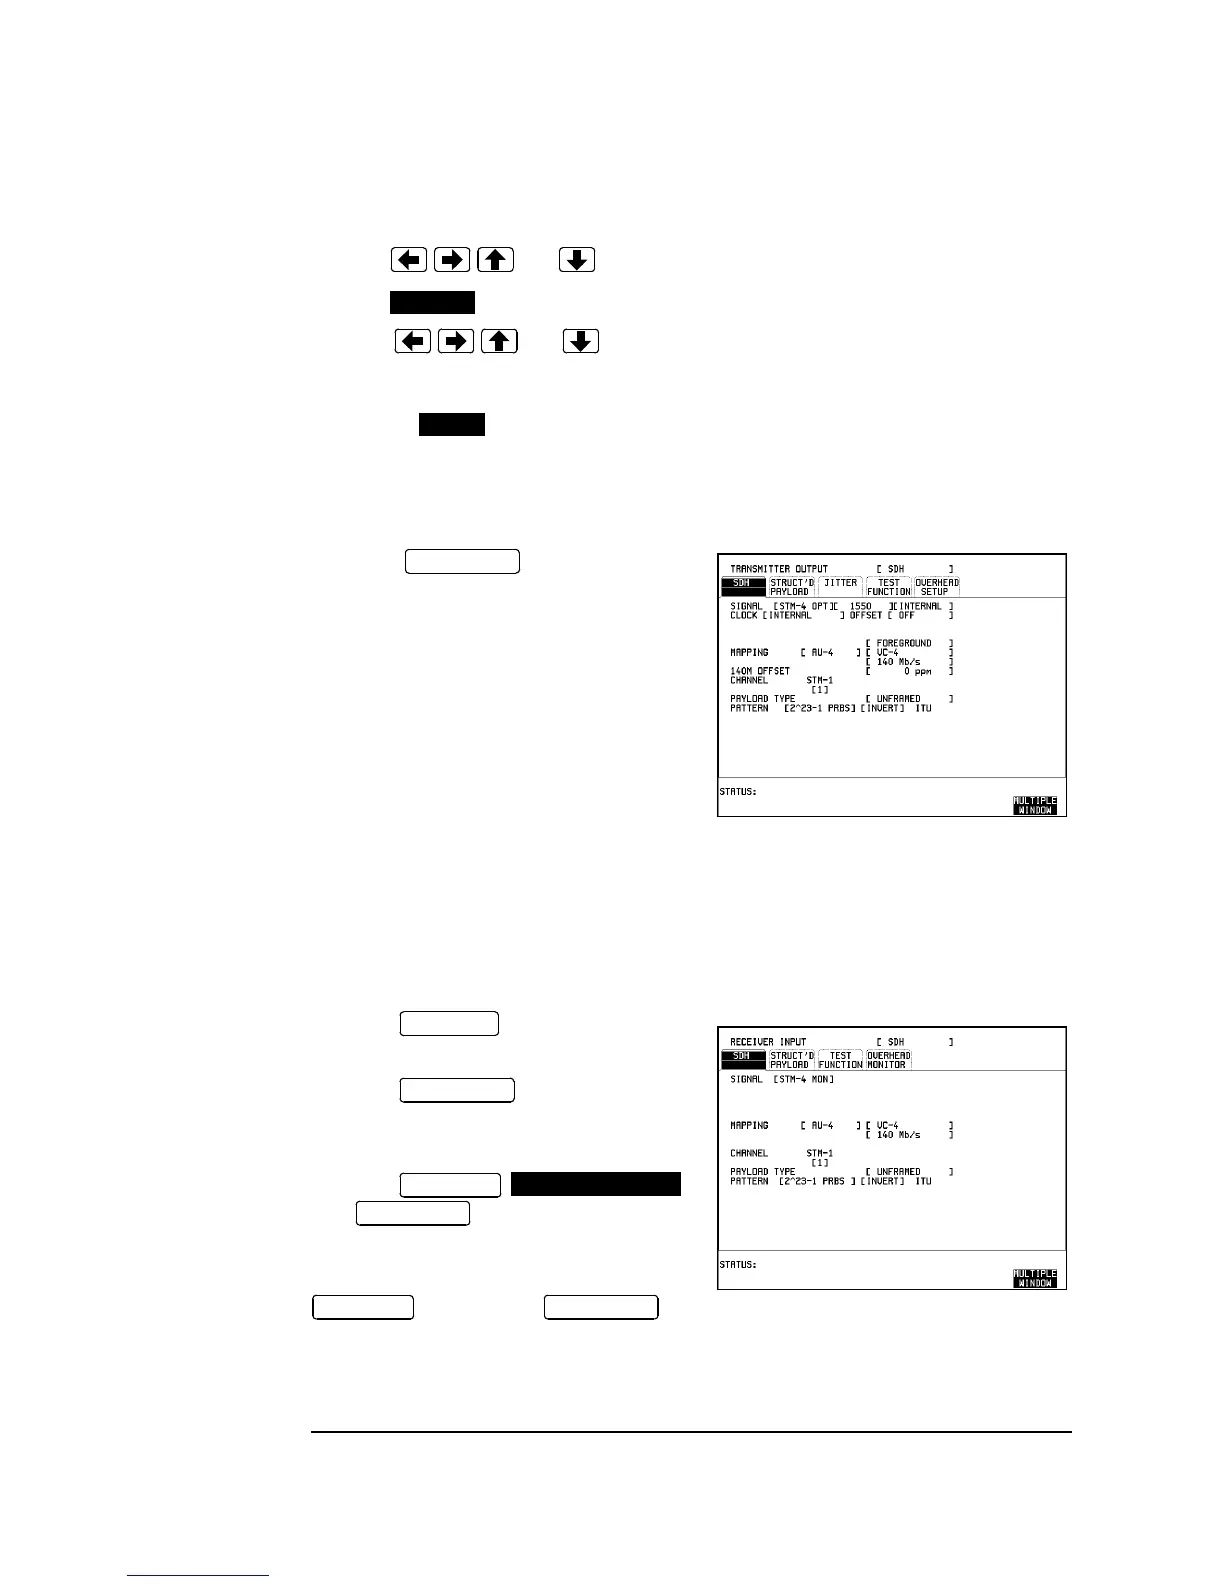
44. Press on the HP 37717C
and set up the display as shown opposite.
45. Verify that the Optical Module LASER
ON led is lit indicating that the laser is
enabled.
46. Adjust the level to obtain a reading of
-8dBm ±1dB on the Power Meter.
Typically around 7dB of attenuation will be
required to achieve this reading.
47. Recall the HP 37717C DEFAULT SETTINGS as shown on 3-2.
48. Verify that the Optical Module LASER ON led is NOT lit indicating that the laser
is disabled before continuing.
49. Disconnect the optical cable from the Power Meter and connect to the HP 37717C
Optical IN Port.
50. Press on the HP 37717C
and set up the display as shown opposite.
51. Press on the HP 37717C
and select SIGNAL [STM-4 OPT] [1550
nm].
52. Press
then to start the measurement.
53. After 5 minutes, check that NO
TROUBLE is displayed on the HP 37717C
display.Press to
stop the measurement.
PARAM
ZERO
TRANSMIT
RECEIVE
TRANSMIT
RESULTS
TROUBLE SCAN
RUN/STOP
RESULTS
RUN/STOP

 Loading...