Warning Due to the weight of the router, the assistance of another person
will help when mounting the router in the next step. You can
minimize the weight of the router by removing the power supply
(plus any interface cards or a second power supply that may
already be installed).
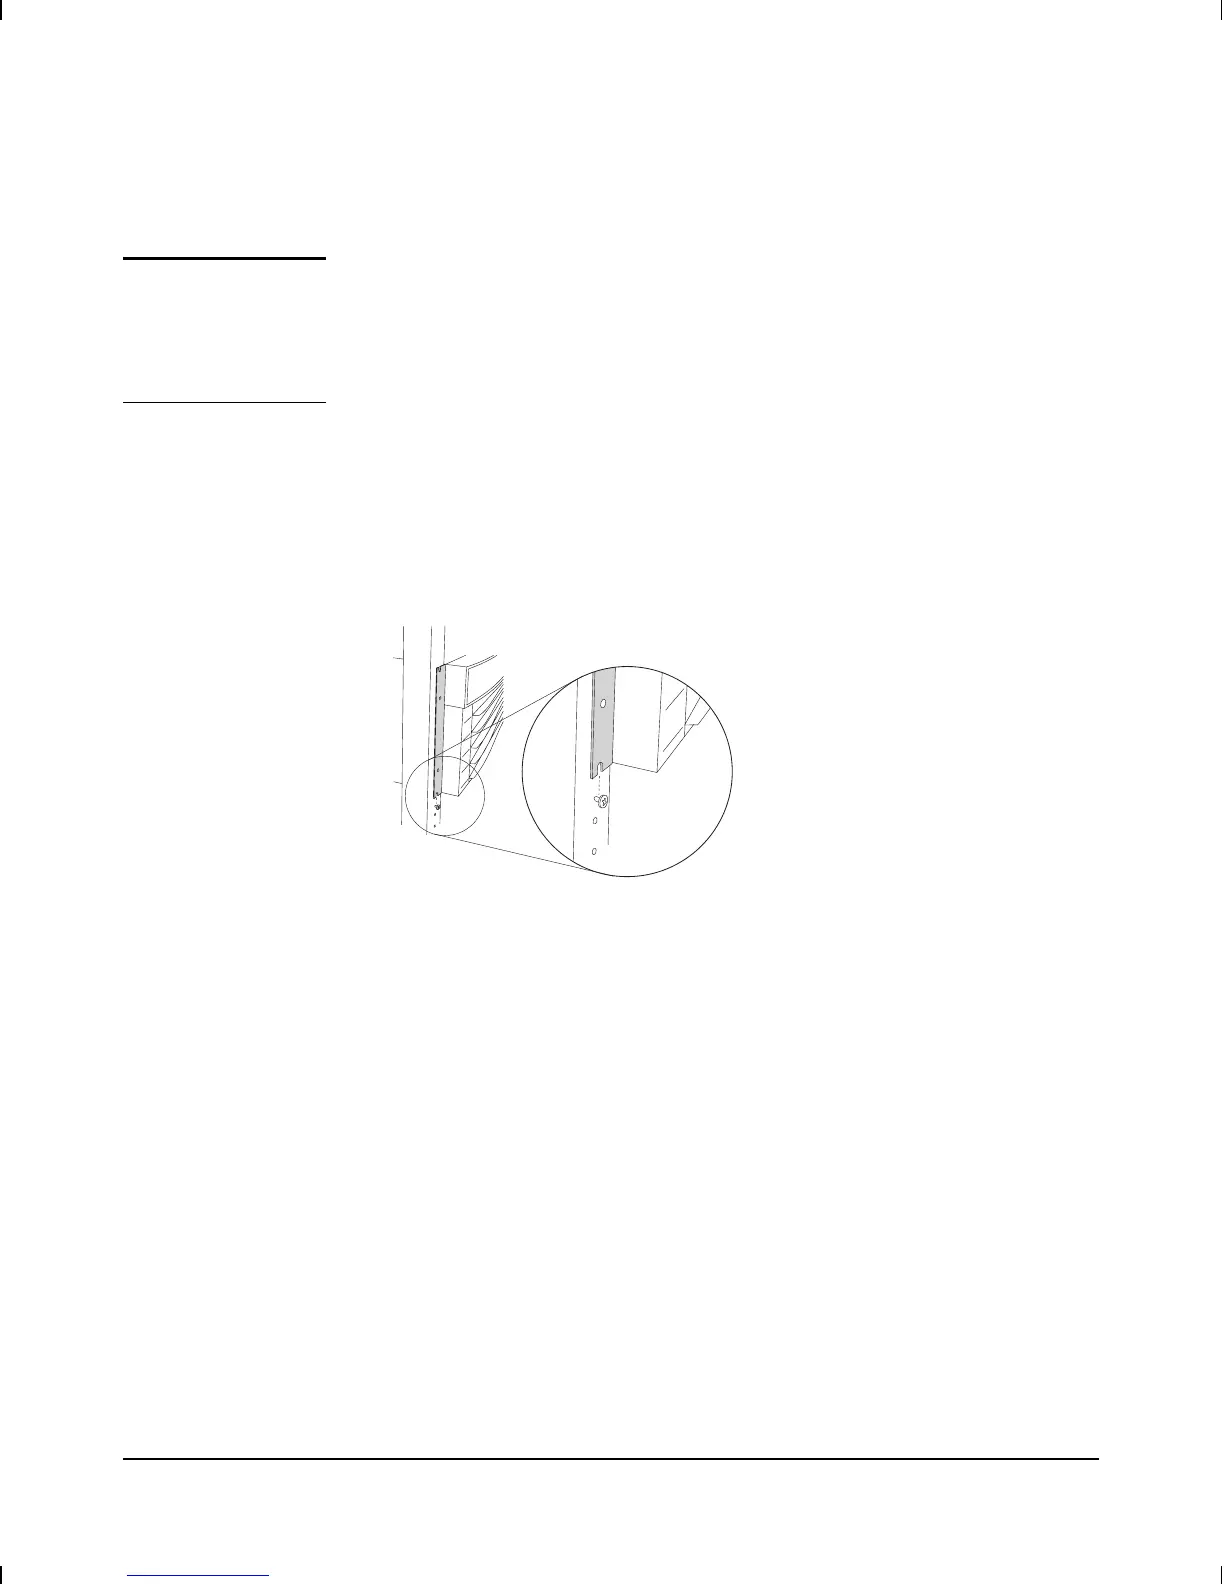
7. Lift the router to the rack or cabinet, and rest the slots at the bottoms
of the brackets over the screws protruding from the upright of the
rack or cabinet. Each bracket should be positioned on the front of
the upright. (See figure 1-4.)
8.
On each side, insert another
5
⁄
8
-in. screw through the upper of the
two closed holes in the bracket, and finger-tighten it into the upright.
9. On each side, move the screw from the slot at the bottom of the
bracket to the lower of the two closed holes in the bracket.
10. Using a Phillips (cross-head) screwdriver, tighten the two screws on
each side.
Table Mounting
Attach the self-adhesive rubber feet to the bottom of the router. Set the
router on a table near the power source.
Figure 1-4. Mounting the Router
Installation
Mount the router.
1-8