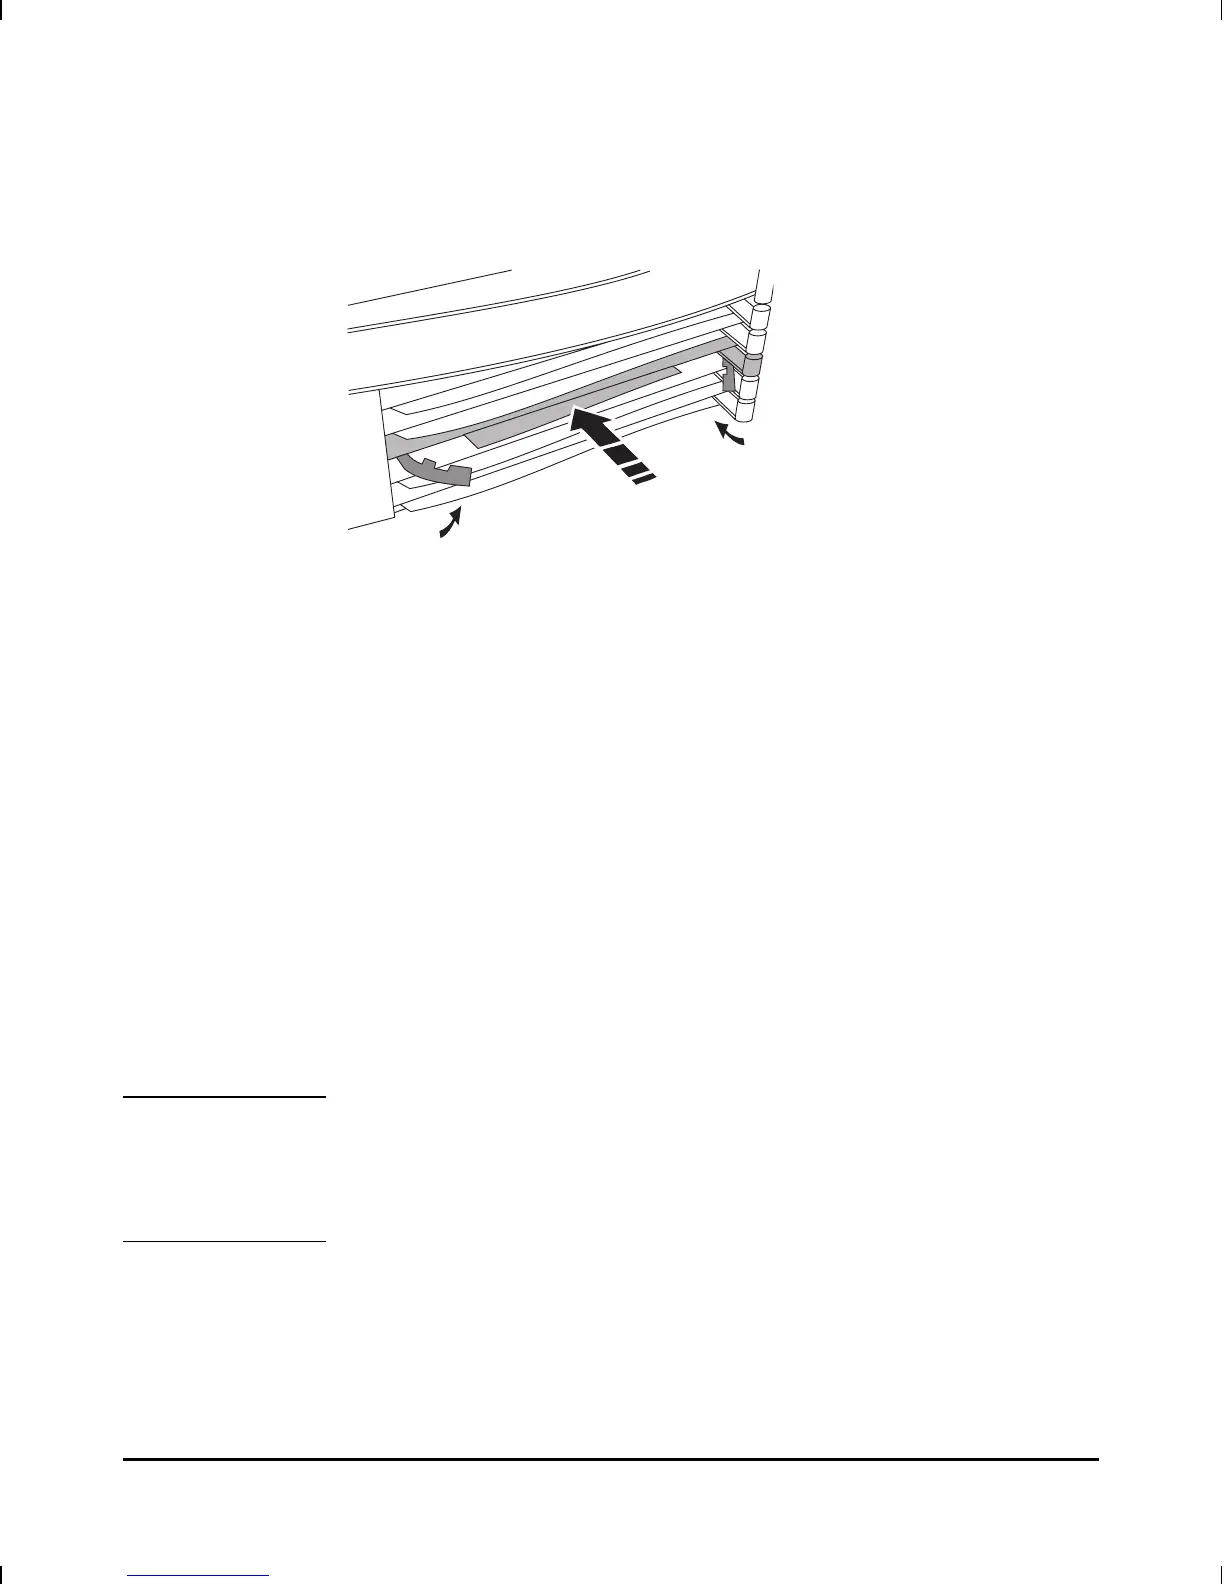
9. Push the two locks evenly to close them, pressing downward slightly
to secure them in place.
10. Check that the Card LED has turned green and the Self-test LED has
turned off.
• If these LEDs continue flashing, the card is not seated properly.
Adjust the position of the card by pushing evenly on both ends,
and ajust the positions of the lock evenly.
• If the Card LED remains orange and the Self-test LED remains on,
the card has failed the self-test. Refer to “Interface Card Self-Test
Failure During Hot Swap” in table 3-2, “LED Error Patterns
During Router Operation”.
11. Reconnect the cables that you disconnected in step 1.
Note If you are replacing an interface card with a different type of interface
card (for example, if you are replacing an Ethernet/802.3 card with a
token ring card), be sure to replace the LED label strip as described in
the next four steps. If you are replacing an interface card with another
card of the same type, you can skip these steps.
12. Open the front door of the router by pulling its lock—the round post
at the upper right—to the right. (See figure 3-8.)
Figure 3-5. Installing Interface Card
Troubleshooting
Replacing a Module
3-24