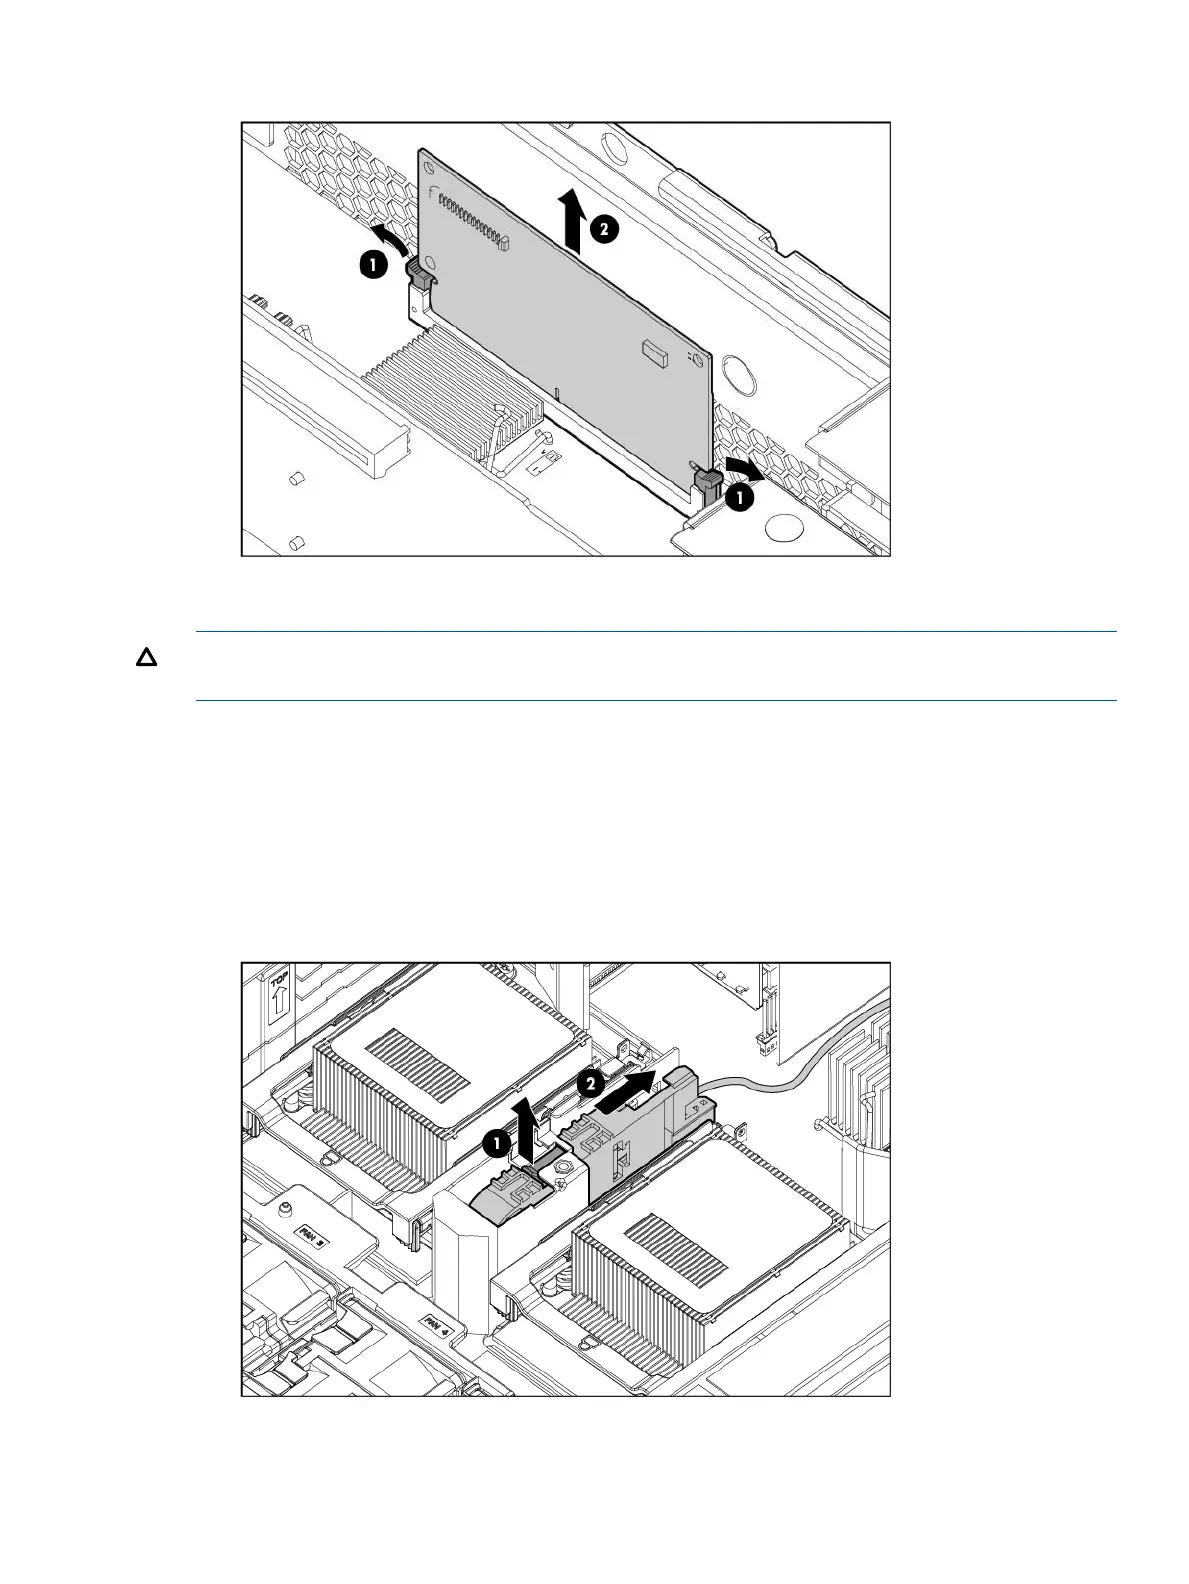
6. Remove the cache module.
To replace the component, reverse the removal procedure.
CAUTION: To prevent damage to the cache module during installation, be sure the cache module
is fully inserted before pressing down.
Removing and replacing the super capacitor pack
1. Power off the server (“Powering off the server” (page 94)).
2. Extend or remove the server from the rack (“Removing the server from the rack” (page 95))
or “Extending the server from the rack” (page 93)).
3. Remove the access panel (“Removing and replacing the access panel” (page 99)).
4. Remove the PCI riser cage (“Removing and replacing the PCI riser cage” (page 104)).
5. Pull up the latch and push the super capacitor pack to the rear of the server.
6. Disconnect the super capacitor pack cable from the board and system board clips.
Removing and replacing the super capacitor pack 107
 Loading...