EasyManuals Logo

HP Carrier-Grade rx2800 i2 Server DC User Manual

HP Carrier-Grade rx2800 i2 Server DC
149 pages
To Next Page IconTo Next Page
To Previous Page IconTo Previous Page
Page #43 background imageLoading...
Page #43 background image
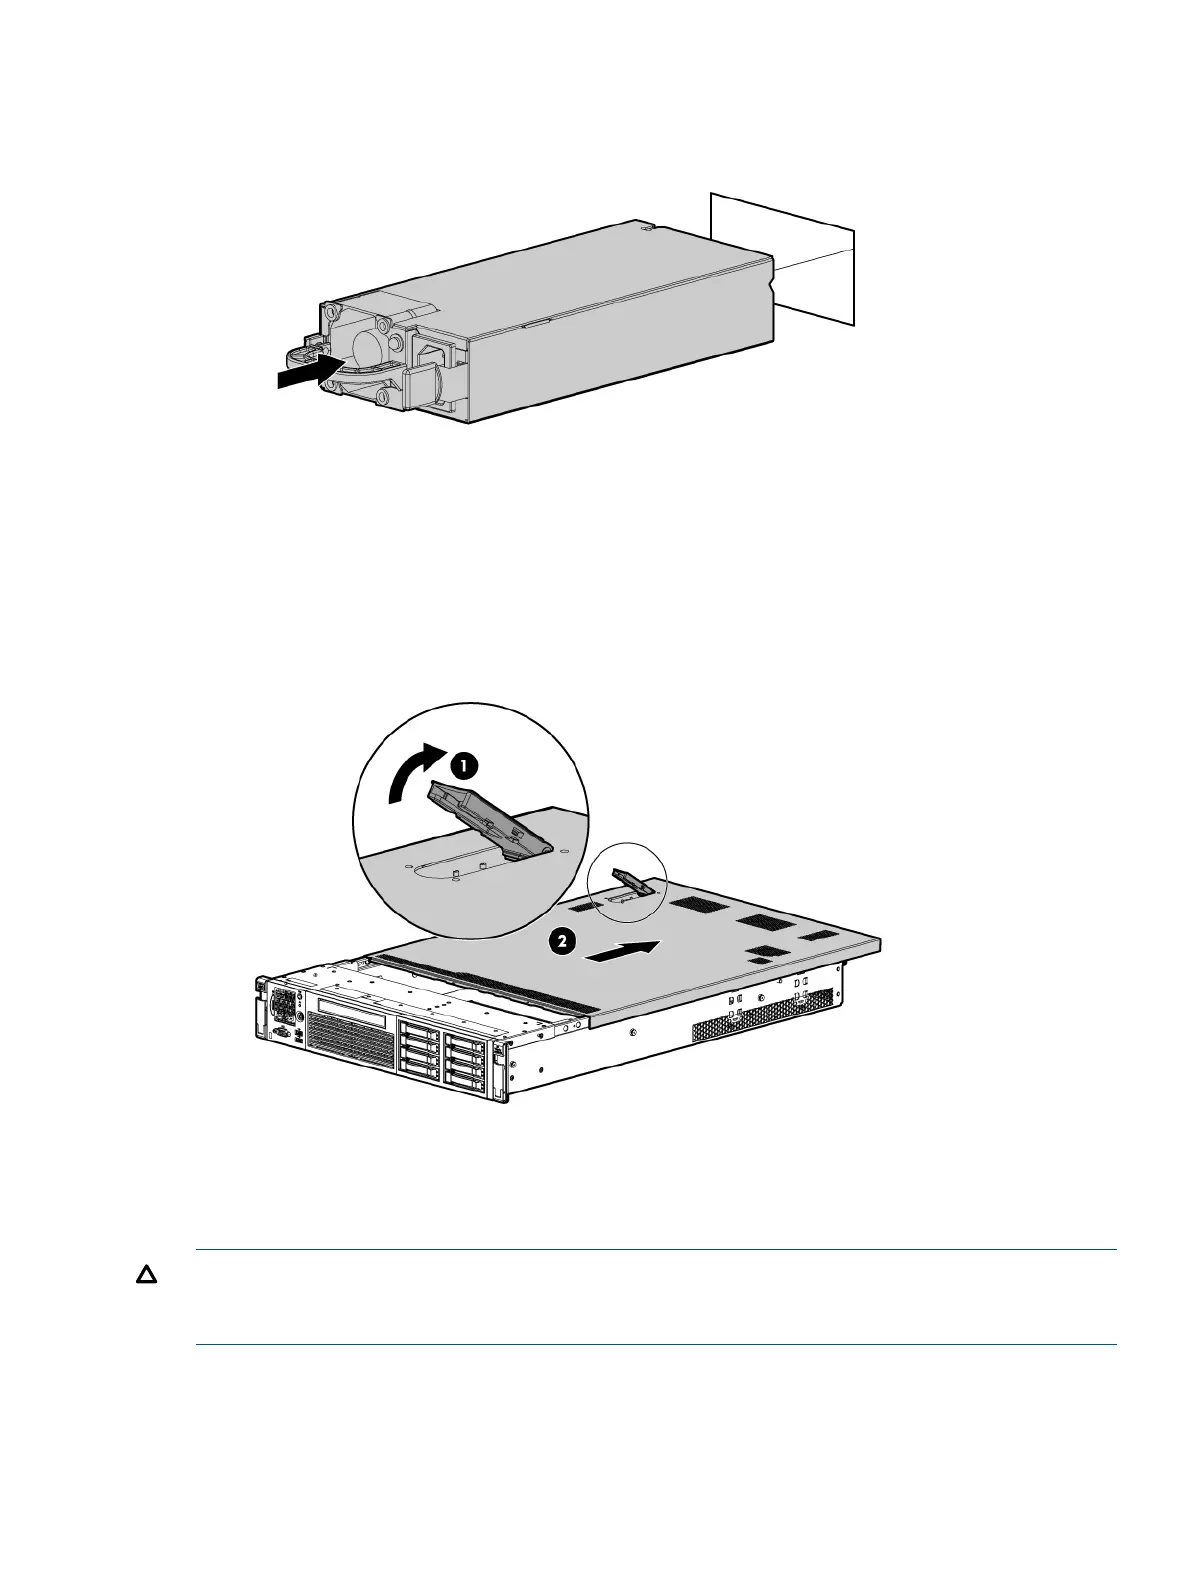
2. Install the power supply.
Removing the access panel
1. Use the T-15 Torx screwdriver attached to the rear of the server to loosen the security screw
on the hood latch.
2. Lift the hood latch handle, and then remove the access panel.
To replace the component, reverse the removal procedure.
Removing the PCI riser cage
CAUTION: For proper cooling, do not operate the server without the access panel, baffles,
expansion slot covers, or blanks installed. If the server supports hot-pluggable components, minimize
the amount of time the access panel is open.
1. Disconnect any cables connected to optional I/O cards before removing cage.
Removing the access panel 43

Table of Contents

Questions and Answers:

Question and Answer IconNeed help?

Do you have a question about the HP Carrier-Grade rx2800 i2 Server DC and is the answer not in the manual?

HP Carrier-Grade rx2800 i2 Server DC Specifications

General IconGeneral
Form Factor2U Rack
Product TypeCarrier-grade server
Memory TypeDDR3
Hard Drive InterfaceSAS
StorageUp to 8x 2.5-inch SAS HDDs/SSDs
Power SupplyRedundant Power Supplies
Operating SystemHP-UX
Operating System SupportHP-UX
ProcessorIntel Itanium Processor 9300 series
MemoryUp to 384 GB (24 DIMM slots)

Related product manuals