Access policy Shows and/or selects the access policy for the logical drive. The possible
settings are Read/Write, Read Only, or Blocked.
Drive cache Drive cache setting - Can be set to Unchanged, Enable, or Disable.
Disable background initialization Background initialization status:
No - Default leaves the background initialization enabled. This option
means that a new configuration can be initialized in the background while
you use the app to do other configuration tasks.
Yes - Disables background initialization for configurations on this
controller.
Default initialization Logical drive initialization setting. Possible options are:
No - Do not initialize the logical drive.
Fast - Initializes the first 100 MB on the logical drive.
Full - Initializes the entire logical drive.
Emulation type Specifies the emulation type policy for the logical drive. Possible options are
Default, Disable, and Force.
OptionOption DescriptionDescription
4. Click Save Configuration.
5. Review and address any warning messages, as needed.
6. Click Confirm and Yes to proceed.
SubtopicsSubtopics
Selecting drives to include in a logical driveSelecting drives to include in a logical drive
Selecting drives to include in a logical driveSelecting drives to include in a logical drive
About this taskAbout this task
Use the steps in this topic to select the unconfigured drives that you want to include in the logical drive.
ProcedureProcedure
1. In the Select Drives screen, specify the type of drive by selecting an option from the Select Media Type drop-down menu.
Options include SSD, HDD, or Both.
2. Select the interface type from the Select Interface Type drop-down menu.
Options include SAS, SATA, NVMe or All.
3. Specify the sector size from the Logical Sector Size drop-down menu.
Options include 512 B, 4 KB, or Both.
The unconfigured drives that match the criteria you specified are listed.
4. Select one of more unconfigured drives.
5. Click Apply Changes.
The Success screen appears to confirm that the selection was performed successfully.
6. Click OK.
The Create Logical Drive screen appears.
Creating a profile-based logical driveCreating a profile-based logical drive
About this taskAbout this task
WARNING:WARNING: Creating a logical drive will permanently delete any data on an associated drive.
ProcedureProcedure
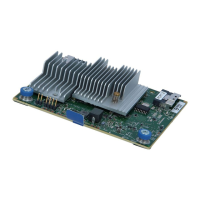
1. From the System Utilities screen, select System Configuration > HPE MRXXX Gen11 > Main Menu > Configuration Management > Create Profile Based Logical
Drive.
 Loading...