- 26 -
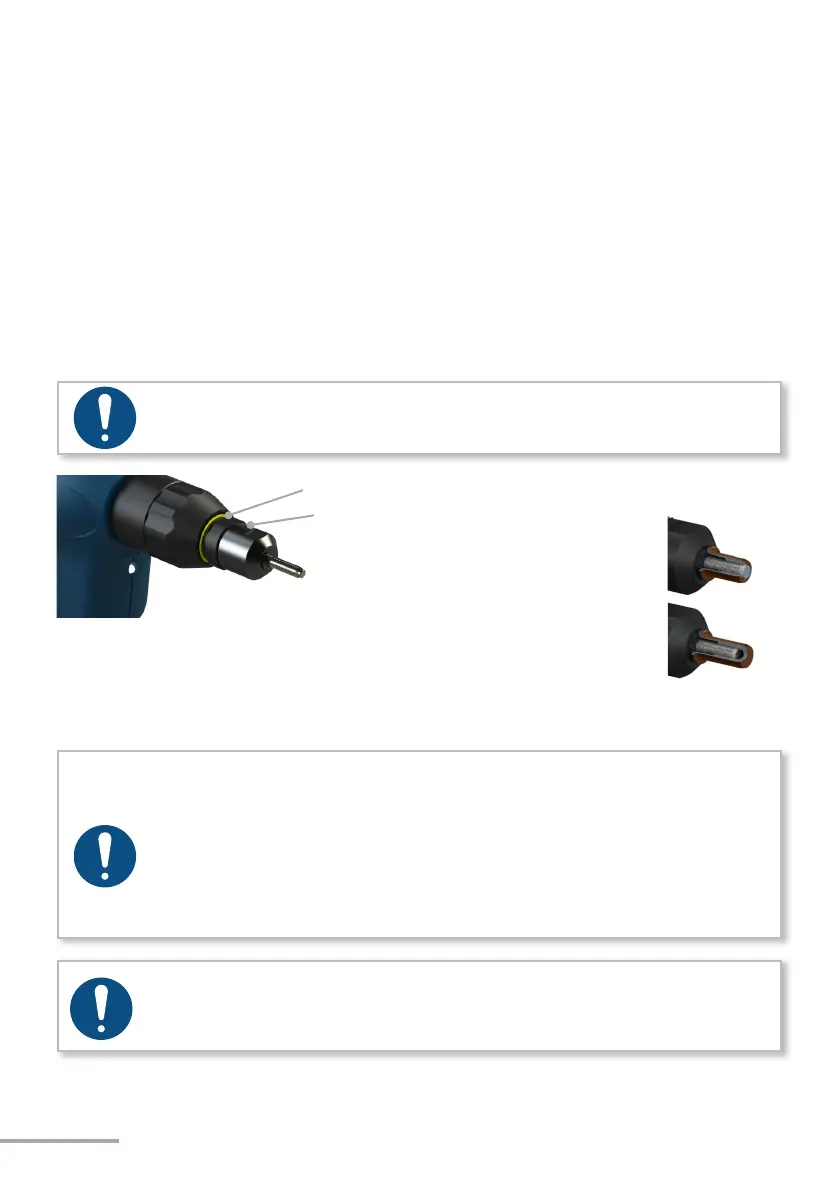
The nose piece must be adjusted to the blind rivet nuts to be processed.
Screw open blind rivet nuts by hand so that 1 - 2 threads sck out of the nut, see Figure
1. Lock the nose piece in this posion using the lock nut. With automac spinning on the
threaded mandrel should now be ush with the blind rivet nut.
With closed blind rivet nuts screw the nuts by hand as far as they will go, see Figure 2, and
then lock the nose piece using the lock nut. With automac spinning on the nut should
now be opmally spun on.
NOTE
These figures are intended as a guide and must proved in tests with the nuts used!
NOTE
Always place the riveting tool at a right angle (90°) to the work surface to be
riveted. An oblique placement leads to faulty riveting. Use only appropriate
threaded mandrels (sleeves) and nose pieces for the rivet nut. An incorrect
threaded mandrel (sleeve) and nose piece can lead to damage of the threaded
mandrel (sleeve), tool, screw thread and components. You can find the size of
the blind rivet nut in the rivet manufacturer’s information.
NOTE
Before using the tool for the first time it must be programmed, see chapter
4.4 on page 37.
Locking using lock nut
Addional fastening with screw
Fig. 1
Fig. 2
 Loading...