EasyManua.ls Logo

Huawei EMU - Figure 4-6 Pushing the Expansion Tubes into the Installation Holes; Figure 4-7 Fastening the Tapping Screws

Huawei EMU
70 pages
Print Icon
To Next Page IconTo Next Page
To Previous Page IconTo Previous Page
Loading...
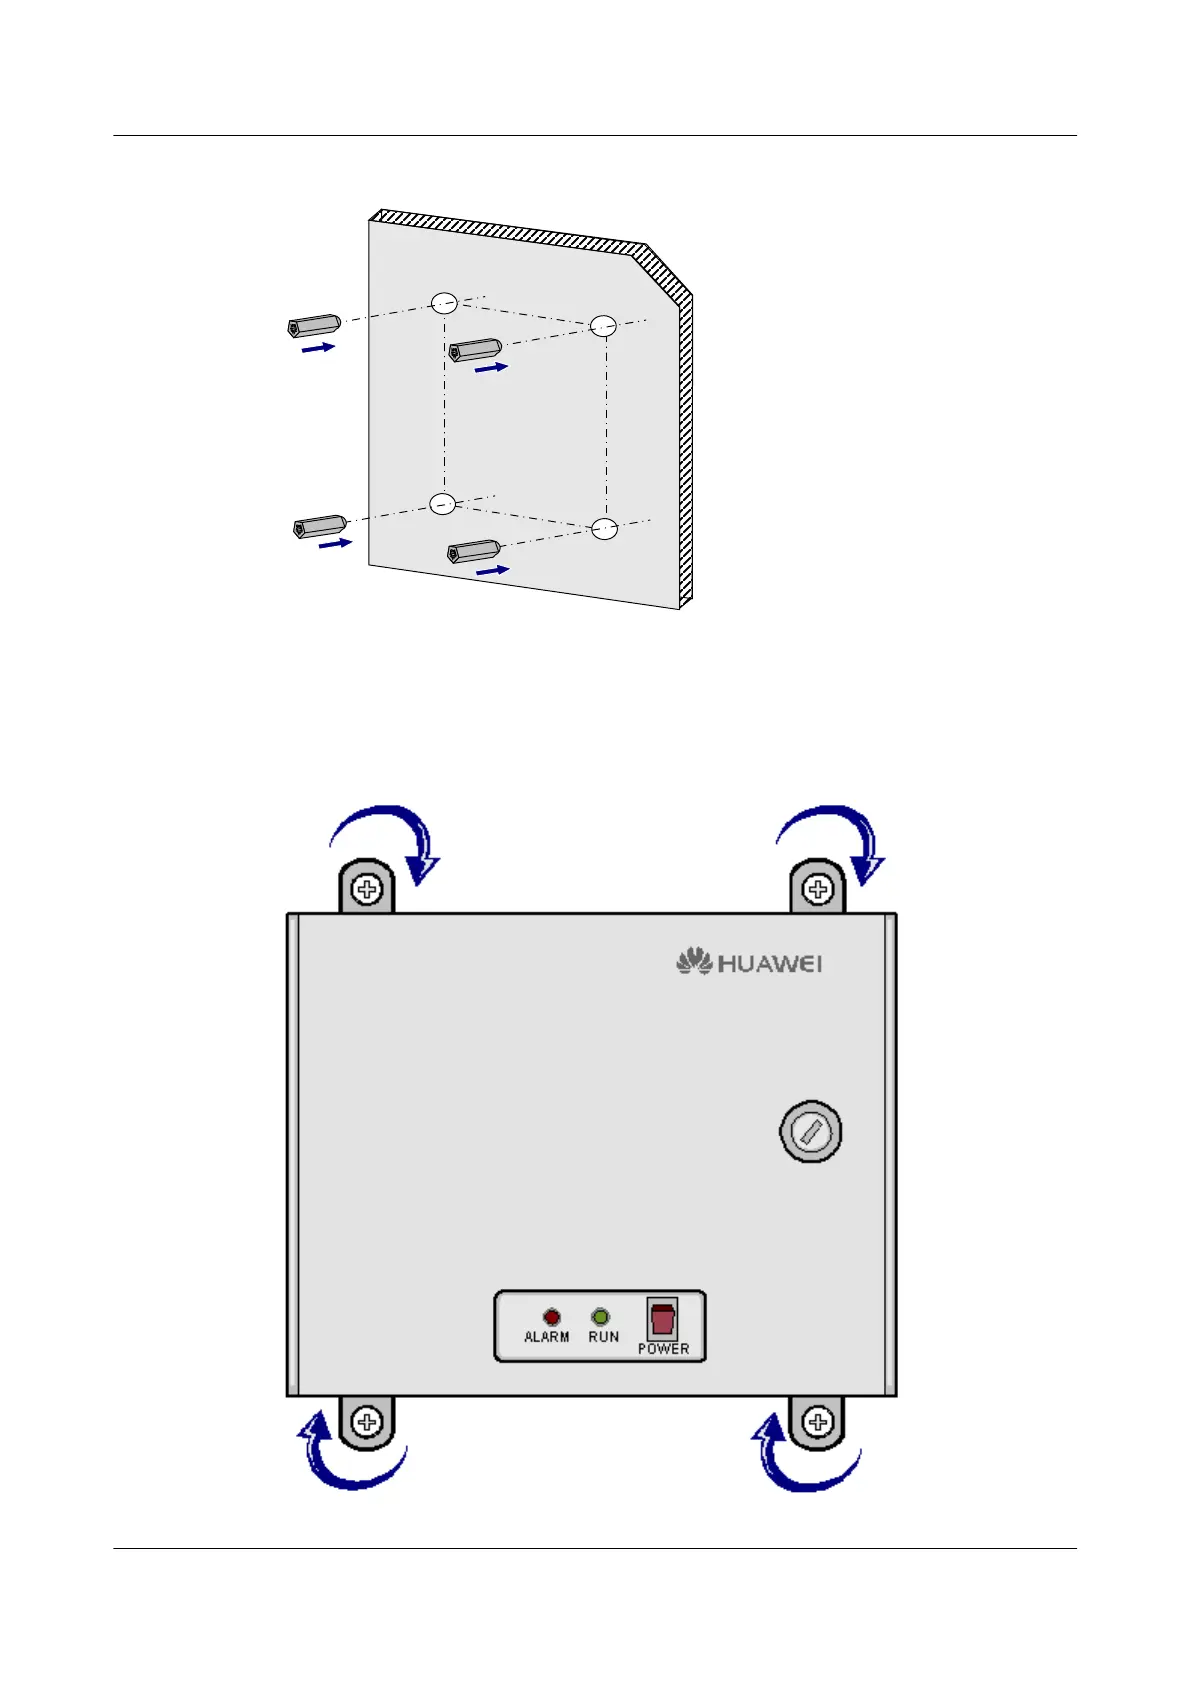
Figure 4-6 Pushing the expansion tubes into the installation holes
Step 4 Use the four delivered ST3.5 tapping screws to fix the EMU, as shown in Figure 4-7.
Figure 4-7 Fastening the tapping screws
EMU
User Guide 4 Installing the EMU
Issue 13 (2009-12-30) Huawei Proprietary and Confidential
Copyright © Huawei Technologies Co., Ltd.
4-7

Table of Contents

Related product manuals