Huawei Proprietary and Confidential
Copyright © Huawei Technologies Co., Ltd.
Step 3 Insert the exposed core wires into the crimp area of the OT terminal and crimp them using
hydraulic pliers.
Step 4 Wrap the wire crimp area with heat shrink tubing or PVC insulation tape.
If heat shrink tubing is used, put it through the power cable and then crimp the OT terminal.
Step 5 Remove the locking cap from the AC OUTPUT waterproof cable connector at the inverter
bottom and remove the plug from the locking cap.
Step 6 Route the AC output power cable into the locking cap and the AC OUTPUT connector at the
inverter bottom.
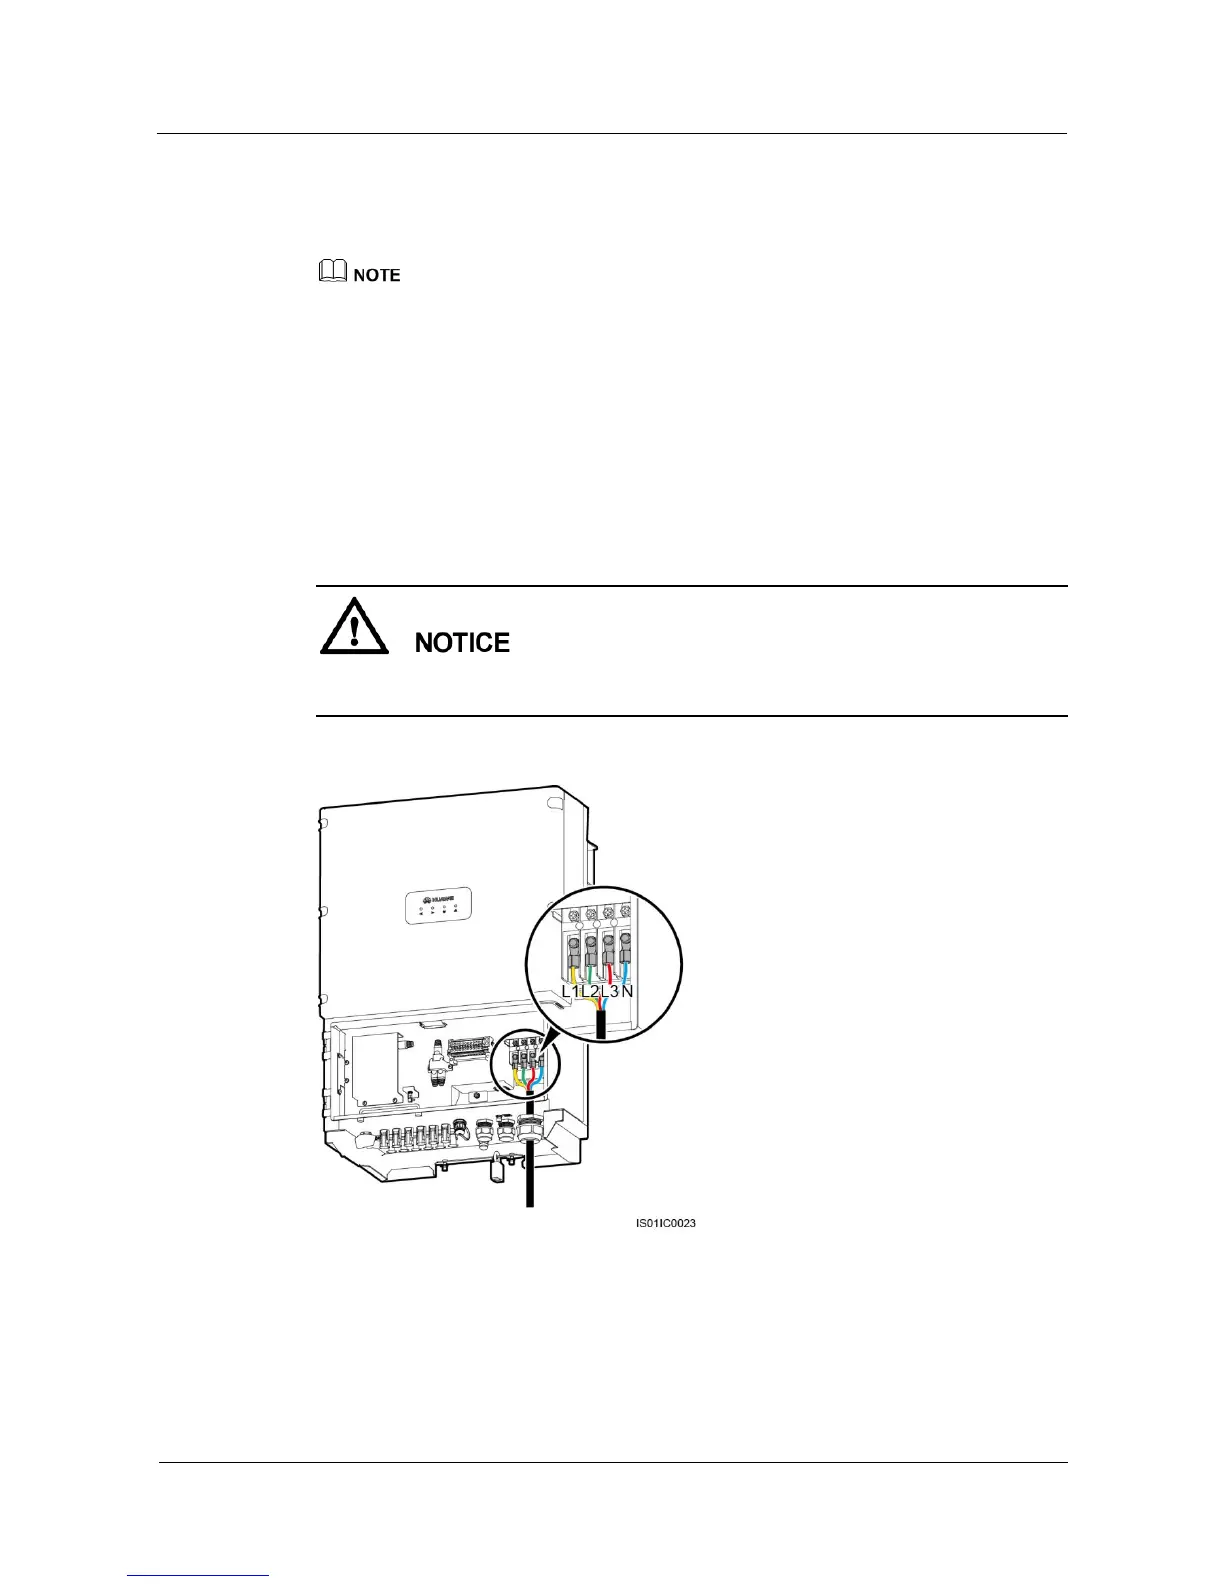
Step 7 Connect the wires of the AC output cable for the SUN2000-33KTL to L1, L2, L3, and N on
the AC terminal block, as shown in Figure 5-9. The required torque is 4 N·m. Connect the
wires of the AC output cable for the SUN2000-40KTL to L1, L2, and L3 on the AC terminal
block, as shown in Figure 5-10. The required torque is 8 N·m.
Ensure that the AC output power cable is securely connected. Otherwise, the inverter may fail
to run or the terminal block may be damaged after the device operates.
Figure 5-9 Connecting AC output cables for the SUN2000-33KTL