5
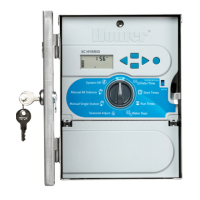
MOUNTING THE CONTROLLER TO THE WALL
1. Secure one screw into the wall. Install screw anchors if
attaching to drywall or masonry wall.
2. Slide the keyhole on top of the controller over the screw.
3. Secure the controller in place by installing screws in the
holes below the terminal strip.
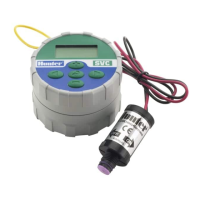
CONNECTING VALVES
NOTE: The XCH operates DC latching solenoids only (order
Hunter P/N: 458200). 24 VAC solenoids will NOT operate
with the XCH. DC solenoids can be easily identied by red
and black leads. The red lead is attached to the station
output, while the black lead is attached to the common wire.
1. Route valve wires between the control valve location and controller.
2. At valves, attach a common wire to the black solenoid wire on all
valves. Attach a separate control wire to the remaining red wire
of each valve. All wire connections should be done using
waterproof connectors.
3. Route the valve wires through the conduit. Attach the conduit
through the bottom right side of the controller.
4. Secure the valve common wire to the C (Common) screw on the
terminal strip. Attach each of the individual valve control wires
to the appropriate station terminals and tighten their screws.
Valve Common Wire (Black Leads)
Valve 1
Valve 2
Valve 3
Valve 4
Station Wires
(Red Leads)
WIRE SIZE
DISTANCE FROM VALVE TO
CONTROLLER
18 AWG (0.8 mm
2
) 550' (168 m)
16 AWG (1.3 mm) 870' (265 m)
14 AWG (2.1 mm) 1,380' (421 m)
12 AWG (3.3 mm) 2,200' (671 m)
 Loading...