INSTALLATION
4
Installation Overview
To install your shading, you will need to perform the following four steps:
STEP 1: Mount the Installation Brackets
STEP 2: Mount the Battery Wand (PowerView Gen 3)
STEP 3: Install the Shading
STEP 4: Connect the Power Source (PowerView Gen 3)
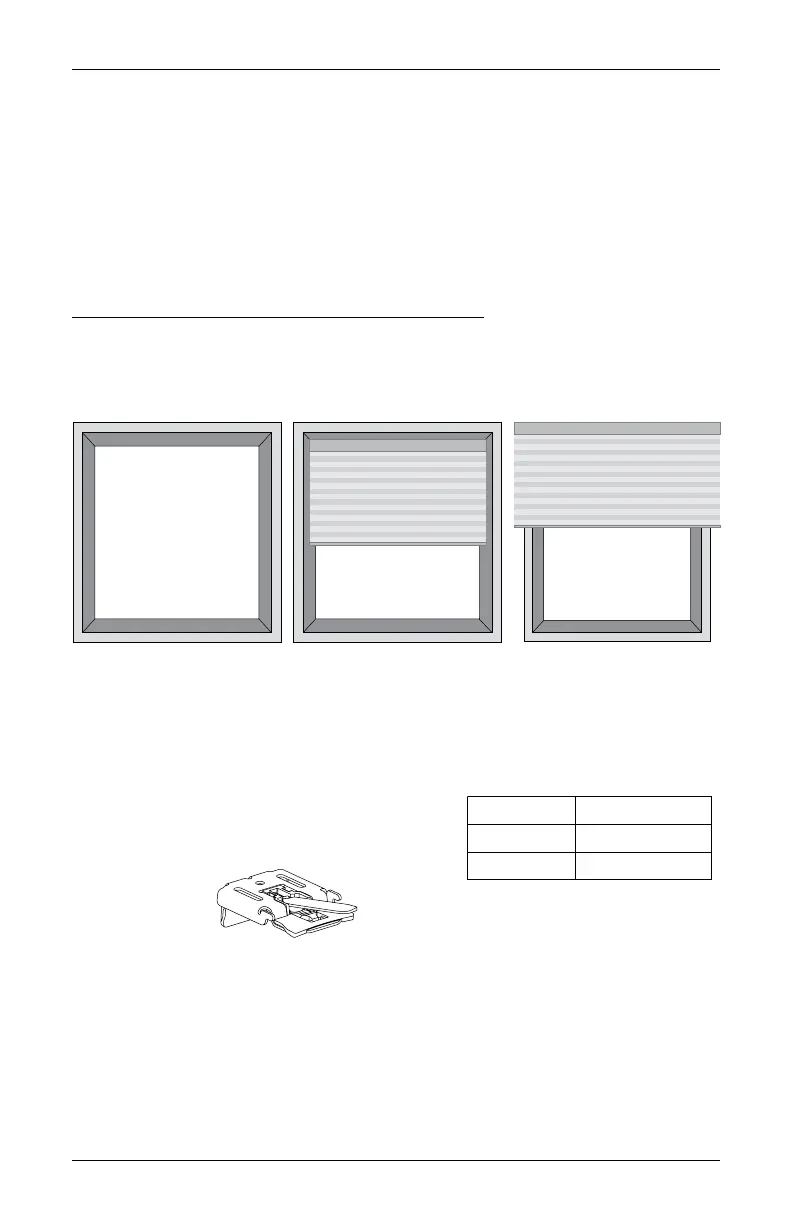
Mounting Types and Window Terminology
If the installation brackets are mounted correctly, the rest of the installation process follows
easily. To prepare for this important first step, review the mounting types and basic window
terminology illustrated below.
■
Refer to the appropriate page below based on your order:
➤
Inside Mount — Page 4
➤
Outside Mount — Page 4
STEP 1: Mount the Installation Brackets
■
The number of installation brackets required
varies with shading width, as shown in the table.
Outside Mount
Shading mounts
outside window
opening.
Inside Mount
Shading fits within
window opening.
Collectively, the sill and
jambs are called the
“window casement.”
Head Jamb
Sill
Jamb Jamb
Width Brackets Required
14" – 48" 2
48
1
⁄
8
" – 84" 3
Bracket