INSTALLATION
15
STEP 4: Connect the Power Source (PowerView
®
Gen 3)
If you have attached the battery wand in step 2, proceed to “Operate the Shading” on page 21.
■
Refer to the appropriate page based on your order.
➤
For an optional satellite battery pack, see 15.
➤
For an optional headrail-mounted rechargeable battery wand, see 16.
➤
For an optional satellite-mounted rechargeable battery wand, see 18.
➤
For an optional 18V DC Power Supply, see 20.
➤
For any other Hunter Douglas power options, see the instructions that came with
the unit.
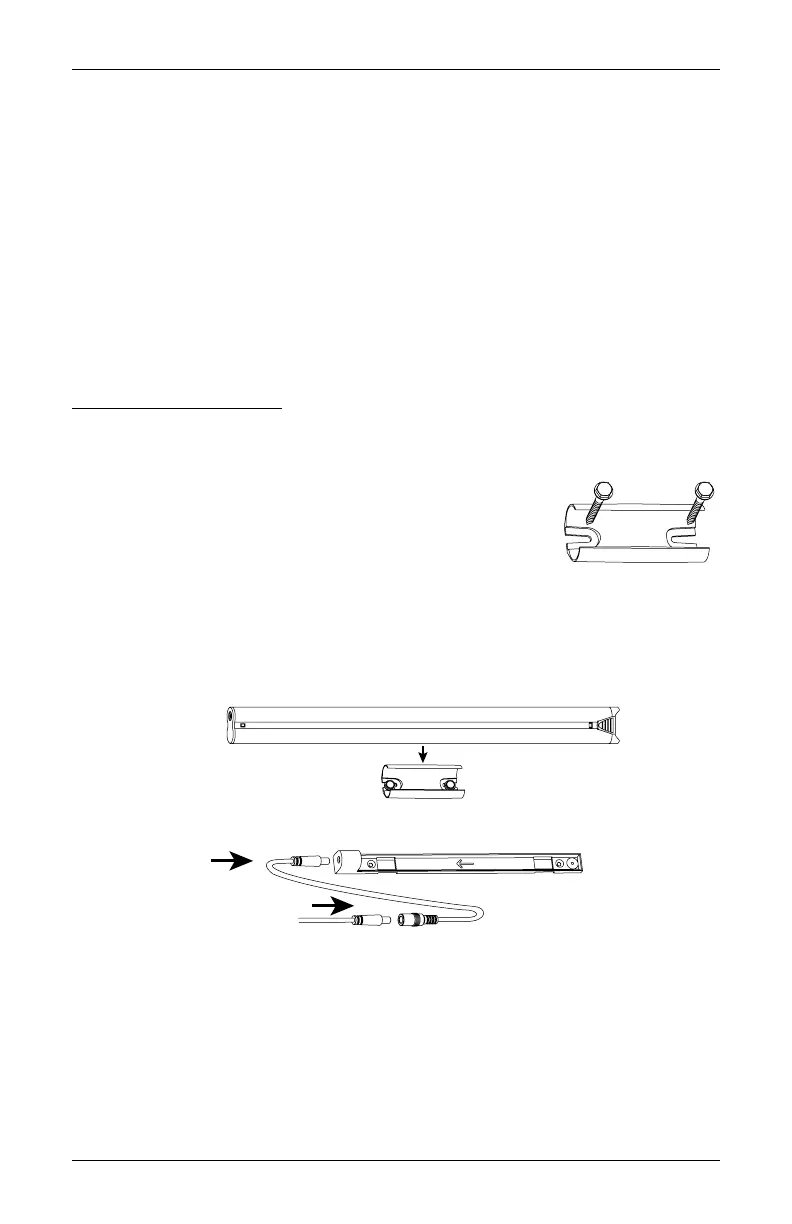
Satellite Battery Pack
Mount the Satellite Battery Pack
■
Decide where you want to attach the wall mount bracket for
the satellite battery pack. It may be installed in any orientation.
■
Mark the screw holes and drill them using a
3
⁄
32
" drill bit.
■
Remove the backing from the double-sided tape on the wall
mount bracket. Press the bracket into place.
■
Attach the brackets using the screws provided.
■
Position the battery wand so the power cable can easily be connected to the socket and
snap the wand into the bracket.
Battery Mount
Extension
Cable
(If Needed)
Power Cable
from Shading