INSTALLATION
5
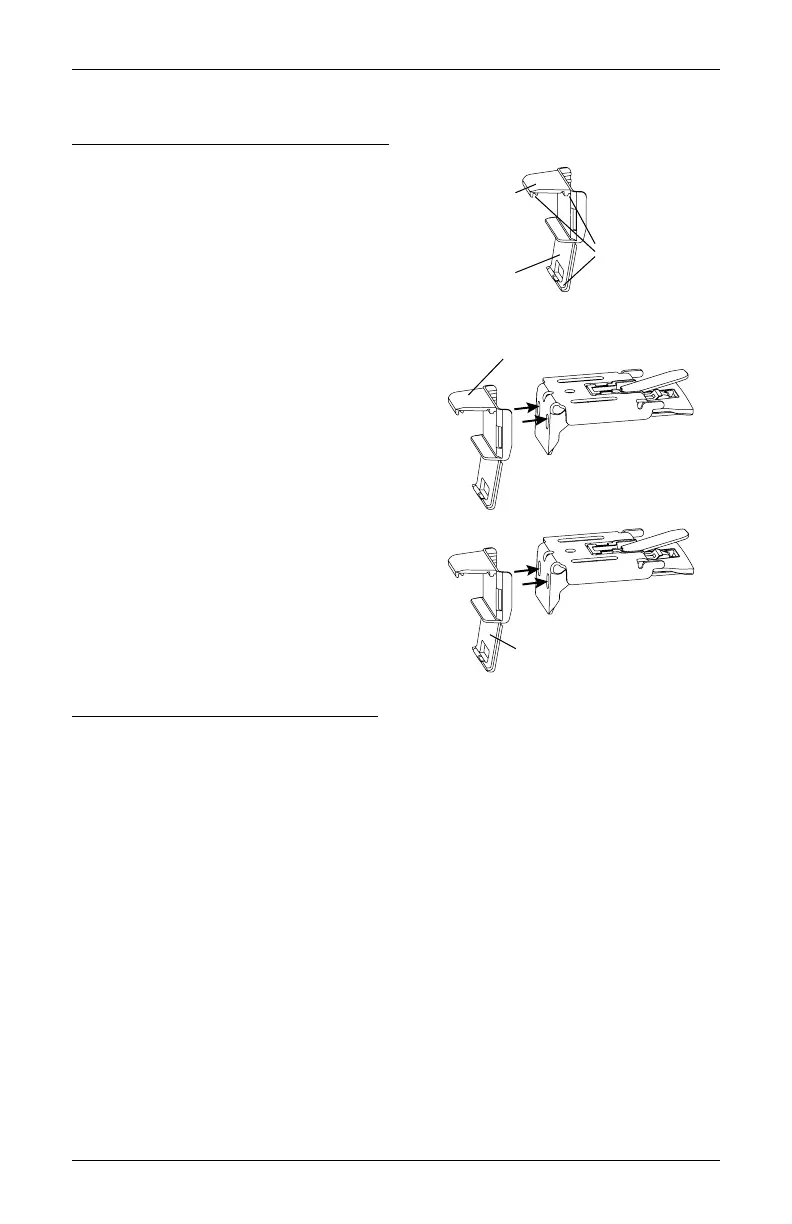
Mount the Installation Brackets — Inside Mount
Prepare the Installation Brackets
NOTE: Back cover bracket is not provided with
rechargeable battery wand.
■
If using the optional back cover:
NOTE: If you have a battery wand, do not
remove the top tab on the back cover bracket.
The top tab ensures that there is clearance for
the If you have a satellite battery pack or an 18V
DC Power Supply, remove the top tab on the
back cover bracket.
➤
Snap the back cover bracket into the metal
installation bracket.
■
If not using the optional back cover:
➤
If you have a battery wand, remove the
bottom tab from the back cover bracket.
➤
Snap the back cover bracket into the metal
installation bracket. This ensures adequate
space for the battery wand.
➤
If you have a satellite battery pack or an 18V
DC Power Supply, it is not necessary to use
the back cover bracket.
Mount the Installation Brackets
■
From the headrail end marks, mark 2" for bracket location on the control side and 7" on
non-control side.
CAUTION: Installation brackets must be installed 7" from the shading end cap on the
non-control side. Failure to place the non-control side bracket outside this area will
damage the shading when installed.
➤
If more than two installation brackets came with your order, space additional bracket(s)
between the two end brackets and mark their location. Mount into wood whenever
possible.
➤
For PowerView
®
Gen 3 shadings with battery wand, allow a minimum of 18" between
bracket centerlines for the battery wand/rechargeable battery wand.
Remove top tab if using a satellite
battery pack or an 18V DC Power Supply.
Back Cover Bracket
Remove bottom tab if using a
battery wand and no back cover.
Top Tab
Bottom Tab
Back Cover
Slots