INSTALLATION
10
STEP 2: Mount the Battery Wand (PowerView
®
Gen 3)
NOTE: Follow this step if you are using a battery wand with PowerView
®
Gen 3.
For the headrail-mounted battery wand and rechargeable battery wand, battery wand clips
and battery wand/rechargeable battery mount are installed before the shading is installed.
Any other power options, the power source will be connected after the shading is installed.
Battery Wand
Install the Battery Wand Clips
■
Attach the battery wand clips to the headrail.
IMPORTANT: Position the clips close to the power cable.
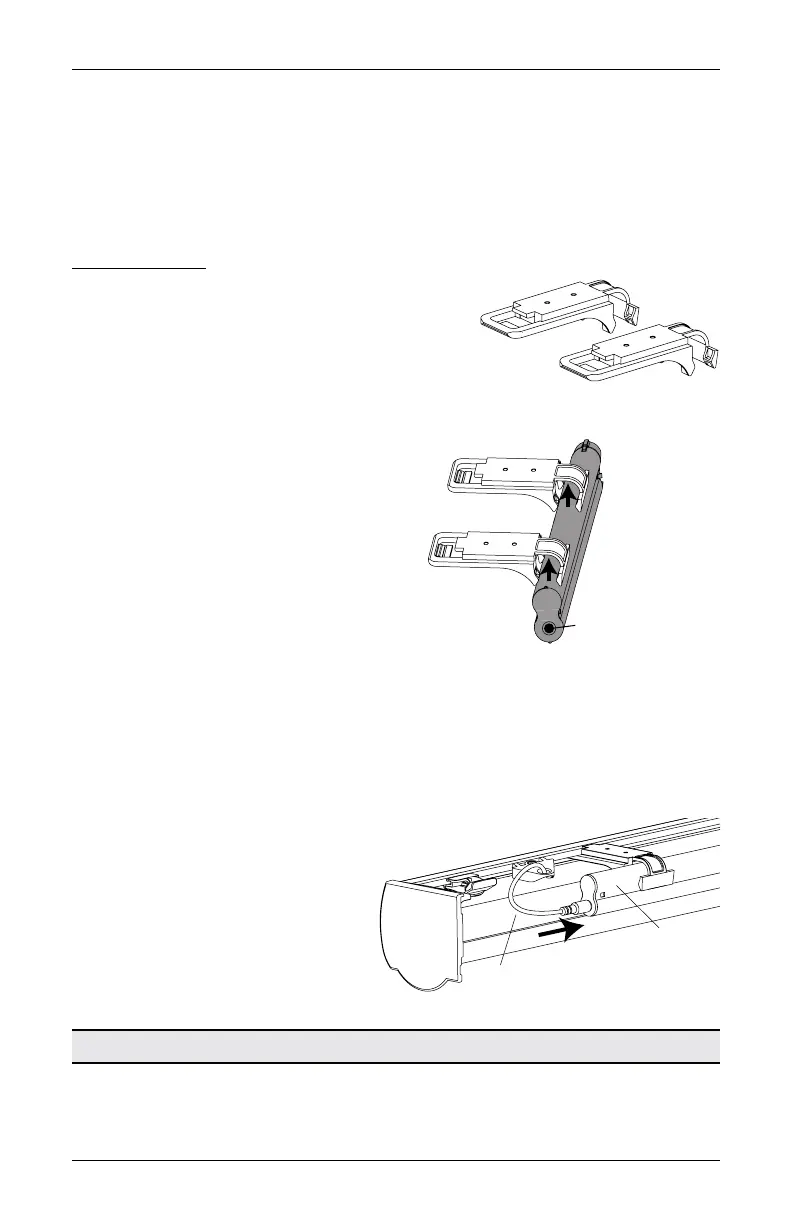
Mount the Battery Wand into the Battery Wand Clips
■
Position the battery wand with its socket
toward the motor end of the shading.
■
Push the battery wand straight up into
the battery wand clips until it snaps into
place. Check to make sure the battery
wand is secure.
CAUTION: Be sure the cables do not
become pinched by the battery wand
clips during installation. Damage or
overheating of components could result.
Plug the Power Cable into the Battery Wand
NOTE: When power is connected to the motor, a blue LED inside the control button housing
will flash to indicate the shading is ready for operation.
■
From the back of the shading headrail, connect the power cable (from the motor side) into
the socket on the battery wand.
Proceed to “STEP 3: Install the Shading” on page 12.
Place the socket
toward the motor end.
Headrail not shown
for clarity.
Battery
Wand
Power
Cable