INSTALLATION
18
Satellite-Mounted Rechargeable Battery Wand
Install the Rechargeable Battery Mount
■
Decide where you want to install the rechargeable battery mount. This may be mounted in
any desired location near the window covering. A satellite battery mount may be installed
in any orientation. When installing a satellite rechargeable battery wand behind the
headrail, take extra care to ensure adequate space is available.
➤
Make sure the provided cable is long enough to connect the satellite battery mount
and the shading.
CAUTION: The rear of the battery mount must be flush against a flat mounting surface.
Do not install on a curved molding.
■
Mark the screw holes.
■
Drill the screw holes using a
3
⁄
32
" drill bit.
■
Attach the battery mount using the screws provided.
CAUTION: Only use the screws provided with the battery mount, designed so that the
screws will install flush with the mount. Protrusion of the screws could result in either the
battery wand not attaching properly causing a failure to connect, or the wand falling out
of the mount. Do not over-tighten.
■
Connect the power cable from the motor side into the power socket on the rechargeable
battery mount.
NOTE: With longer cables, wire retainers (not supplied) are recommended to secure
the cable.
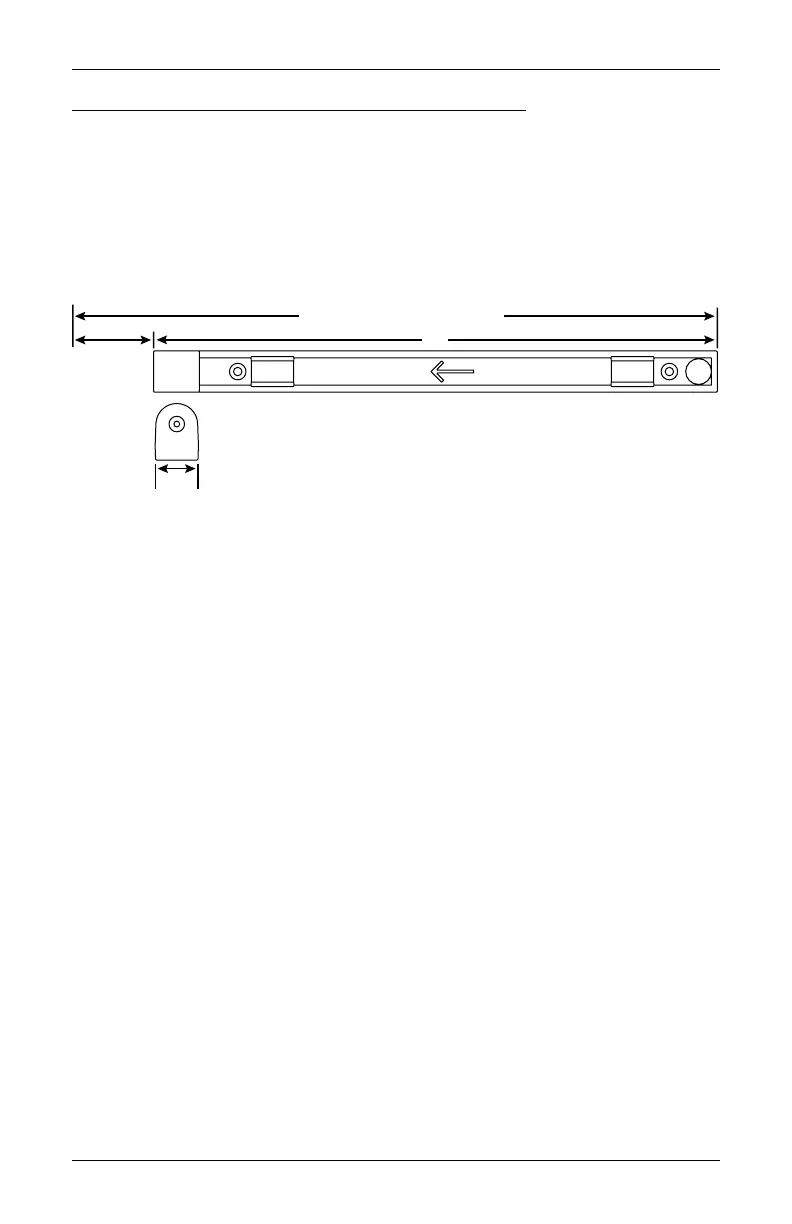
2"
Power
Socket
End
Allow 2" at power socket end for the extension cable jack.
Minimum flat mounting area = 15" x 1"
13"
15" Minimum Mounting Length