2266
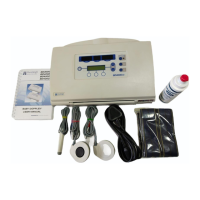
Servicing Procedures - Control Unit
Retractile Cable - Control Unit
1. Carefully de-solder the retractile cable using solder wick, leaving the holes clear to fit the
new cable (See figures 1,2 and 3).
Cable Refitting
1. Fit new cable to control unit as described previously.
Volume Control
1. Carefully de-solder the three electrical connections and two supports using solder wick. Do
not use solder pumps as they may generate static.
2. Ease the legs free in the holes and lift the volume control free taking extreme care not to lift
or damage any tracking.
3. Clean the area around the volume control and fit the replacement.
4. Solder the volume control taking care not to overheat the volume control or PCB.
Overheating the PCB could result in the tracks breaking and the volume control becoming
unreliable.
6.4 Control Unit Reassembly (see figs 1,2,3)
After dismantling the control unit as previously described the following repairs can be
undertaken.
Sockets/Switches
1. Clean any debris from inside the case halves and carefully wipe the LCD display and the
window. This should be done with an anti-static cloth to avoid the build up of static.
Note: When wiped, the LCD display may show marks and symbols when the unit is not
turned on. This is caused by static charge on the display and will disappear after
a short while.
2. Replace the three "O" rings on the PCB mounting pillars. Marked products, ensure the
1 copper washer and 2 beryllium washers are fitted as shown in Fig 3.
3. Replace the PCB taking care to ensure that:
a) The switches and sockets are correctly engaged in the labels.
b) Battery contacts are correctly located in the case.
c) No leads are trapped under the PCB.
4. Position the loudspeaker in the PCB cut-out, making sure that the wires are twisted together
and are clear of the case halves and switches.
5. Slide the spring over the shaft of the on/off switch button and clip the button on the shaft.
6. Replace the top case half taking care to engage the two locating lugs at the top of the case
and to avoid damaging the labels. Ensure that no wires are trapped, that the retractile
cable grommet is correctly placed and the On/Off button is located in the cut-out.
7. Check that all labels are secure and undamaged.
 Loading...