108 Automower from
5. Repair instructions
™
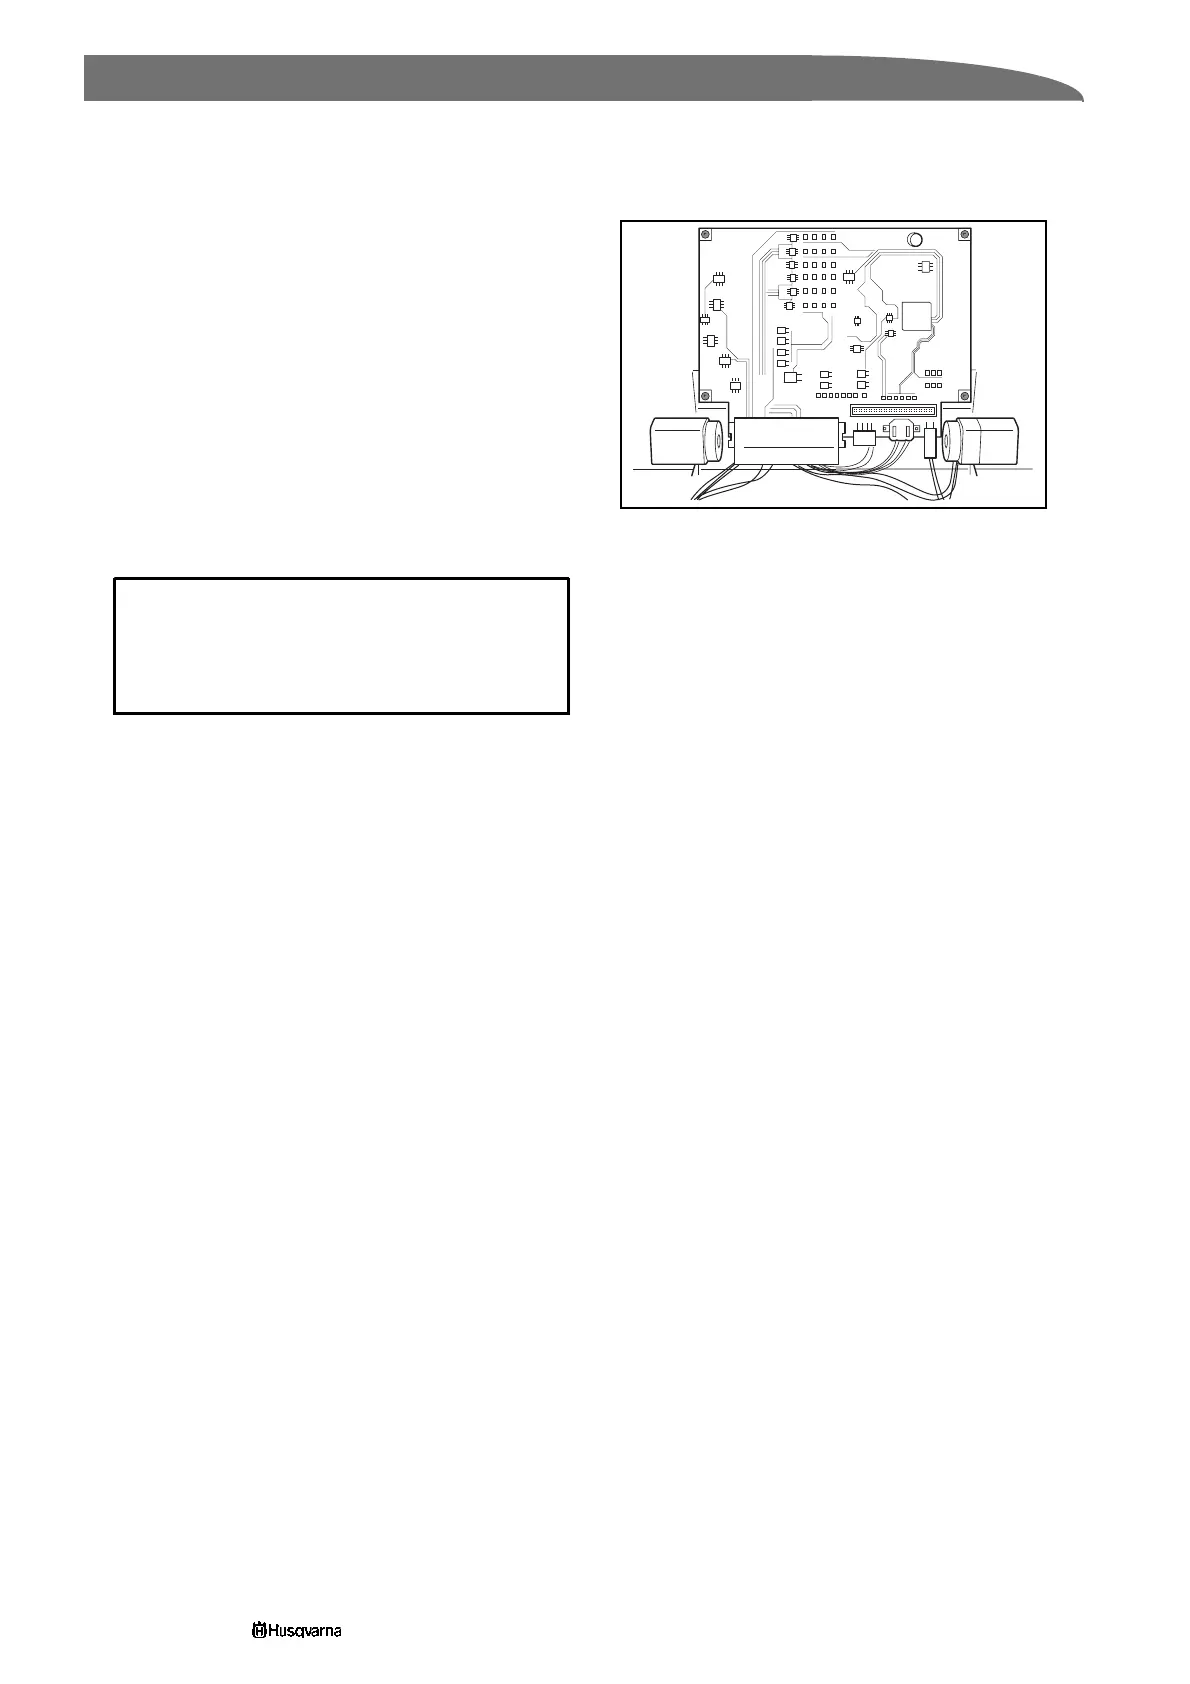
5.8 Replacing the control box
A mower’s operating information is stored in the
control box. This information, with the help of the
service program Autocheck, can be saved in a file on
a computer and then transferred back to the mower
once the control box has been replaced, see
Operating history: Copy all data to new control box on
page 78.
1. Dismantle the body and chassis.
2. Remove the cable harness and battery cable
from the control box.
3. Unscrew the four screws, torx 20, holding the
control box.
4. Remove the old card and replace with the new
card.
5. Refit the screws and connect the cables again.
6. Check that the mower works.
7. Fit the chassis and body.
A new start-up sequence starts when the main switch
is turned to the ON position after replacing the control
box, provided that the data on the old control box has
not been transferred to the new via Autocheck first.
IMPORTANT INFORMATION
Only hold a circuit board by its edges. Never
touch the card’s components and pin
terminals.
3012-311

 Loading...