61
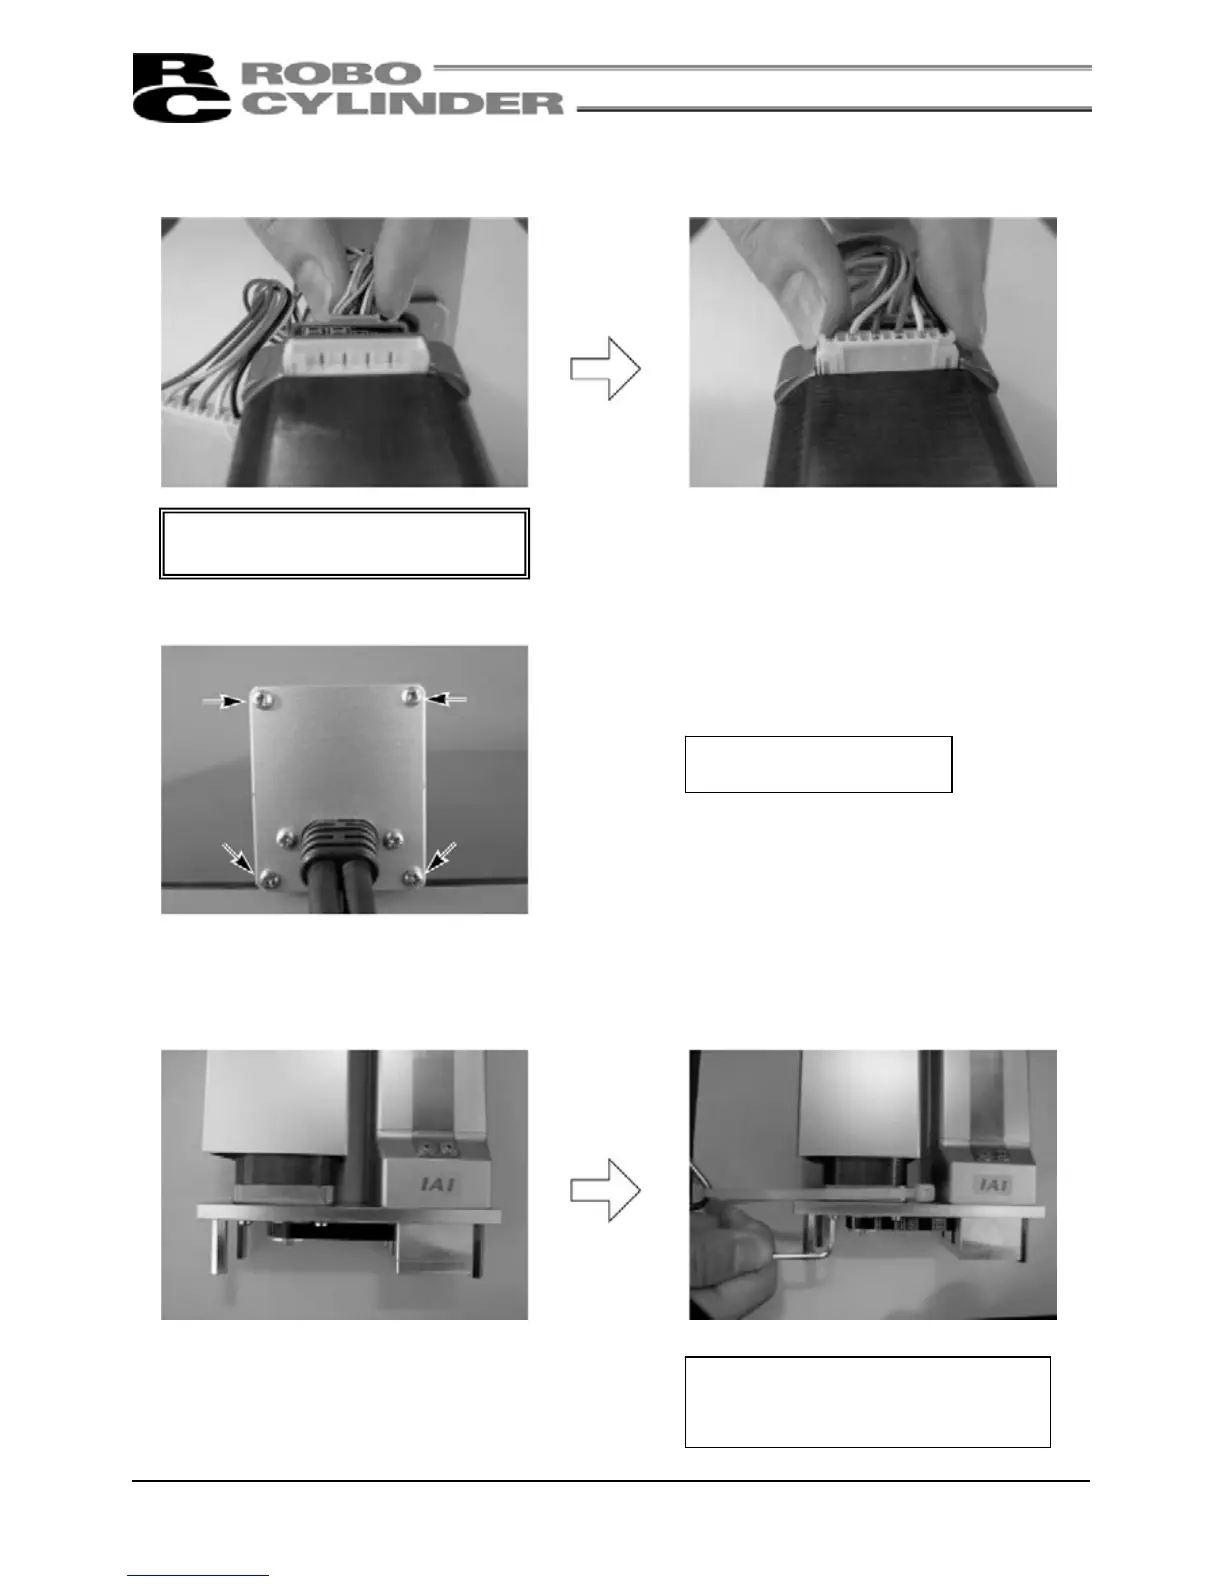
8) Connect the encoder connector and motor connector to a new motor.
• Connection of the encoder connector • Connection of the motor connector
9) Couple the motor cover to the motor end cap with the affixing pan-head
screws (M3 × 6, 4 pcs.). At this time, make sure not to pinch the cables.
Caution: Do not apply a force to the
encoder by touching it directly.
10) Temporarily tighten the motor with the tension adjusting bolts (hexagon socket-head screws: M3 ×
10, 4 pcs.) and loop the belt. In this condition, pass a looped strong string (or long tie-band) around
the motor-end flange, pull it with a tension gauge to the specified tension, and uniformly tighten the
adjusting bolts (hexagon socket-head bolts: M3 × 10, 4 pcs.).
(Use an Allen wrench of 2.5mm across flats.)
Tightening torque of M3 bolt:
61.5N·cm (6.27kgf·cm)
Tension: 2.5kgf