Do you have a question about the IAI ROBO Cylinder RCS2 Series and is the answer not in the manual?
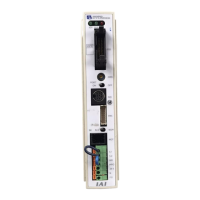
| Supply voltage | 24 VDC |
|---|---|
| Allowable voltage fluctuation range | ±10% |
| Operating Temperature | 0 to 40 °C |
| Storage Temperature | -10 to 60 °C |
| Protection Class | IP20 |
| Communication | Ethernet, RS-232C |
| Number of controlled axes | 1 |
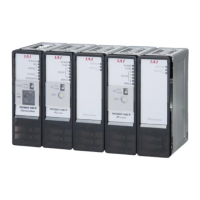
Introduces the RCS2 actuator series and its types.
Details RCS2CR actuators for cleanroom applications.
Specifies correct grease for cleanroom actuators to prevent dust.
Explains hazard levels (Danger, Warning, Caution, Note) and safety warnings.
Covers safe usage, installation, and handling practices for actuators.
Details safety measures for maintenance, inspection, and repair procedures.
Lists incorrect ways to handle cables to avoid system issues.
Provides guidance on using cable tracks with actuators to prevent damage.
Provides a brief introduction to the operating manual and its purpose.
Outlines essential guidelines for operating the actuator safely and correctly.
Covers fundamental procedures for maintaining and inspecting the actuator.
Defines the duration of the product warranty.
Details what is covered and not covered by the product warranty.
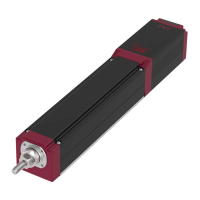
Identifies parts of the standard RCS2 motor straight type actuators.
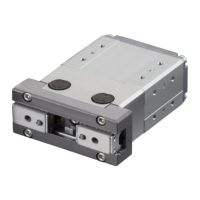
Identifies parts of the RCS2 built-in type actuators.
Identifies parts of the RCS2CR cleanroom specification actuators.
Identifies parts of the RCS2 motor reversing type actuators.
Provides instructions for safely handling unpacked actuators, including precautions for the stainless sheet.
Details procedures for transporting actuators assembled with peripheral equipment.
Specifies the recommended environmental conditions for actuator installation.
Outlines the recommended conditions for storing the actuator.
General guidance and precautions for installing the actuator, including stainless sheet care.
Explains how to mount the actuator using the base's tapped holes.
Details mounting using through holes on the actuator's top face.
Describes how to mount the actuator using optional foot bases.
Specifies requirements for the mounting surface to ensure stability and performance.
Explains using base side faces as reference planes for precise mounting.
Details using foot base side faces as reference planes for mounting.
Provides recommended screw types, sizes, and tightening torques for mounting.
Instructions for installing loads onto the actuator's slider using tapped holes.
Describes the optional slider spacer for SA4 type actuators.
Provides guidelines for connecting actuator cables, including precautions.
Details maximum speed limits to prevent resonance and motor restrictions.
Specifies allowable load moments and overhang lengths for actuator operation.
Provides precautions and adjustment notes for actuators equipped with a switch.
Explains how to use the slit for fine-tuning slider position.
Specifies the required suction rate for cleanroom actuator operation.
Describes the quick joint for connecting air tubes for suction in cleanroom applications.
Details models and options compatible with high acceleration/deceleration.
Lists specifications for actuators supporting high acceleration/deceleration.
Highlights important considerations for using high acceleration/deceleration types.
Lists compatible controller models for high acceleration/deceleration actuators.
Outlines the schedule for visual inspection, interior checks, and grease supply.
Lists items to check during exterior visual inspection of the actuator.
Provides instructions for cleaning the exterior of the actuator.
Details how to visually inspect the internal components of the actuator.
Describes procedures for cleaning the inside of the actuator.
Specifies the correct grease types for guides and ball screws for different specifications.
Illustrates the correct procedure for applying grease to guides and ball screws.
Explains the procedure and tools required for replacing and adjusting the stainless sheet.
Introduces the reduction belt for motor reversing types and its inspection.
Lists the specific belt types for different actuator models.
Details the procedure for adjusting belt tension for SA4R, SA5R, SA6R models.
Details the procedure for adjusting belt tension for the SA7R model.
Details the procedure for adjusting belt tension for SS7R, SS8R models.
Provides a step-by-step guide for replacing the belt on SA4R, SA5R, SA6R models.
Provides a step-by-step guide for replacing the belt on SA7R models.
Provides a step-by-step guide for replacing the belt on SS7R, SS8R models.
Detailed steps for replacing motors on SA4C, SA5C, SA6C actuators.
Detailed steps for replacing motors on SA7C actuators.
Detailed steps for replacing motors on SS7C, SS8C actuators.
Detailed steps for replacing motors on SS8C actuators.
Detailed steps for replacing motors on SA4R, SA5R, SA6R actuators.
Detailed steps for replacing motors on SA7R actuators.
Detailed steps for replacing motors on SS7R, SS8R actuators.
Shows wiring diagram for motor and robot cables.
Shows wiring diagram for encoder cables for X-SEL-J/K controllers.
Shows wiring diagram for encoder cables for SCON, SSEL, X-SEL-P controllers.
Explains how to apply and use home mark stickers for positioning.