400 IBM eX5 Implementation Guide
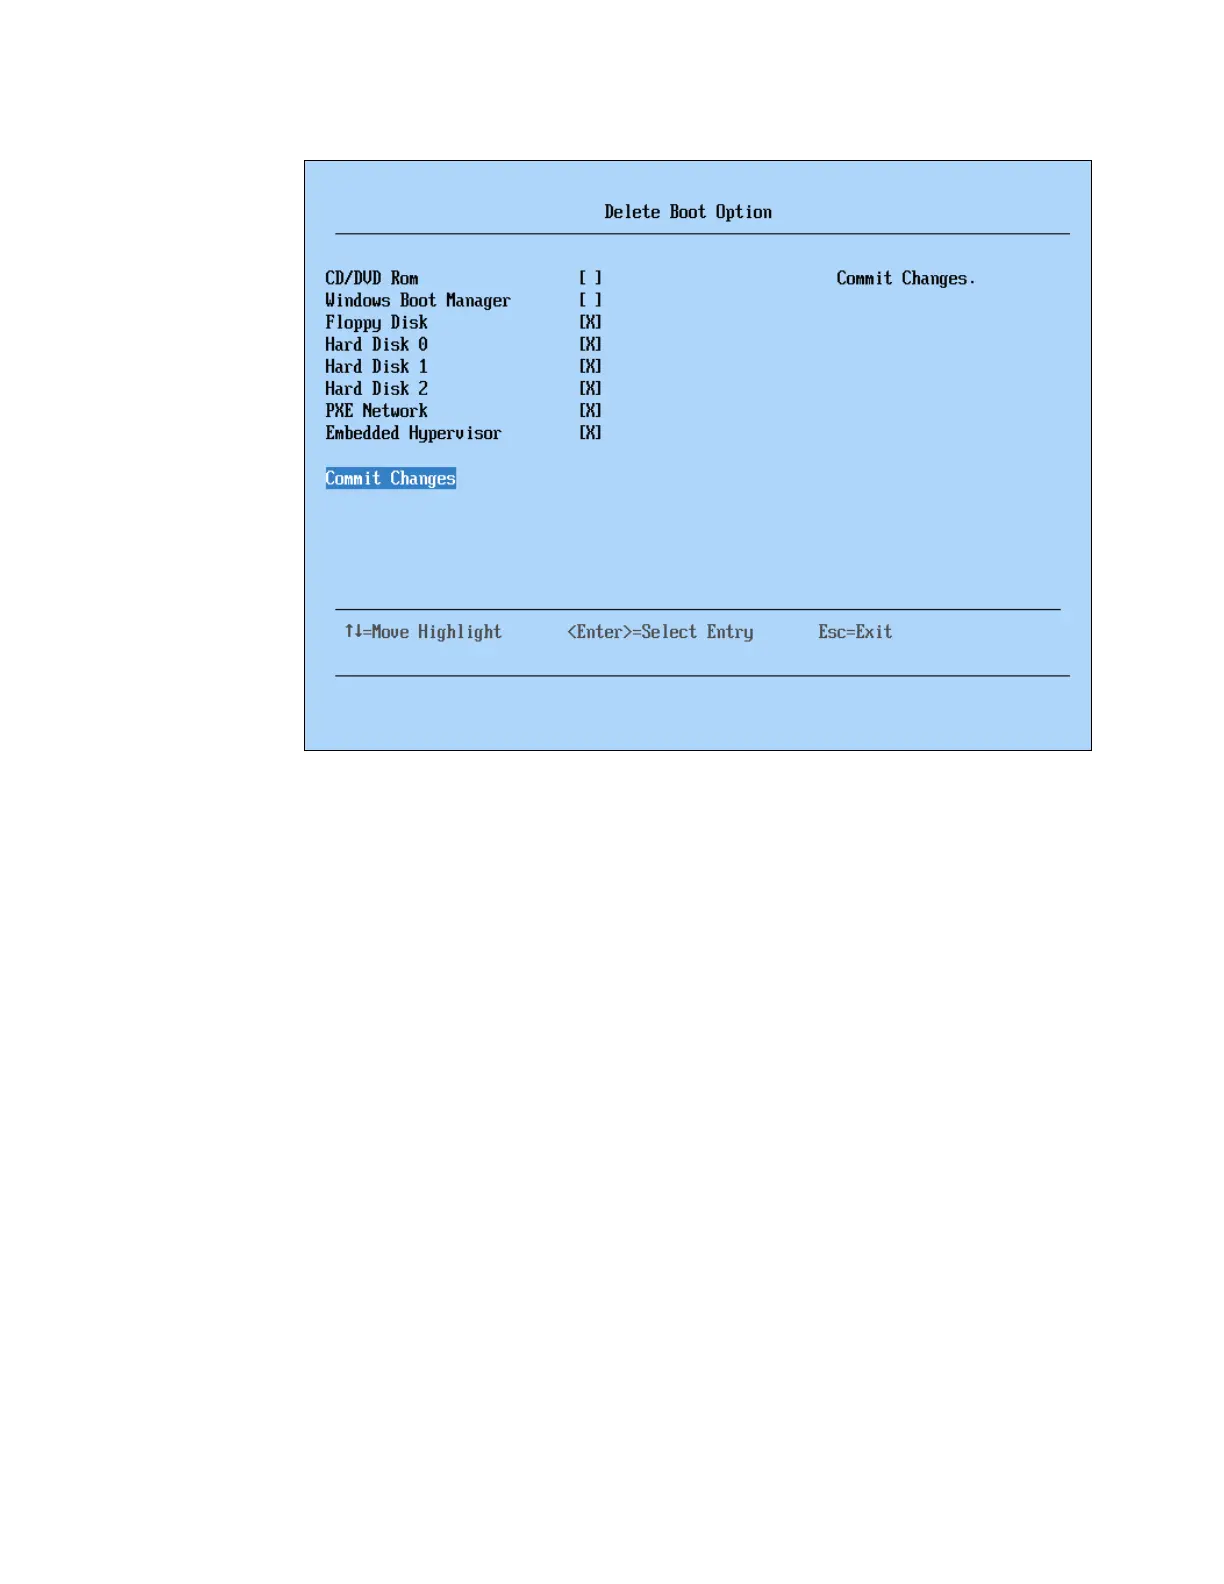
Figure 8-34 Deleting boot options
Note that, in our example in Figure 8-34, we also have selected Hard Disk 0 for removal.
Our system is running Windows 2008 with GUID Partition Table (GPT) disk, and therefore,
Windows Boot Manager is being used to boot the operating system.
5. Press Esc to return to the Boot Manager menu.
6. Select Change Boot Order from the Boot Manager menu.
7. Press Enter to make the device list active.
8. Use the up and down arrow keys to navigate to the device for which you want to change
the order. After you highlight the device, use the - or Shift and + keys to move the device
up or down the list. You can then perform the same actions to move other devices up or
down the list. Press Enter when finished.
9. Use the down arrow key to highlight Commit Changes and press Enter to commit the
changes that you have made.
10.Press Esc to return to the Boot Manager main menu.
11.Press Esc again to exit to the System Configuration and Boot Management main menu.
12.Press Esc again to exit the UEFI and press the Y key to exit and save any changes that
you have made. The HX5 then proceeds to boot normally.
8.5.3 HX5 single-node UEFI settings
No specific UEFI settings are required for the HX5 to operate in a single-node configuration.
The settings used are determined by the operating system that is installed.
 Loading...