420 IBM eX5 Implementation Guide
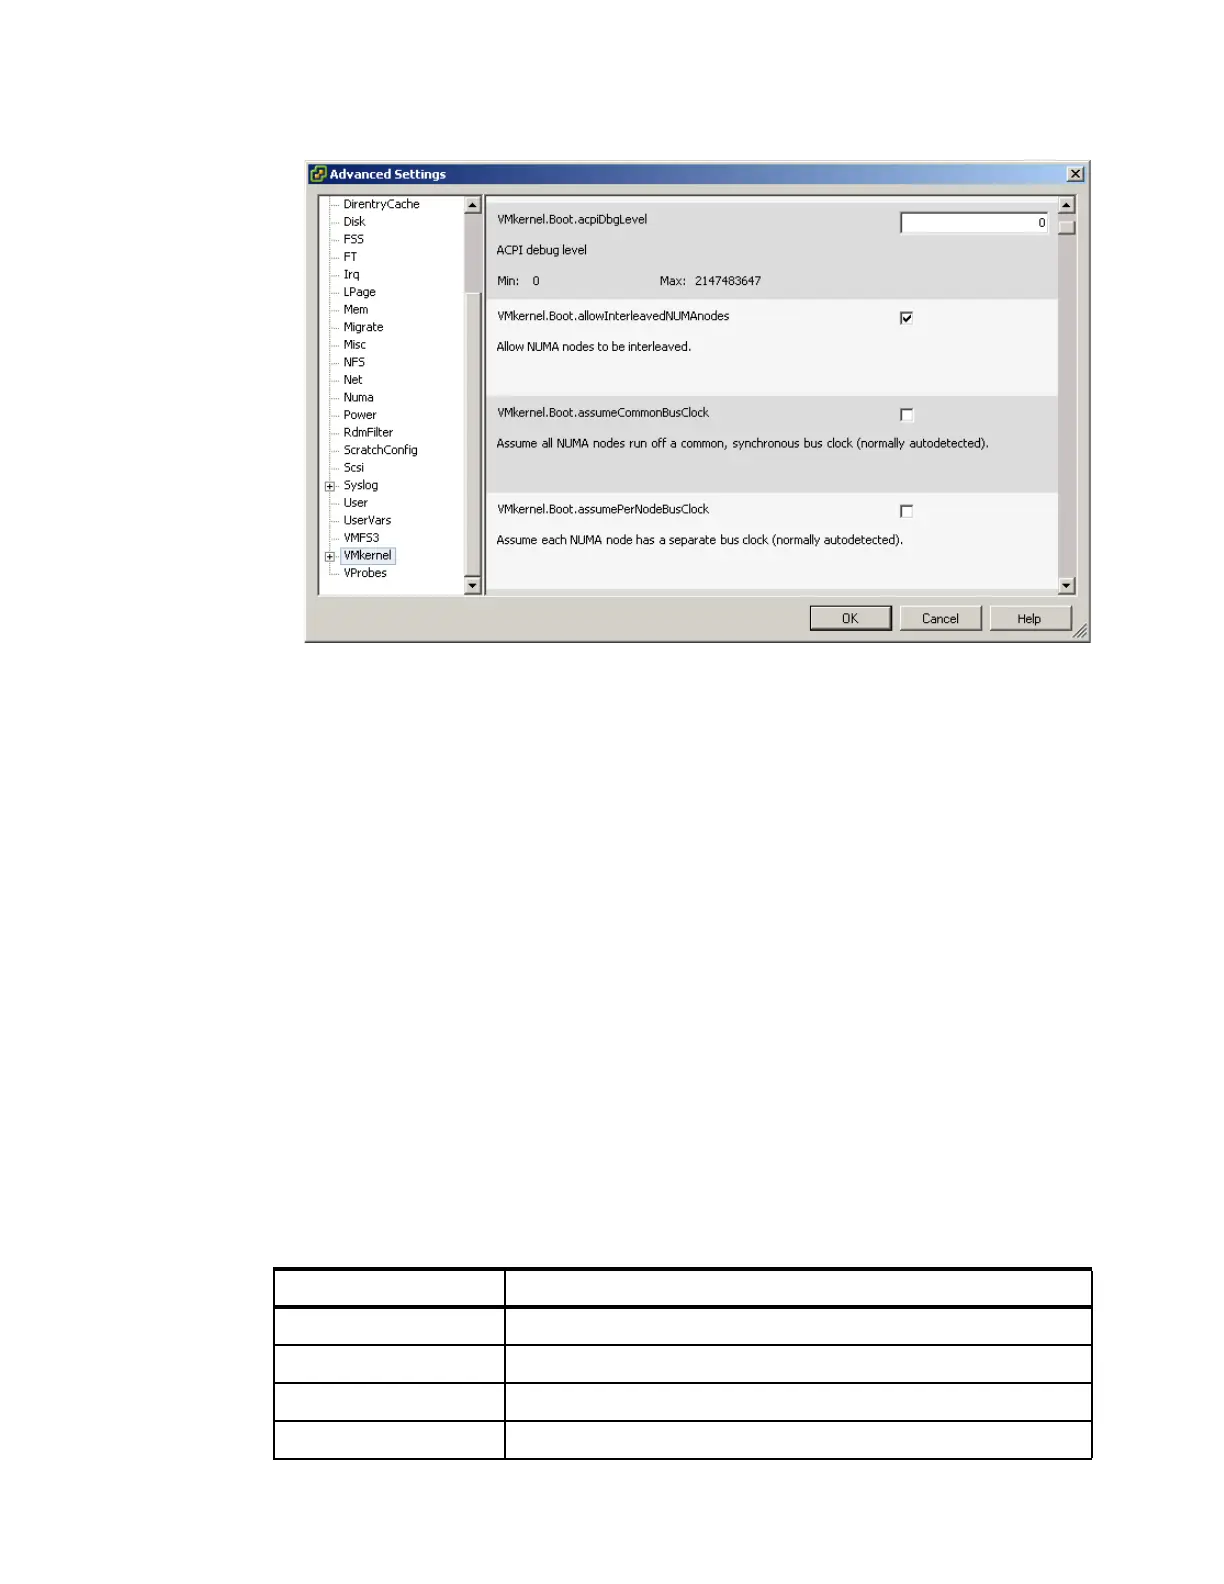
Figure 8-56 Editing the WMkernel settings in vSphere Client
4. Click OK.
5. Shut down the HX5.
6. Ensure that you have the latest FPGA code installed on the HX5 by updating it, if required.
7. Physically attach the MAX5 by using the instructions that are provided in the Installation
Guide.
8. Reflash the FPGA code to ensure that both the HX5 FPGA code and MAX5 FPGA code
are at the same level.
9. After the FPGA code has been flashed, log in to the UEFI by pressing F1 at the UEFI
splash panel.
10.Select System Settings Memory from the System Configuration and Boot
Management main menu.
11.Ensure that the MAX5 Memory Scaling option is set to Non-Pooled.
12.Continue to boot the server normally. Log in to the vSphere Client and check that the
additional memory shows on the Systems Summary tab.
Restoring ESXi to the factory defaults
You can use the IBM recovery CD to recover the IBM USB Memory Key to a factory-installed
state. Table 8-5 shows the available CDs.
Table 8-5 VMware ESXi recovery CD
Part number Description
68Y9634 VMware ESXi 4.0 U1
49Y8747 VMware ESXi 4
68Y9633 VMware ESX Server 3i v 3.5 Update 5
46M9238 VMware ESX Server 3i v 3.5 Update 4
 Loading...