Installing a DIMM
The very low profile (VLP) dual-inline memory module (DIMM) is a tier 1 CRU. You can install it
yourself. If IBM installs a tier 1 CRU at your request, you will be charged for the installation. The low
profile (LP) DIMM is a tier 2 CRU. You can install it yourself or request IBM to install it, at no additional
charge, under the type of warranty service that is designated for the compute node.
About this task
To install a DIMM, complete the following steps:
Procedure
1. Read the Safety topic and the “Installation guidelines” on page 35.
2. Read the documentation that comes with the DIMMs.
3. Shut down the operating system on all partitions of the compute node, turn off the compute node,
and remove the compute node from the IBM Flex System Enterprise Chassis. See “Removing the
compute node from an IBM Flex System Enterprise Chassis” on page 37.
4. Carefully lay the compute node on a flat, static-protective surface, with the cover side up.
5. Open and remove the compute node cover. See “Removing the compute node cover” on page 39.
6. Locate the DIMM connectors on the system board. Determine the connector into which you will
install the DIMM. See “Supported DIMMs” on page 59.
7. Touch the static-protective package that contains the part to any unpainted metal surface on the IBM
Flex System Enterprise Chassis or any unpainted metal surface on any other grounded rack
component, and then remove the new part from its shipment package.
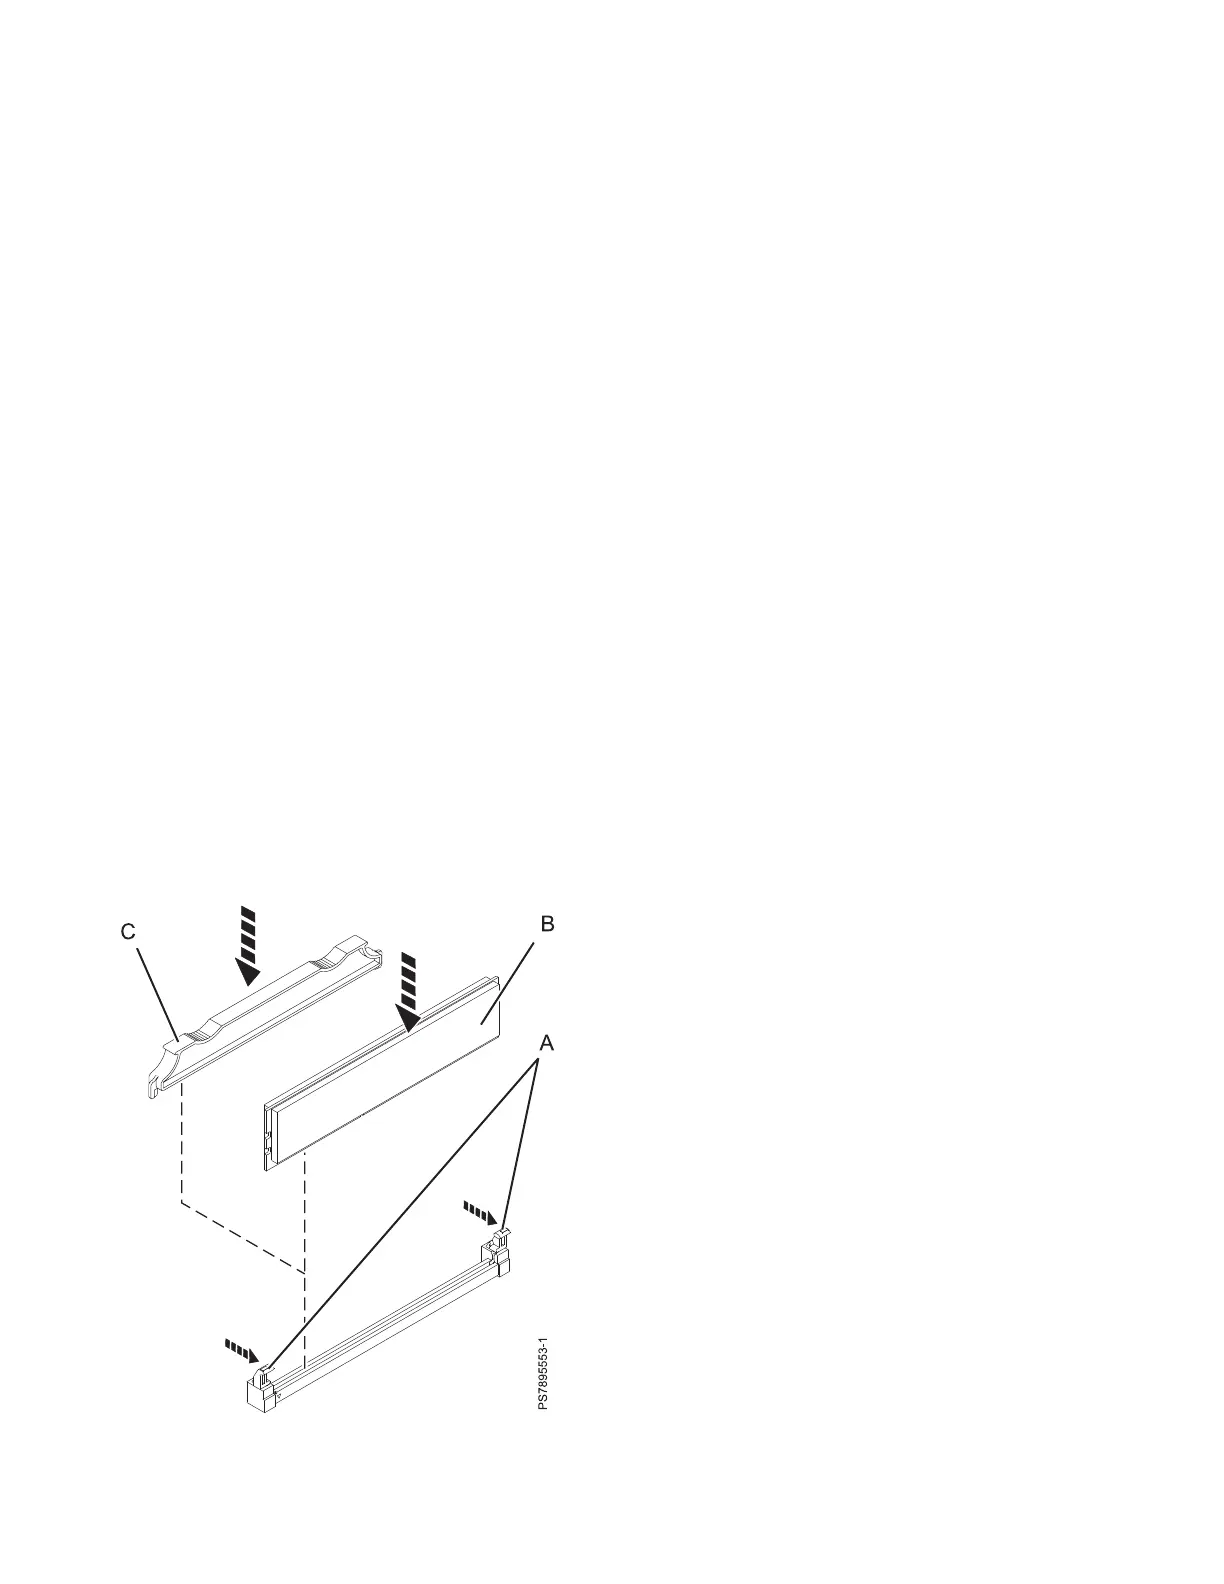
8. Verify that both of the connector retaining clips are in the fully open position.
9. Turn the DIMM so that the DIMM keys align correctly with the connector on the system board.
Attention: To avoid breaking the DIMM retaining clips or damaging the DIMM connectors, handle
the clips gently.
10. Insert the DIMM (B) by pressing the DIMM along the guides into the connector.
Verify that each retaining clip (A) snaps into the closed position.
Figure 26. Installing a DIMM
58 Power Systems: IBM Flex System p260 and p460 Compute Nodes Installation and Service Guide