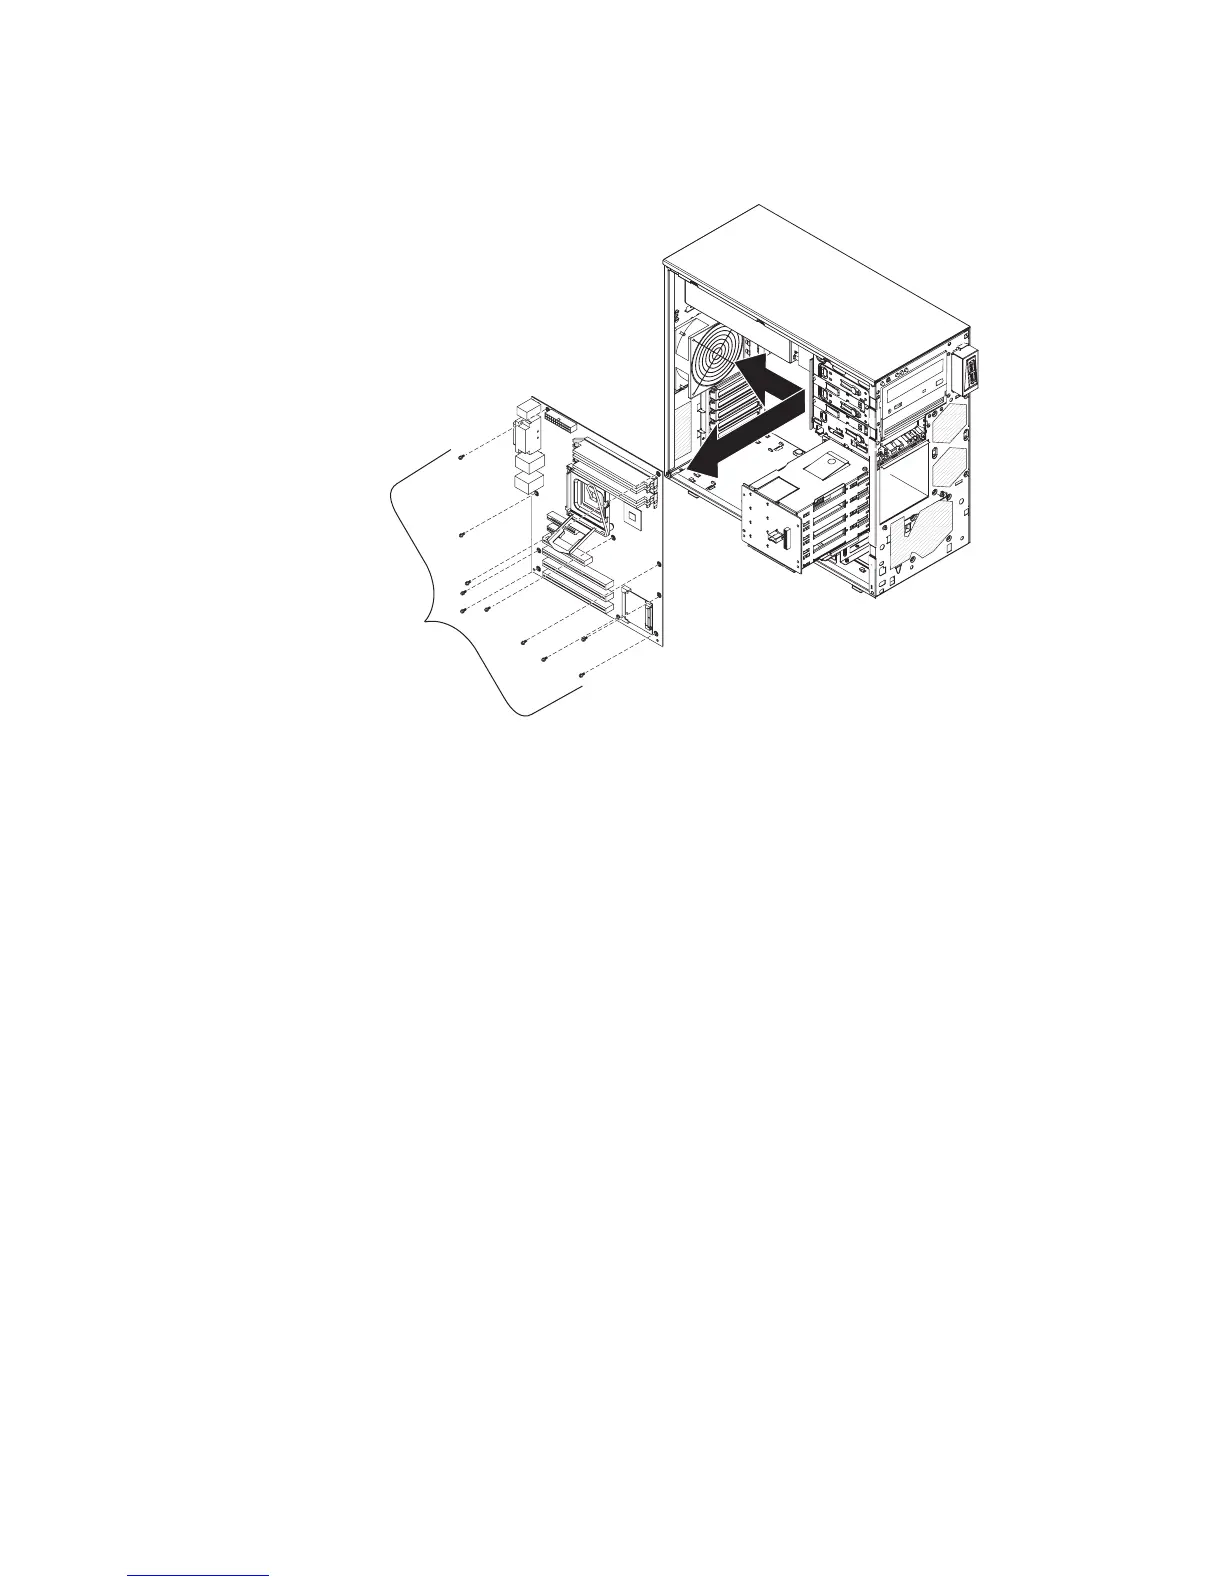
Installing the system board
To install the system board, complete the following steps.
System board
mounting screws
(10 places)
1. Insert the system board into the chassis and slide it toward the rear of the
server until it fully engages the tabs in the chassis.
Note: The tabs are fully engaged when the screw holes in the system board
are aligned with the corresponding holes in the chassis.
2. Install the seven screws that secure the system board to the chassis.
3. Install any of the following components that you removed from the system
board:
v SAS/SATA controller (see “Installing the SAS/SATA controller” on page 119).
v Battery (see “Installing the battery” on page 103).
v DIMMs (see “Installing a memory module” on page 102).
v Microprocessor and fan sink (see “Installing a microprocessor and fan sink”
on page 125).
v Adapters (see “Installing an adapter” on page 84).
4.
Press and hold the retaining tab on top of the cage; then, rotate the drive cage
into the chassis until it locks into place.
5. Reconnect any cables to the system board that you disconnected during
removal.
6. Install the side cover (see “Installing the side cover” on page 78).
7. Lock the side cover if it was unlocked during removal.
8. Reconnect the external cables and power cords; then, turn on the attached
devices and turn on the server.
128 System x3200 Types 4362 and 4363: Problem Determination and Service Guide