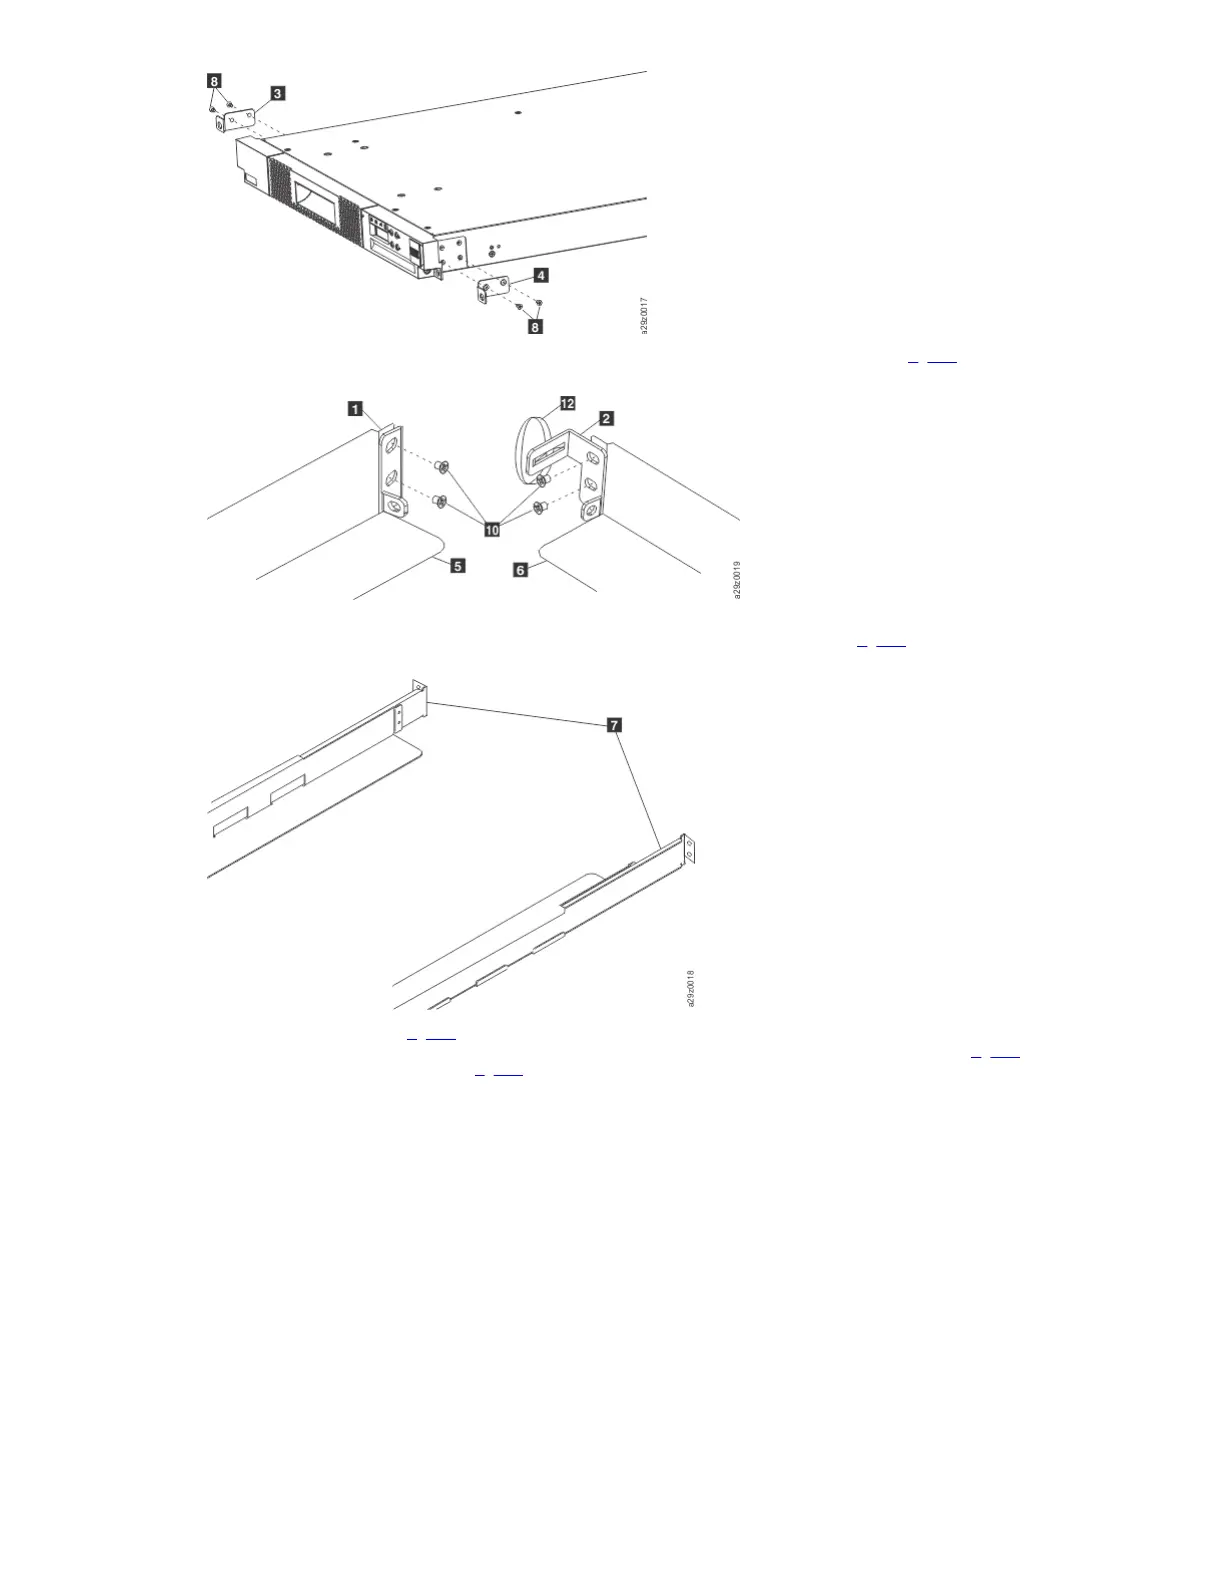
4. Attach the left 1 and right 2 rear brackets to the left 5 and right 6 front rails with 2 round-head screws 10 on each side (Figure 4).
Figure 4. Attaching the rear brackets to the rails
Important: Do NOT tighten these screws completely.
5. Slide in the rear rails 7 from back to front to create the rail assemblies. Ensure that the screw holes face outwards (Figure 5).
Figure 5. Creating the rail assemblies
6. Install the rail assemblies into the rack (Figure 6). Ensure the 3 holes in the front of the unit align with the 1U space marked on the vertical rails in Step 2. Secure
the rails to the rack with 4 flat-head screws 9 on each side of the rack. Use both of the two screw locations on the rear of the rack rail (Figure 2). Use the top and
middle screw locations on the front of the rack rail (Figure 1).
Figure 6. Installing the rail assemblies
 Loading...


