ADS-RR(SR)-CHR03M-DS
chRysleR 200 2015-2017
Automotive Data Solutions Inc. © 2018
3
Fig. 1.3 Fig. 1.4
Fig. 1.2
Fig. 1.1
Fig. 2.5
Fig. 2.3
Fig. 2.1
Fig. 1.3 Fig. 1.4
Fig. 1.2
Fig. 1.1
Fig. 2.6
Fig. 2.4
Fig. 2.2
INSTALLATION INSTRUCTIONS
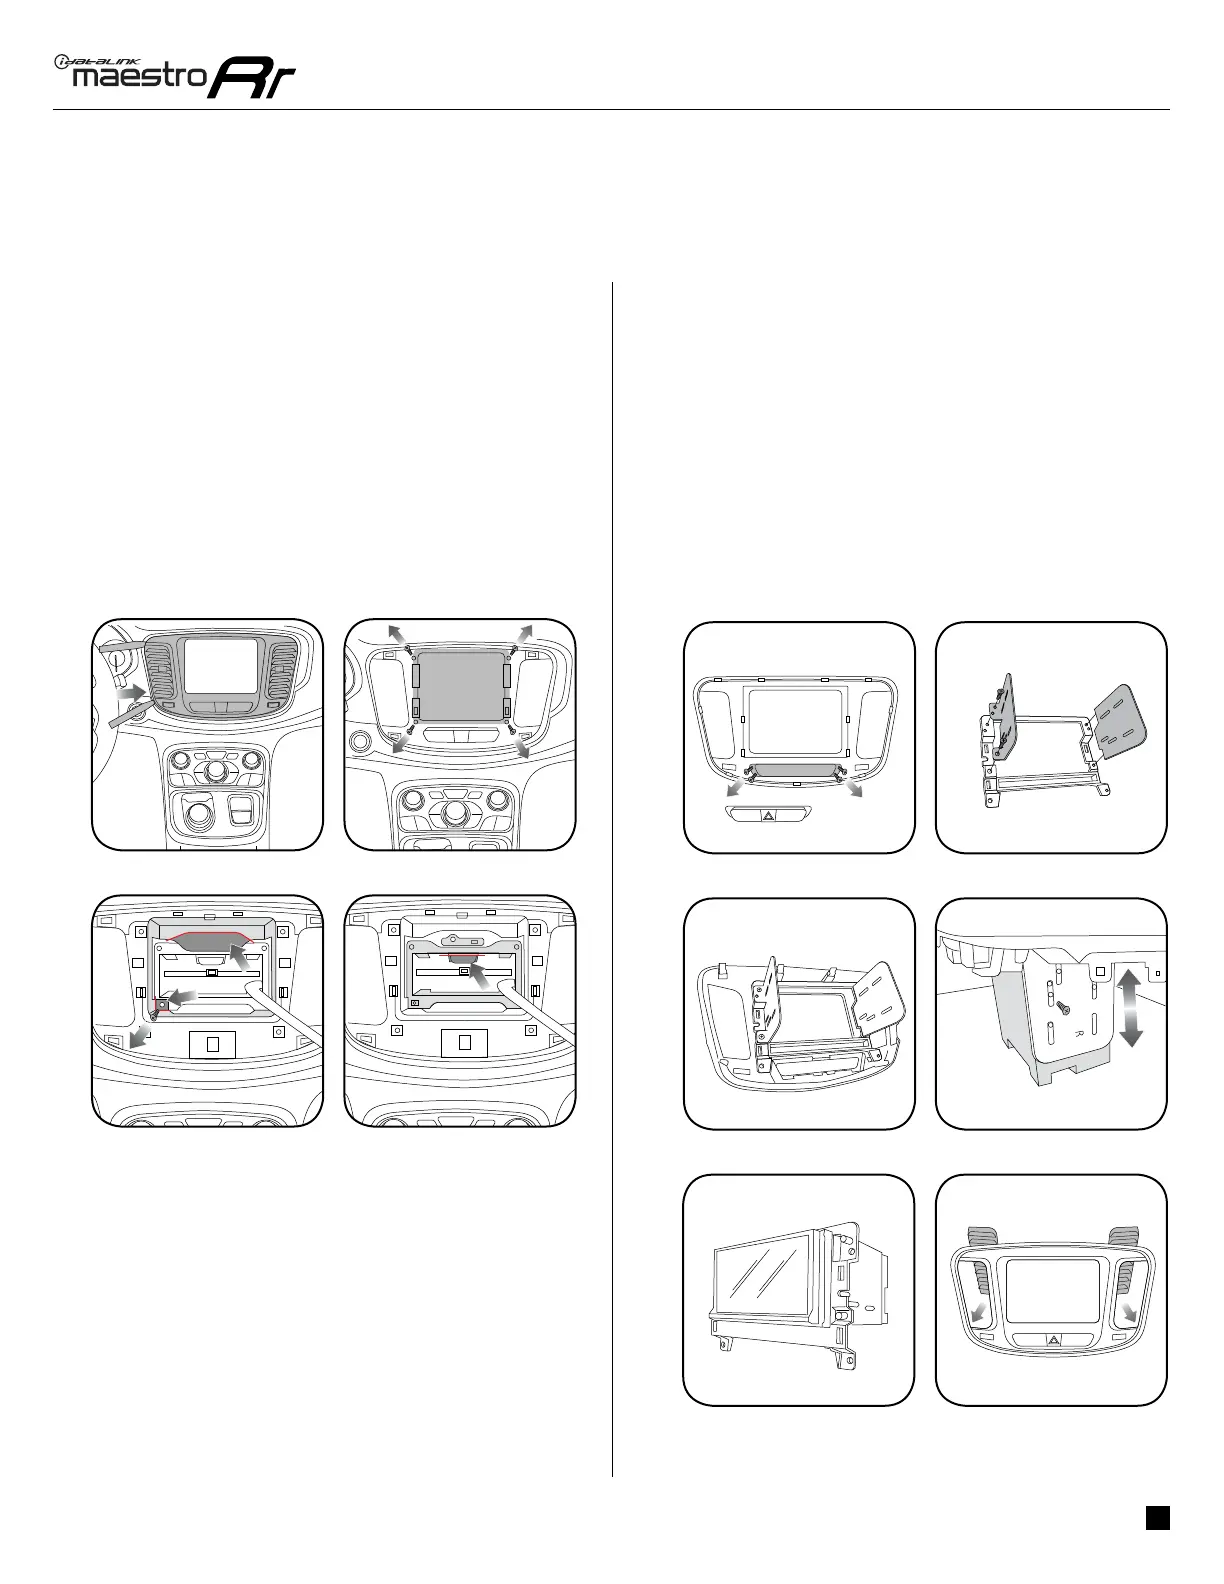
DASh DISASSEMBLy
Remove the radio bezel by prying it forward with a panel
removal tool. (Fig. 1.1)
Remove the (4) screws holding the radio in, then unplug
and remove the radio. (Fig. 1.2)
Remove the screw securing the bracket. Cut the plastic
at the top and bottom of the radio cavity, where indicated.
(Fig. 1.3)
Using a Dremel with a cutting wheel, cut the fl at bracket
holding the front bracket as close as possible to the cross-
member. (Fig. 1.4)
DASh KIT ASSEMBLy
1. The dash kit comes with a blank panel in place of the
hazard switch. If your factory bezel has a hazard switch in
this location, remove it from the factory bezel and install it
in the K200. (Fig. 2.1)
2. Screw the (2) metal brackets into the plastic surround of
the dash kit using the supplied screws. (Fig. 2.2)
3. Clip the assembled bracket to the back side of the K200.
(Fig. 2.3)
4. Place the K200 assembly over the aftermarket radio. Adjust
the bezel and radio placement to the desired mounting
depth, and then insert the screws to fasten the metal
brackets to the radio. (Fig. 2.4)
5. Now that the radio has been secured properly to the new
brackets, unclip the radio and mounting brackets from the
K200 bezel. (Fig. 2.5)
6. Transfer the vents from the OEM radio bezel to the K200.
(Fig. 2.6)
 Loading...