ADS-RR(SR)-VW01-DS
Volkswagen Beetle 2012-2015
Automotive Data Solutions Inc. © 2016
3
INSTALLATION INSTRUCTIONS
STEP 1
• Unbox the aftermarket radio and locate its main harness.
• Connect the wires shown on the next page from
aftermarket radio main harness to the VW1 T-harness and
match the wire functions.
STEP 2
• Connect the factory harness to the VW1 T-harness.
• Mate the male and female 4 pin WHITE connectors of the
VW1 T-harness.
• Do not use any of the RCA plugs (WHITE, GRAY, GREEN &
PURPLE) of the VW1 T-harness.
STEP 3
• Access the OBDII connector located under the driver side
dashboard.
• Connect the BROWN /RED wire of the VW1 T-harness to
the wire located at pin 6 of the OBDII connector. (See the
vehicle wire chart reference for wire colors)
• Connect the BROWN /YELLOW wire of the VW1 T-harness
to the wire located at pin 14 of the OBDII connector. (See
the vehicle wire chart reference for wire colors)
• Do not use the GREEN/WHITE wire.
STEP 4
• Plug the aftermarket radio harnesses into the aftermarket
radio.
• Plug the Data cable to the data port of the aftermarket
radio.
• Insert the Audio cable into the iDatalink 3.5 mm audio jack
of the aftermarket radio.
STEP 5
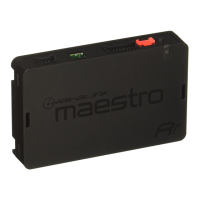
• Connect all the harnesses to the Maestro RR module then
proceed to module setup.
The module is now ready to be used.
Insert the aftermarket radio in the dashboard housing and
test all the functionalities.
Reassemble the dashboard carefully.
Note: The OEM backup camera cannot be retained with
this solution. It can be retained by using a third party
component to composite video converter.
OEM BLUETOOTH SETUP
Only one Bluetooth system can be set for hands free calling.
This must be determined before installation. Both the
factory and aftermarket systems can be used for Bluetooth
audio streaming. If the aftermarket Bluetooth is chosen for
hands free calling, the aftermarket microphone must be
installed in the vehicle and the factory Bluetooth module
must be unplugged. In most vehicles, it is located under the
passenger seat. If the vehicle is equipped with Bluetooth
but there is no Bluetooth module under the passenger’s
seat then the Bluetooth system is built into the MDI module.
Unplugging the MDI module will disable both factory
systems.
2013 Kenwood Radios:
For these radio models, the OEM Bluetooth is turned OFF
by default. To turn ON the OEM Bluetooth, insert the key
into the ignition and turn it to the ACC position. The Radio
will turn on and the setup screen will appear. Scroll to the
bottom and select the vehicle set up menu by pressing SET.
Go to the option OEM Bluetooth and select ON. Press the
return arrow then scroll to the bottom of the page select
FINISH.
2014 Kenwood Radios:
For these radio models, the OEM Bluetooth is turned ON
by default. To turn OFF the OEM Bluetooth, insert the key
into the ignition and turn it to the ACC position. The radio
will turn ON and the setup screen will appear. Scroll to the
bottom and select the vehicle set up menu by pressing SET.
Go to the option OEM Bluetooth and select OFF.
2014 Alpine Radios:
For these radio models, the OEM Bluetooth is turned ON by
default. To turn OFF the OEM Bluetooth, insert the key into
the ignition and turn it to the ACC position. The radio will
turn ON and the main screen will appear. Select the settings
button, in the top right corner, then select GENERAL.
Select INTEGRATION SETUP then select HANDS FREE
CONNECTION. Two options will be available ON or OFF,
select OFF.
 Loading...