IDEATEC S.A. - Z.I. de Noville-les-Bois - rue Léopold Génicot 19A - 5380 Fernelmont, Belgium - Tel: +32(0)81 42 00 10 - Fax: +32(0)81 57 91 70 - E-mail: info@ideatec.be
User Guide POLARIS V1.0 - Console V1.16 - Module V2.16
Page 18
5.
Ü Preassemble the console without blocking the 2 hexagonal head screws.
Ü Choose the best place to install the console on the dashboard.
Ü Locate and note the 6 fixation holes at the base of the foot (page 22).
Ü Fix the base and position the console perfectly.
Ü Block the 2 hexagonal head screws.
Ü Attach the cover to the back of the foot with the screw provided.
Ü Place the small black cap on the head of the screw on the back.
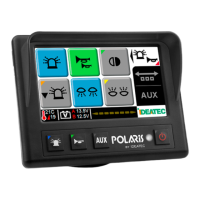
5.1 Touchscreen Console & FSP-6K/FSP9K Housing - Foot
mounting setting
Use only screws, nuts, and washers provided by the manufacturer.
Using other, longer screws in the back of the console may seriously damage its internal parts.
The manufacturer cannot assure any warranty or accept liability if other fixing elements or screw,
nuts, and washers are used to install the console.
Elements installation
The safety of future users of this product depends on your installation. Therefore, it is critical that
you read, understand, and follow all instructions contained in this installation guide.