77
En
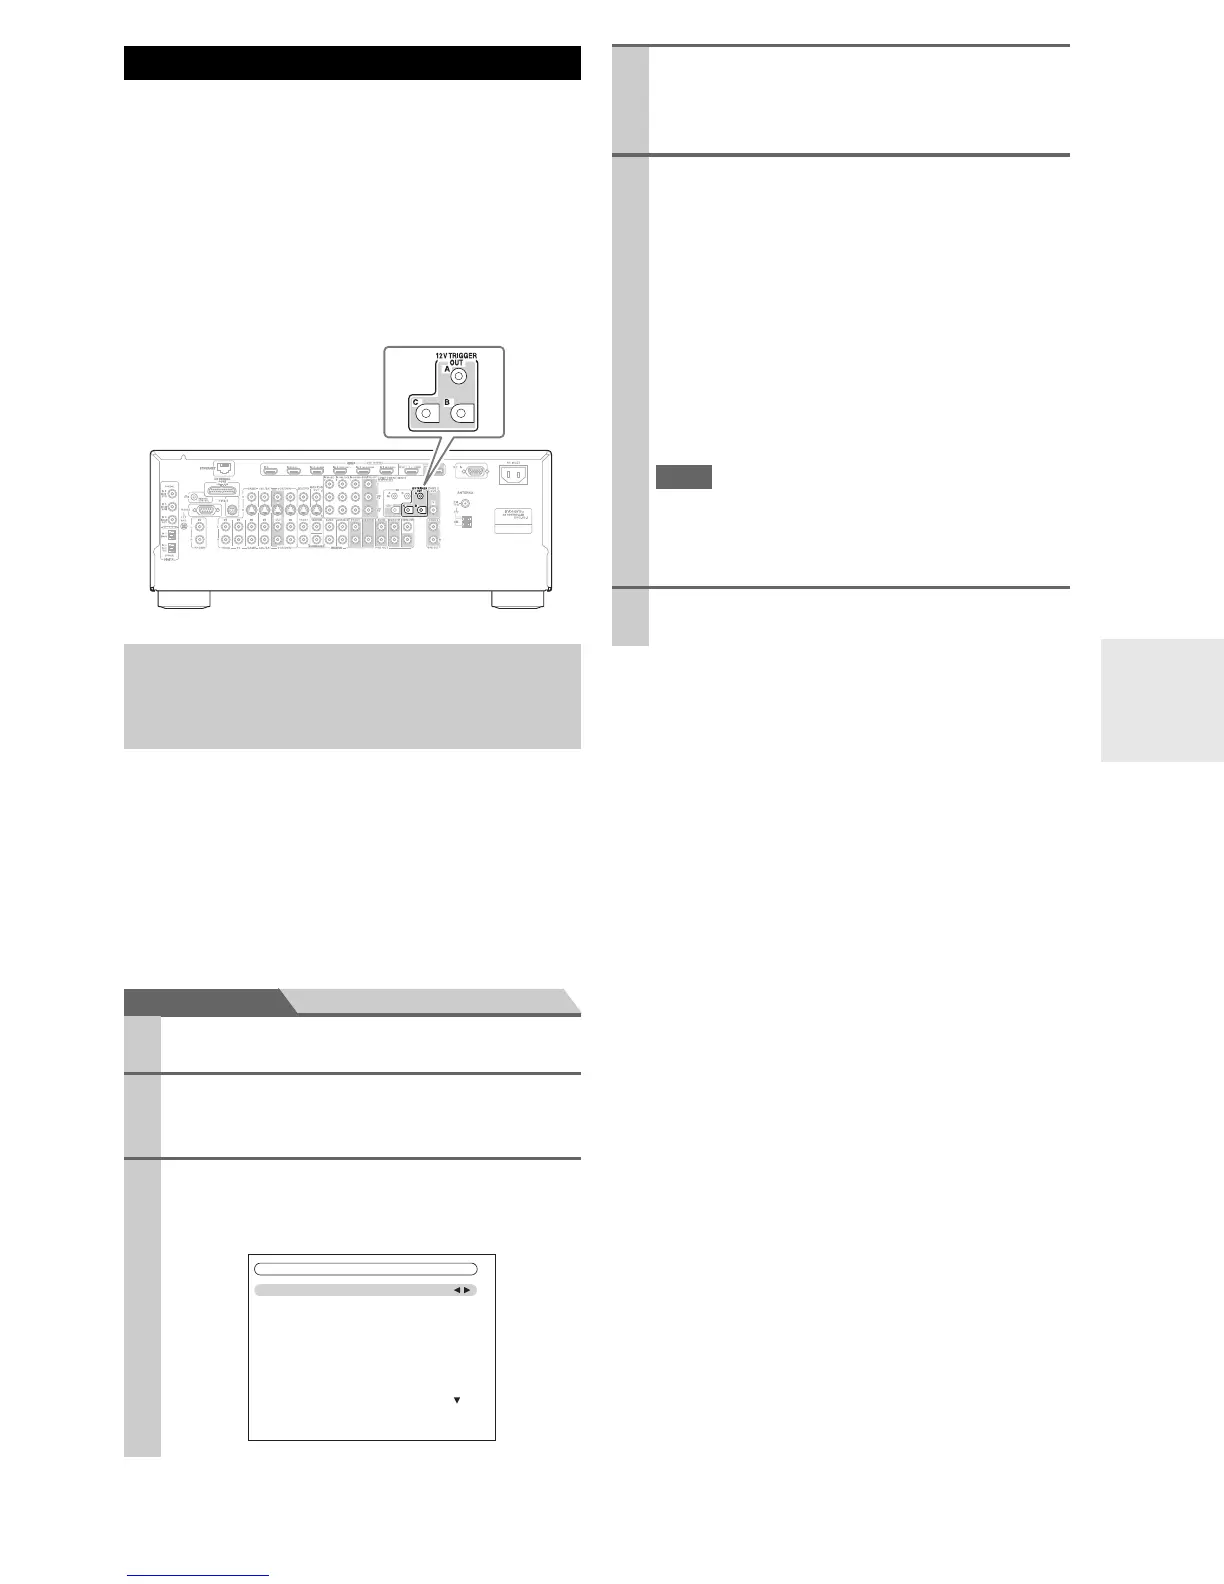
The 12V triggers A, B, and C can be used to turn on 12V
trigger-capable components automatically when they are
selected as the input source. The triggers can be set so that
they activate when a connected component is selected as
the input source for the main room, Zone 2 or any combi-
nation of rooms. When triggered, the output from a 12V
TRIGGER OUT goes high (+12 volts and 150 milliam-
peres max. at TRIGGER OUT A; +12 volts and 25 milli-
amperes max. at TRIGGER OUT B and C).
When several components are turned on simultaneously
by using triggers A, B, and C, depending on the type of
components, a large amount of current may be drawn
momentarily. To prevent this, you can delay trigger signals
A, B, and C individually. Another application for trigger
delay is eliminating the “thump” noise that’s sometimes
heard when a source component is turned on. Delaying the
trigger signal for your power amplifier so that it’s the last
component to be turned on will accomplish this.
Menu Miscellaneous
Using the 12V Triggers
Hookup
• Use a miniplug cable to connect the AV controller’s 12V
TRIGGER OUT A, B, or C jack to the 12 V trigger input on
a connected component.
1
Press Receiver followed by Setup.
The main menu appears.
2
Use q/w to select “Miscellaneous”, and then press
Enter.
The Miscellaneous menu appears.
3
Use q/w to select “12V Trigger A, B or C Setup”,
and then press Enter.
The 12V Trigger A, B or C Setup screen appears.
6-3. 12V Trigger A Setup
Delay
BD/DVD
VCR/DVR
CBL/SAT
GAME
PC
AUX
0sec
Main
Main
Main
Main
Main
Main
4
Use q/w to select “Delay”, and use e/r to select:
0sec, 1sec, 2sec, or 3sec.
When 0 sec is selected, the trigger signal is output as
soon as the input source is changed.
5
Use q/w to select an input source, and use e/r to
select an option.
Off:
No trigger signal is output. A 12-volt trigger
signal is output when the connected component
is selected as the source for:
Main:
Main room.
Zone 2:
Zone 2.
Main/Zone 2:
Main room or Zone 2.
• By default, all input sources on the “12V Trigger A
Setup” menu are set to “Main”, those on the “12V Trig-
ger B Setup” menu are set to “Main/Zone 2”, and those
on the “12V Trigger C Setup” menu are set to “Zone 2”
6
When you’ve finished, press Setup.
The setup menu closes.