EasyManua.ls Logo

Iseki TH4365 - Hydrostatic Cartridge Oil Filter Replacement; Front Axle Oil

Iseki TH4365
113 pages
Print Icon
To Next Page IconTo Next Page
To Previous Page IconTo Previous Page
Loading...
TH4295,4335,4365
7
6
H
y
drostatic Cartrid
g
e Oil Filter Replacemen
t
The h
y
drostatic cartrid
g
e oil
f
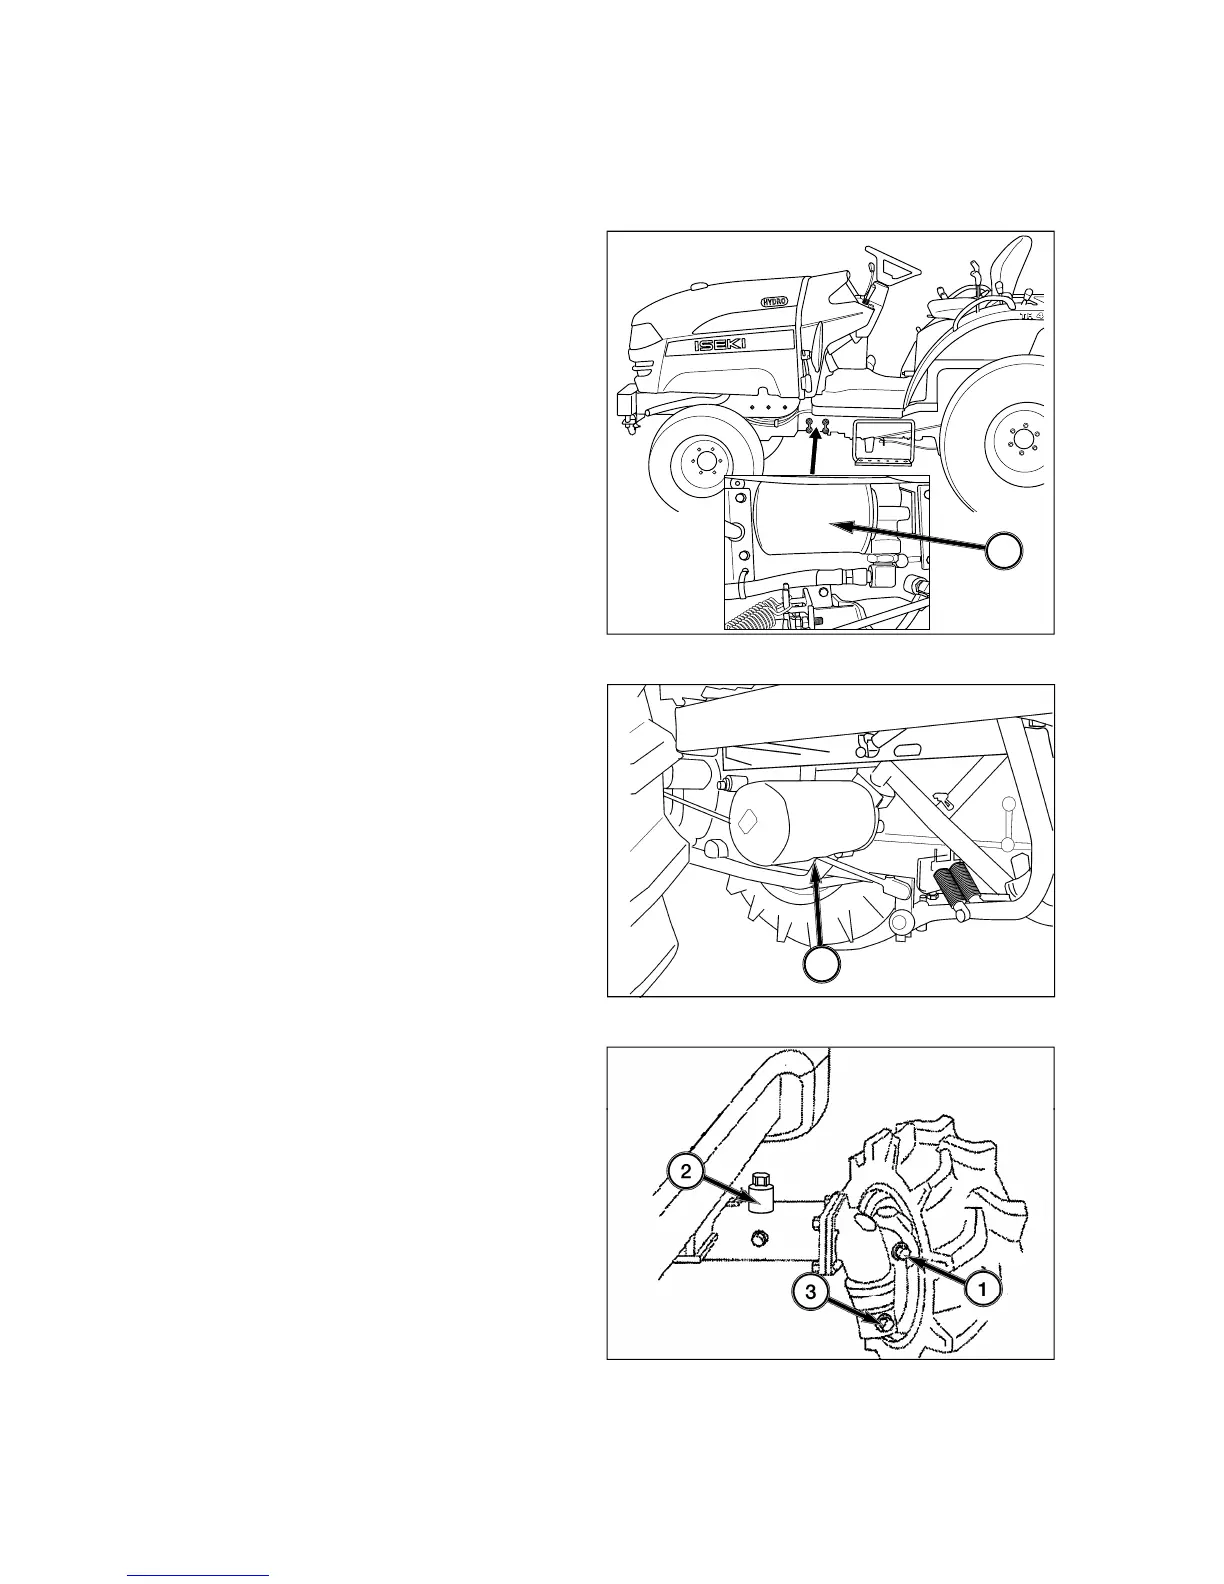
ilter is located under the
l
e
f
t step.
FIG. 6-10
:
Alwa
y
s replace the h
y
draulic oil
f
ilter while
oil is removed. Carefull
y
unscrew the oil filter
(
1
)
from its transmission. Use of a filter wrench ma
y
be
necessary
.
C
lean the
f
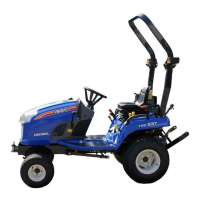
ilter adapter and lubricate the
O
-rin
g
on
the replacement filter adpter with clean h
y
draulic oil.
Install the new filter until
O
-rin
g
contacts the transmis-
s
ion and ti
g
hten additional 2/3 turn b
y
hand. Do not
use
a
f
ilt
e
r wr
e
n
c
h t
o
in
s
t
a
ll th
e
f
ilt
e
r.
R
eplace the cartrid
g
e after the first 50 hours, and then
e
ver
y
200 hours.
FIG. 6-11
:
Transmission
f
ilter, 4, with oil drained,
u
nscrew
f
ilter
f
rom adapter
(f
ilter wrench ma
y
be
r
equired
)
.
C
lean adapter and lubricate seat on new
f
ilter. Install
u
ntil
f
ilter
g
asket contacts adapter and ti
g
hten ad-
ditional 2/3 turn, b
y
hand. Do not use filter wrench to
ti
g
hten.
Front Axle Oil
Fr
o
nt
d
riv
e
a
xl
e
h
as
a
co
mm
o
n
o
il l
e
v
e
l f
o
r fr
o
nt
d
if-
ferential housin
g
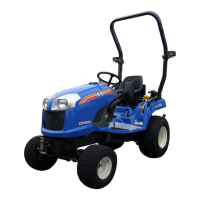
and each wheel reduction unit.
O
il
l
evel should be checked ever
y
200 hours of Tractor
operation. The oil should be chan
g
ed ever
y
600 hours
of operation
(
indicated on Hourmeter
)
.
FIG. 6-12: To Check Oil Level -P
a
rk Tr
ac
t
o
r
o
n l
e
v
e
l
g
round and then remove oil level plu
g
,1.
O
il should be
l
evel with or sli
g
htl
y
below level plu
g
openin
g
. Remove
fill plu
g
, 2, and add oil until oil is expressed from level
p
lu
g
openin
g
. Replace level plu
g
and fill plu
g
.
T
o Chan
g
e Oi
l
-Remove drain plu
g
s, 3,
f
rom both
wheel reduction units. When all oil has drained,
r
eplace drain plu
g
s and fill housin
g
to level plu
g
open-
in
g
. Replace level plu
g
and
f
ill plu
g
.
FIG. 6-10
FIG. 6-1
1
FIG. 6-12
1
4

Table of Contents

Related product manuals